The Importance of Setting the White Balance


You probably haven't noticed when you look at things that sometimes the light is tinted a certain colour. If for example you are inside at night with the lights on, the light is probably quite yellow. This is called the colour temperature. Your eyes and brain do a pretty good job at adjusting for this and your camera does its best but can't figure it out like you can. So some times your photos come out in a way you don't expect. The photo below was taken at night with the lights on and you can see that it is all yellow:

I then set the white balance manually check your camera manual for how to do this and took another photo about a minute later. So it was still dark and I had the lights on but this is what I got:

Totally different right? The camera knew that the light in the room was too yellow and stripped the photograph of the unnatural colours. You almost can't tell that its not day time any more. To set the white balance on your camera check your manual. On my camera (Nikon) I press Menu> White Balance> Preset Manual> Measure. It then asks if I want to 'Overwrite the preset data?' and I then select 'Yes'. The next part will be the same for any camera, you take a photograph of something white or grey. You can get fancy photography boards to use but a white sheet of paper will do. This sets the 'white balance' for your particular lighting. Instead of actually taking a photo the camera works out the colour temperature and then how much it need to adjust by.

This is a handy trick for any photo shoot and you should do it every time your lighting changes and at the beginning of any shoot. Each different situation will have a different tone to the light but if you set the white balance you can teach your camera what the colour is supposed to look like. So remember to do this next time! Good Luck. Zoe

Q&A With Sally Lewis: Opening an Etsy Shop

 
Today we are hosting our very first Q&A session with the talented Sally Lewis, you can find Sally over at her blog Sally Makes Art. She recently opened an Etsy Shop and we are going to find out from her how she did it and what she learned.

So first of all Sally why don’t you say a bit about yourself and introduce your blog to us.
I am a 23 year old tea drinking, craft enthusiast living in the midlands, UK who graduated back in 2012 from Sheffield Hallam with a Degree in Creative Art Practice. I started my blog ‘Sally Makes Art’ in May 2013 when I felt myself getting stuck in a rut. I was determined to continue to make art and not let it take a back seat to my distinctly uncreative job. My blog became my place to try out ideas, give me a purpose to make things again and be inspired by amazing bloggers around the world.


And what about your Etsy shop, when did you open it and what are you selling?
The idea to open an Etsy shop was again a way of pushing myself to do something new. I got the idea back in the summer of 2013 after making a wedding present for a friend and being told that I should start selling my work. I worked on my ideas, products and graphics for months before finally opening on 7th January 2014. One of my passions is paper and paper craft. My whole body of degree work and dissertation was centred around books and paper and my interest has since expanded into stationary, handmade books, origami….anything made from paper! So it seemed only natural that I would be selling handmade products crafted from paper.


 I must say your shop looks lovely and very professional. Can you tell us a brief checklist of what you needed to do before you opened your shop?
You should always start with a list – get all of your ideas or concerns out onto paper and work through them. Mine were anything from how much I could afford to spend on materials out of my own money right through to thinking how I wanted to package and ship my items.

A mini checklist of essentials would be to ask yourself these questions:

What am I going to sell?
How am I going to make it and how much will I sell it for?
What will my shop be called?
How do I want my shop to look?
Are there any technical things I can’t do myself e.g. banners and graphics?
What am I hoping to achieve?


What about the legal stuff, did you have to think about tax, terms and conditions and the like? Or was this more or less covered in Etsy's start up guide?
Yes, this one of the things that took the most time for me. I spent a lot of time reading the Etsy start up guide which is really helpful but I also spent time reading the forums and learning from those who had successful shops. Things like tax can seem scary but you just need to do your research first. For things like terms and conditions and shop policies it is quite straight forward. Again, I looked at my favourite shops for ideas. Just be realistic and honest and you can’t really go wrong.


If you could give only one piece of advise to some one considering starting their own handmade business what would it be?
Just do it! I was scared that my products wouldn’t be good enough or I would never sell anything and have wasted money but if you start small and build up as you go along then there’s not really anything to lose. I’ve learnt a lot and I feel like I’ve really achieved something.


What have you got planned next for your blog and shop, or do we just have to wait and see?
I would love to do more collaborations and talk to more bloggers so that is my new blog goal for 2014. As for my shop, you will have to wait and see what products I am working on next!


Thanks so much Sally for sharing with us what you have learned so far and good luck with the shop! Don't forget to have a look at Sally's Blog too! Zoe 

Dished Up: Homemade Marshmallows and Hot Chocolate Recipe

Marshmallows are one of those things I always fancied having a go at making. So when I stumbled across this recipe on the Good Housekeeping website I decided there was no time like the present.
The recipe is pretty straight forward and if you have a sugar thermometer and some patience then they results are delightful! Now I've made some I'm not sure I'll ever want shop bought marshmallows again. They were great fun to make and watching a dark sugar syrup transform into white foaming marshmallow was a treat in itself. But treat they definitely are! I've always felt quite comforted knowing that marshmallows are fat free but after making some I now realise quite how calorific they must be. 


I followed the recipe closely, as it was such a specific method but decided to toss about of the third of the cut marshmallows in cocoa powder rather than icing sugar. These one's were my favourite. The contrast of the bitter cocoa against the sweet marshmallows was just yummy.

But of course it would be wrong to make marshmallows and not have them with hot chocolate. I'd like to shake the hand of the person who came up with that combo! So below you'll find my recipe for homemade hot chocolate. Please understand that this isn't the drink you want to have every night before bed as it is super indulgent. But for a night in with some girl friends it is the perfect treat.

What you need per serving: 
200ml Milk
2tbsp Double Cream
25g your favourite chocolate (I had some 74% cocoa chocolate left over from a dairy free dessert. The drink was on the bitter side but worked really well with the marshmallows. I would normally opt for something around the 50% mark)
Marshmallows (optional)

What to do:
1. Mix the milk and the cream in a heat proof glass or mug.
2. Heat the mixture in the microwave for 4 minutes on medium, stirring halfway through.
3. Break the chocolate into small pieces and add it to the hot milk.
4. Stir until the chocolate is melted and well mixed in.
5. Indulge!

Cassie xx

Ditsy Floral Polly Top From By Hand London


So my new years goal for making a new item of clothing per month has started with a bang, this Polly top which is a free pattern downloaded from By Hand London is the second thing I have made already! I am one month ahead! This was also the first 'real' pattern I have tried, by which I mean one that I haven't drafted myself. To be totally honest I think I made the wrong size, its a little bigger than I would like and thats after taking it in a little, but nonetheless I am pleased with the results.


I am very conscious that if I start making my own clothes its very easy to make lots of dresses and a few skirts and then end up with only half a wardrobe. So I really wanted to start with a few tops and make practical items. This one will be great when the weather warms up and a get a bit less pasty pale but I can easily wear it under a chunky knit for now.


One thing that I had to consider when cutting out my pattern pieces was how I could fit them all on to my fabric. The pattern suggests using 1.8m plus extra to make the bias binding. I only had 1.5m and couldn't easily get any more. To fit them all on to my fabric I did this:


I moved the fold of the fabric from the centre over to the left. This way I had enough space to place all my pieces on the fold and had lots left over to cut the bias binding from. The binding for the sleeves easily fit onto the space available. The binding for the neckline was cut out of two thin rectangles and stitched together to make one long piece.


I really enjoyed using a 'real' pattern, next time I will just have to get someone to measure me more carefully. The instructions with the pattern were very helpful and simple enough for a beginner. I definitely think I will invest in some other patterns in future, I am considering another pattern from By Hand London that I could make a summer dress from and then a winter dress from later on in the year. Do you think it's worth it? Do you have a particular pattern maker you prefer? I would like to have a good look around and investigate all the different ones.

The other thing I made was a top from jersey (stretch) cotton and I am pretty disappointed with it. This was in part because the fabric I bought was very thin and therefore tricky to work with but also because its not very flattering on me. Would you like to see it any way? Let me know. Zoe x

Photograph A Friend and Experiment With Aperture

This week I challenged myself to take some photos of a friend and experiment with aperture.  I will just be talking about the effect that changing the aperture has on your photos so if you want to understand a bit more about the science behind it check out this post here. Firstly I will talk a little bit about photographing your friend.

Photograph A Friend
My friend is my handsome husband Stephen (commonly known as Blowers) and he was very obliging. He normally pulls funny faces when he knows someone is taking his photo so a challenge for me was to try and get him to act naturally while I snapped away. Since we have a fairly easy going relationship that has been built up over the years it wasn't too tricky but I can imagine that as a photographer taking photos of some one you barely know this can be the biggest challenge. I tried to get him to chat about his day and make a few jokes. Sometimes this meant the photos had him mid word and looking silly but I tried to wait to in between sentence and for short pauses to press the button and take the shot. If you didn't manage to do this maybe try next time.

Aperture
Now to talk a bit about aperture. Aperture is measured in f/stop numbers. It's slightly confusing but the larger the f/stop the smaller the aperture (to understand why read more here). I'll show you some photos that I took to show you what effect changing the aperture had.

The photo above was taken with an aperture of f/25. This is a larger f/stop number. You can see that both Stephen and the background are in focus.

In this second photograph the f/stop number is smaller, the aperture is f/15. If you compare this with the photo above you can see that the background is starting to get fuzzy. We say that the 'depth of field' is smaller or shallower. This is because a smaller slice of what you see is in focus.

Finally the above photograph has an aperture of f/3.8. This is the smallest f/stop (largest aperture) I could use on my camera. It has made the background very fuzzy and is totally focused on Stephen. This has the smallest depth of field and really makes Stephen stand out. For this reason using a large aperture (small f/stop number) can result in great portraits. On the other hand if you are trying to photograph a scenery you will need a small aperture (large f/stop number).

So remember this
Small Aperture = Large f/stop number = Large depth of field
Large Aperture = Small f/stop number = Shallow depth of field

It is worth just mentioning though that having a smaller aperture means less light will go in through your lens. In Aperture mode the camera will compensate for this by having a longer shutter speed. This means you are more likely to get a blurry photo unless you ensure your camera is steady and preferably use a tripod. You may have found you couldn't take a decent photo of your friend when you aperture was small because they kept moving, don't worry, just use a larger aperture next time. Zoe x

14 Tips For Beginner Craft Fair Sellers


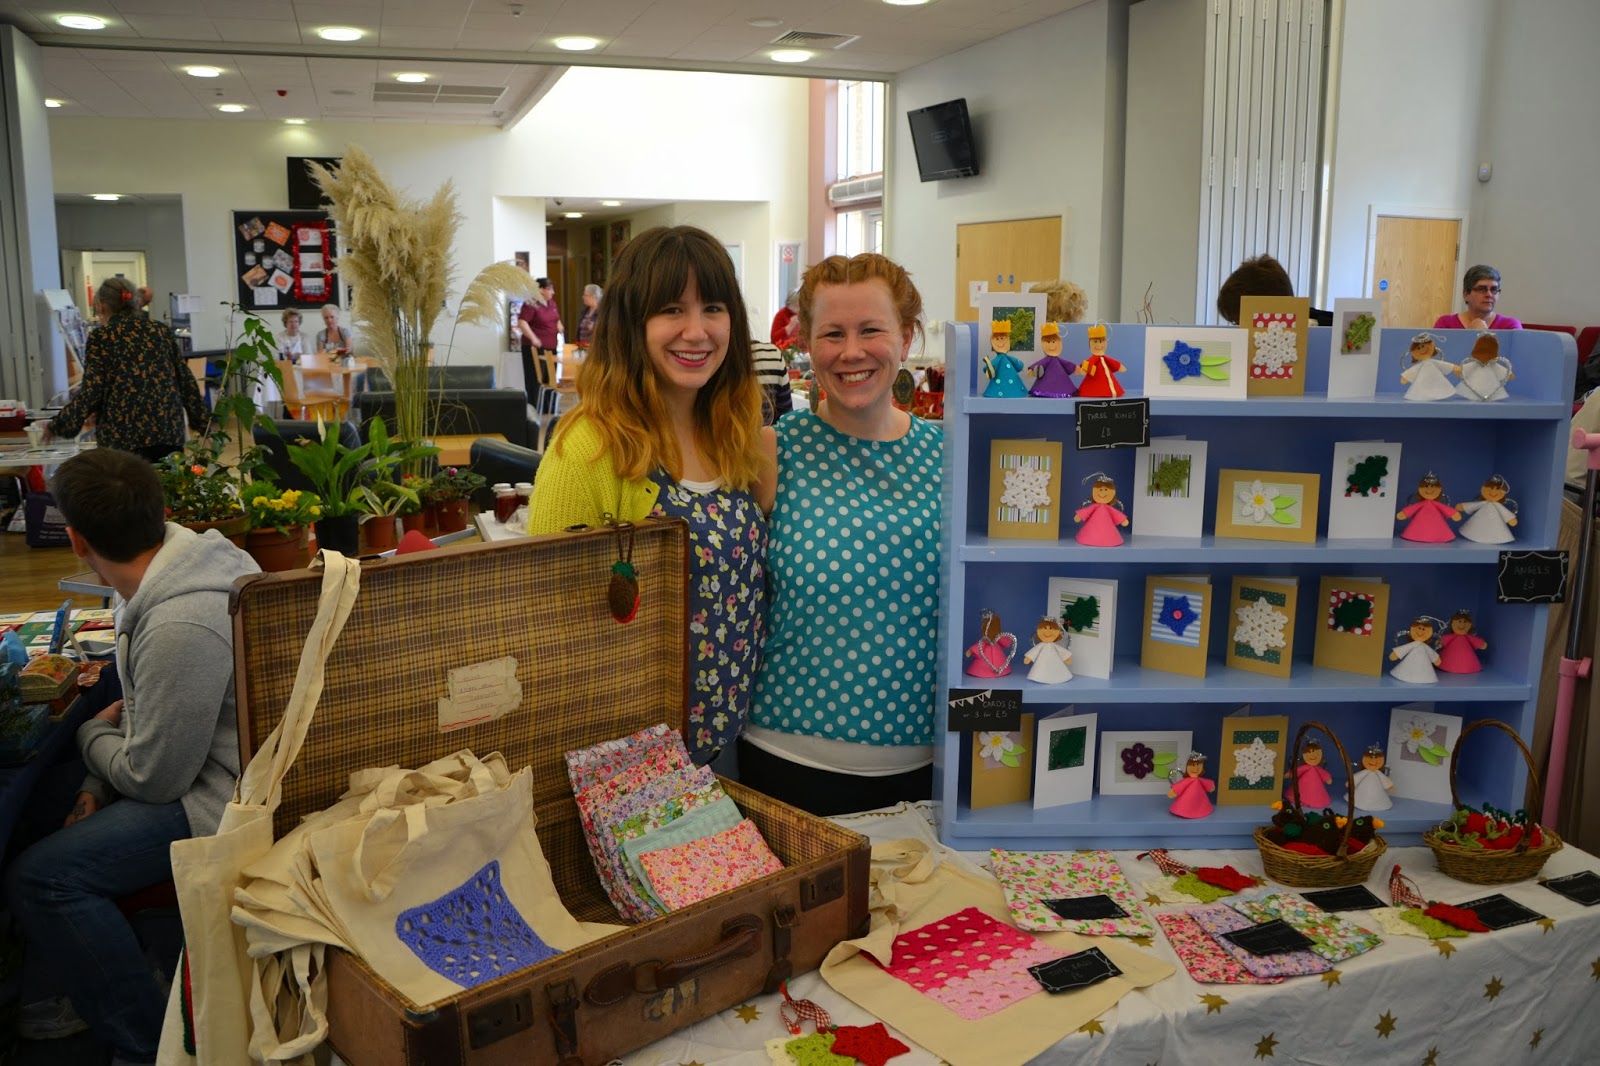
Finding tips and information for selling at craft fairs isn't easy. We had a lot of fun heading down to some craft fairs last year and while it was our first time we feel like we have learned so much already. We wanted to share some of these lessons with you in case you are thinking about it in the future. Some are general about your stall and style, and some are more specific about what to take. I hope they can help:

1. Think about working with some one else
Cassie suggested that we could work together at some craft fairs for the first time this year. The biggest bonus of working together is there is less preparation to do. I made the angels, iPad and kindle sleeves and the other nativity figures and Cassie made the granny square bags, the key rings, robins and cards. We didn't need to come up with so many ideas each because we had enough between us and we didn't have to do so much making but could split the cost of each stall between us.

2. Think about how well your items go together
When I shop at craft fairs I am always much more attracted to stalls that have a clear 'image'. This usually comes from the personal skills and style of the maker (or makers). Cassie and I have over-lapping skills and similar styles so our 'image' was quite natural. I would describe it as Colourful Handmade Chic but you might want to call it something different!

3. Try to find fairs that fit with your style and price
One mistake we made was going to a fair where almost every one shopping there was able to make all the things we were selling. At this fair we only just covered the cost of the table that we had hired. Furthermore we were the most expensive stall by quite a wide margin! Try to find out the sort of customer that you might get at each fair and consider all you prices for that individual fair. We actually found finding fairs one of the hardest things to do so have a look around at whats local and not so local.

4. Think carefully about your price
I would say pricing when you start out is very tricky. Consider the cost of the the materials used, factor in the time you took to make each one (bare in mind that the more you make the quicker you will get) and look on Etsy for how much others are selling similar items for. Then come up with a price. If this seems too high to you and you think you won't sell any start with just a few and see if they sell. Or you could make just one to display and take orders for others (factor in postage costs too). If your price seems too low, mark it up a bit to start with and you can always take lower offers if people are interested on the day but think its too much. All in all this is tricky, sometimes you'll get it right and sometimes you won't and peoples interest will vary from fair to fair any way.


5. Consider your display and how it fits with your style
When you think about how to display your items try to fit this with your style. Don't forget you have a limited amount of table space so add height if you can. Even if you love lots of colour (we obviously do) try to make your background fairly neutral because you want your products to stand out but this still can fit within your style. Cassie bought this bookshelf for £5 and painted it. It was a bit cumbersome to take to and from each fair but it was perfect for displaying our cards and angels. It fit with out colourful theme, added lots of height and extra display space but was plain enough that our goods stood out.

6. Remember that you might have to adapt your display
Each craft fair you go to will have slightly different tables and layout so try to be flexible with your display. We couldn't use the bookcase at one of the fairs we went to so we had to figure out a new way to display the angels and the cards. We used a bench and covered this with out table cloth to make extra surface space and a different height.


7. Stand up and say hello to potential customers
Customer service is really important to me when I go into a shop, if the assistants are not friendly I am instantly put off buying and often walk out the shop. This is even more important when you are selling your own goods. If you have put time and effort into making things, put some effort into selling them too. If you don't sell then you might not make much profit or even make a loss. We had chairs behind our tables at all the fairs we went to. We moved them before the fair started so we weren't even tempted to sit down. If you are doing a longer fair this might not be practical but when there are people near your stall you should stand up. Also don't be tempted to spend the whole time chatting with the person you have gone with, I don't mean stand there silently but when a customer comes pause your conversation to speak to them instead.

8. Look Nice
Wear something nice, do your hair and put some lippy on. I am not talking ball gowns or cocktail dresses, but something that fits with your style so you are presenting an image of the business through yourself as well. We dressed colourfully but fairly casually and smiled. Easy.

9. Make a stock list
Have a list of what you have made and tick it off every time you sell one. This was essential for us because we were doing it together and needed to make sure the right money went to the right person but I would really recommend doing this even if you are on your own. Every time you tick something it's very satisfying and without it you would easily lose track of what you have sold. Also if you are planning to do more fairs in future its a great way of seeing what sold well so you know what to make for next time

10. Take business cards
Even though you are just starting out you need to have something with your website, blog or e-mail address written on to give to each customer. You never know if someone may need to contact you. They might want to ask something simple about washing or repairing an item or they may want to contact you to order more. If you have one item that you consider to be your best and most important then its a good idea to have a picture of that on the business card too, the card may travel and end up with someone who has never seen you before and then has a reason to visit your site. My business cards didn't have this this time but they might next year. Bags also add to the whole impact of your business and also are very practical for people who are hoping to buy more than one thing.


11. Make enough of everything
When you are making your goods it is very tricky to know how many to do of each before you sell for the first time. Remember you are more likely to sell more of your smaller and cheaper things so make the most of those. Try to make enough to you fill your table but have spares in a box underneath so you can replenish when you make sales.

12. Think about what you will do with whats left
Unless you are only selling at school fairs its probably not a good idea to have an empty table at the end of the day. Obviously though you want to sell as much as possible but you will almost certainly have some left over so what are you going to do with them? The more fairs you go to the easier this becomes, you know you have more fairs to go to and it becomes easier to know how much to make for each time so I would recommend booking onto at least 2 or 3 for your first year. If you don't sell everything then consider setting up an Etsy shop or selling your goods via your blog or website. (More on this to come another day).


13. Take something to drink and eat
While you don't want to be talking to customers while you have your mouth full of sandwich, you will be there for quite a long time and, especially if you're working alone, won't be able to leave your stall. So take a flask of coffee and something to snack on.

14. Enjoy it
You absolutely must enjoy yourself. We went with the attitude this year that we loved making things and thought it would be fun. We wanted to cover our costs but our main aim wasn't to start a profitable business to support ourselves. Even if your aim is to go into serious business of craft fairs it is essential that you are enjoying yourself or you will simply burn out and not be successful.

This is by no means an extensive list of all the things you need to think about to sell at craft fairs. The one place I managed to find a good list of instructions was on this list from handmade jane. It is very helpful and it gives you a list of things you need to take with you, but hopefully we have given you a few ideas of how to plan ahead for your first craft fair. Zoe (and Cassie). xx

Make a Dress Up Dolly: The Clothes


On Monday I shared with you the tutorial for making a dress up dolly so next we need to make her (or him) some clothes. You can make up your own clothing shapes if you like but I have kept mine fairly simple. I have however made each dolly their very own 'super-suit' with their initial on the front, hehe!

What you need:
1 dress up dolly (see tutorial)
1 template from your dolly you have already made
fabric scraps
sewing machine
white thread
fusible bondaweb
Felt ( I used one colour for each dolly that I made so they didn't mix up their clothes).


Method:
Start out by ironing some bondaweb onto several bits of fabric, I used bits and pieces that were left over from quilting mainly but I would suggest having some denim and some white. For your other fabrics try and use fabrics with small patterns or that are plain because the pieces you will cut out will be very small.


Now to make your clothes templates use your dolly template as a guide and draw clothes shapes to fit her. You can be as imaginative as you like, if you want to make a super suit for yours then just cut off the head and hand from your template when you're done and use then. Then draw around these onto the paper side of the bondaweb. This is pretty fun because you can design an entire wardrobe out of your fabric scraps. If you are making a super suit for your dolly make sure you cut out the main suit form one colour and the boots, pants and initial from a second colour.

Then you need to cut out your clothes shapes from your fabric, take off the paper backing and lay them onto your felt so that none of them over lap. Leave off your boots, pants and initial of that super suit because you need to bond these to your suit NOT to the felt. (If you want to make a mask for your dolly to coordinate with your suit you will need to glue this to some prickly velcro.) Take a tea towel and iron the clothes onto the felt until they have bonded.

Next you can place the boots, pants and initial onto the super suit and iron these on (don't forget your tea towel!) You can also iron on any other details you like, for example a collar in a contrasting colour, a pocket on a dress or a pretty hem maybe.


Once these are all ironed to the felt you can use your sewing machine and stitch extra details onto the clothes like hems, pockets or embroidered details using some more fancy stitches.


This looks very messy because of all the loose thread but when you cut out these pieces, which is the next thing to do, they almost all get trimmed as you cut any way.


And there you have it, a lovely dress up dolly and her entire wardrobe. And now you know how you can add to her wardrobe any time you like. I hope you're little one enjoys it too. Zoe xx

You can find this and other tutorials over at Stitch By Stitch.

The Best Light for Photography and Some Simple Selfies


The most important thing to get right when taking a photo is the light. Find good quality natural light. One mistake I have made a lot in the past was confusing 'good quality light' with 'lots and lots of light'. If you look back on some of my first posts you can see I often took photos in the middle of the day with bright sunlight, I reasoned that this light was the best because it was the most light. I even went so far as to reshoot some of my finished items in full sunlight after having photographed them on a cloudy day. Well I was wrong. Bright midday sunlight can cause harsh shadows, make your subject look washed out and people look all squinty instead of having wide open eyes. Check out the photo on the left below, this was taken in too much light.

The photo on the right was taken in the last hour of sunlight in the day, this is a good time to take photos but this one is no good either, why? Because my face if all shady. I was looking down to the ground and the dark earth didn't reflect much light onto my face. So too much light is no good, and not enough is just as bad.

What you want is soft light, so stand in the shade but with enough light reflected towards you face. In the above two photos because the camera was held higher, the light from the sky was bouncing off my face which made it much brighter but not so much that I look like the midday photo. You can use some other kind of reflector as well, anything white that bounces the light back onto your subject, so if you don't want to be looking up have a look around for white walls, vehicles or other objects to use.

So the best light is natural, soft but enough in the right direction that your subject isn't in shadow.

Selfie Tips
Now to talk a tiny bit about selfless. Admittedly they're a bit silly but they're fun too. It feels pretty strange when you start taking photos of yourself. In fact I still feel strange even though I have had a fair bit of practice now although it is getting easier. So if you aren't happy with your selfies, try taking some more. The more you take the easier it will become. This week I have literally taken hundred of photos of myself. Here a few things I have learnt.

I like the two photos above, a selfie doesn't always have to be looking straight at the camera, in fact it doesn't even have to include your face (all of these examples do though).

These two are examples of what NOT to do. Both are blurry. This is an easy mistake to make when taking a photo of yourself. The first is blurry because I was moving as I took the photo, I was trying to do a jumping photo so thats not really surprising. The 'mirror selfie' is focused on the reflection of my camera instead of me, bummer. My favourite selfie I took this week is the one at the very top of the post.  If you look closely you can see that this is actually focused on the camera and not my face as well but it's still my favourite (aka I couldn't get it to focus on my face even after 100 shots). I took it inside but with all the lights off and lots of natural light coming in through the window as the curtains were pulled right back.

The photo below is another mirror selfie but I moved the camera lower to take a shot of my whole face, for most of these photos I totally missed my head, or chopped off my chin or forehead so they take practice. Also remember to look into the camera not at yourself otherwise your eyes look really strange. For those of you fed up with the selfie maybe you should try some out and see if you think they're tricky too.


Right that's enough photos of me! What have you learnt anything from taking selfless? Have fun. Zoe x

Dished Up: Chicken and Spinach Lasagne


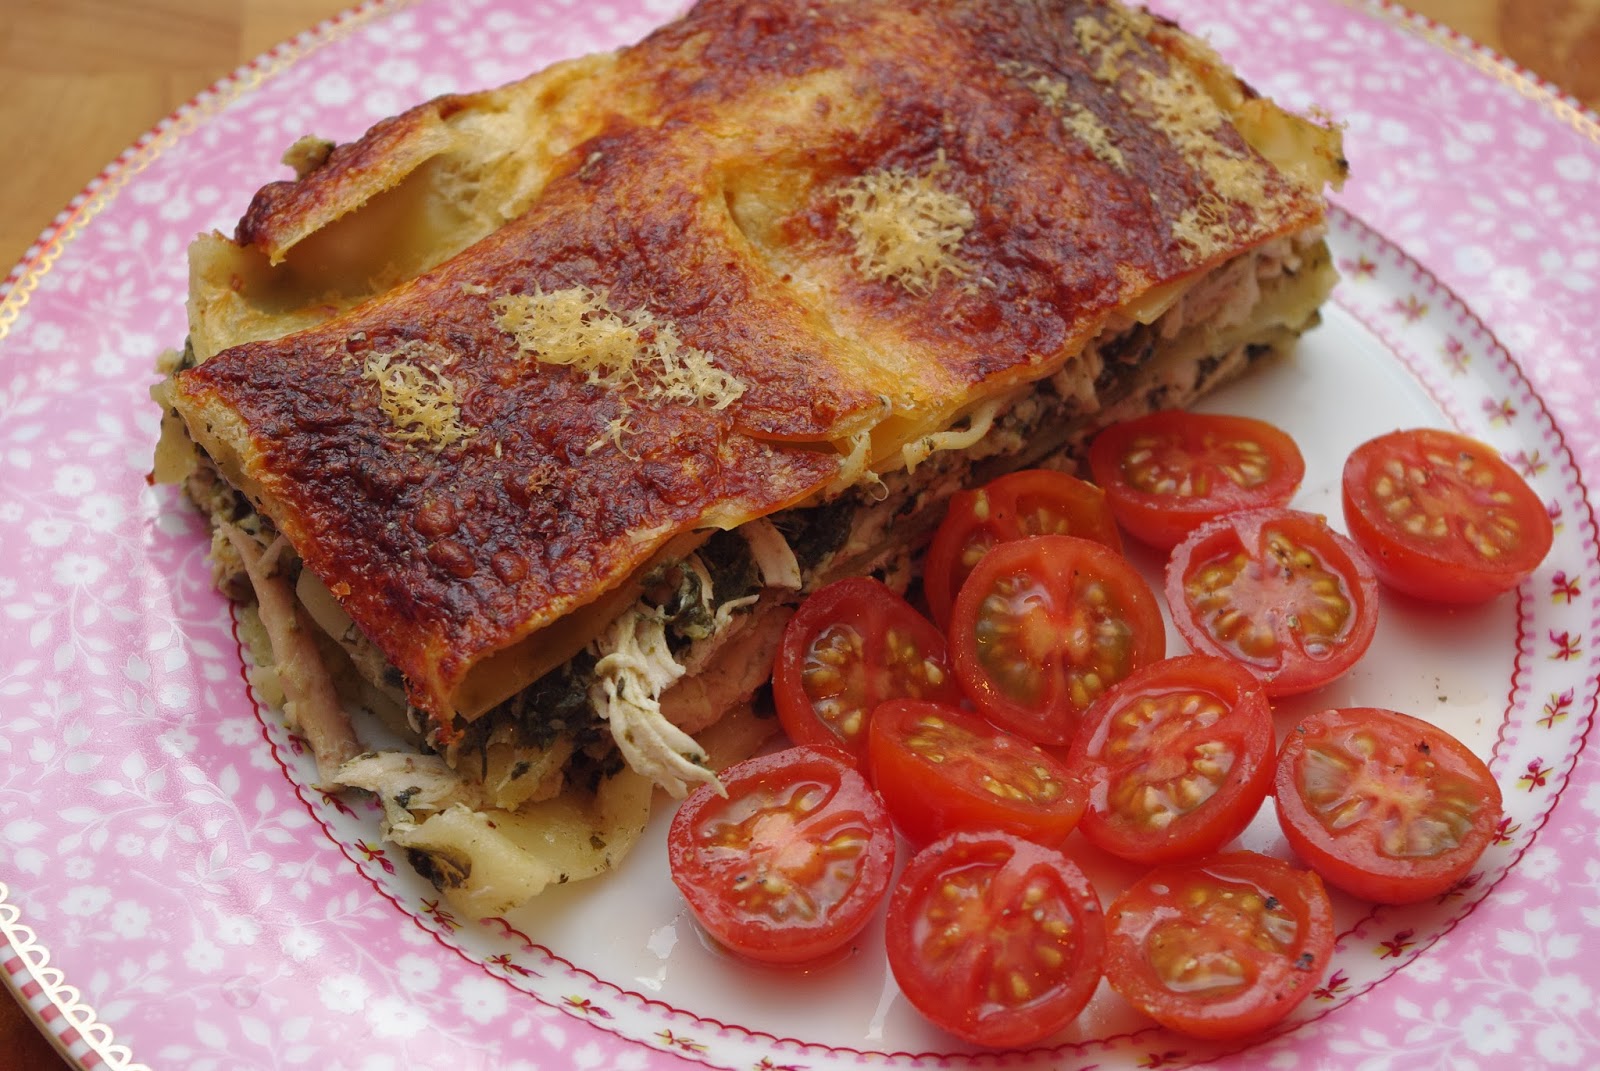
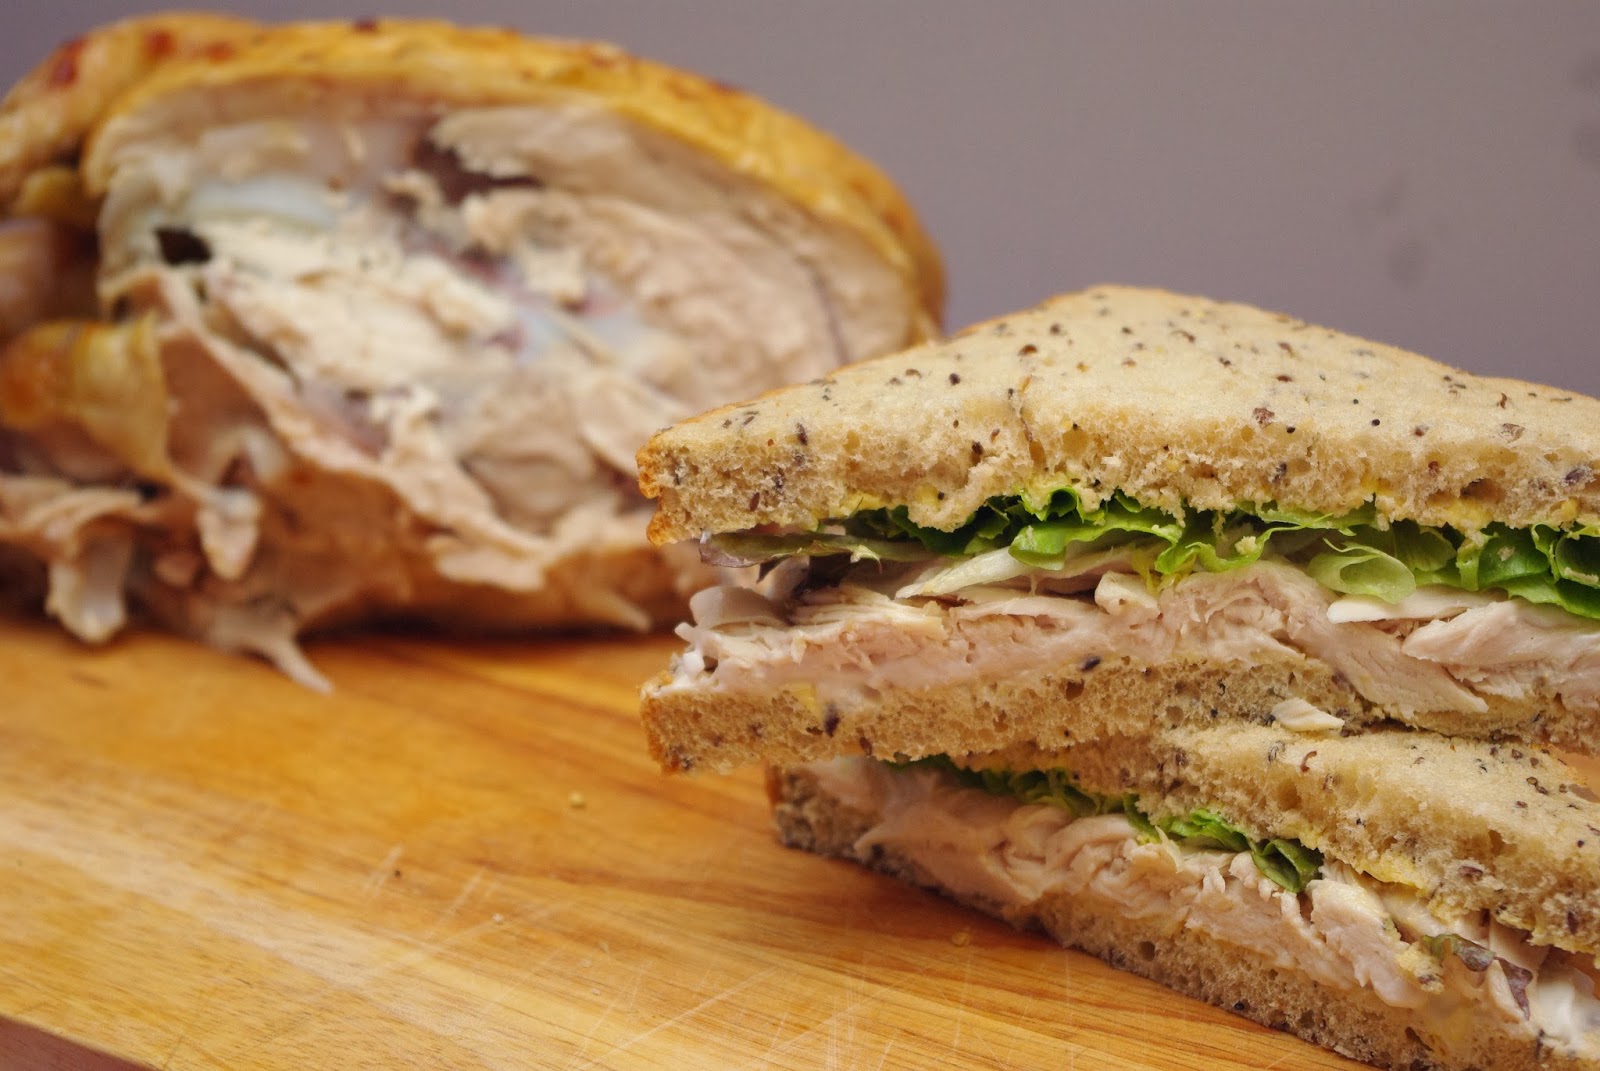
With food prices going up and up, I'm always looking for tasty but cheap sandwich fillings for the husband's pack lunches. One thing I do quite often is roast a chicken at the beginning of the week. Half a chicken is enough to feed us as a family so I use half for a meal then shred the other half and use for lunches. One of the meals I make with the chicken is this tasty lasagne. To keep the cost of this meal down I have used dried lasagne but this requires precooking for this recipe. If your budget stretches to it then use fresh lasagne. If your time stretches to it then make your own!


I think this recipe could feed four adults if you serve it with some garlic bread or something like that. We had it with a tomato salad dressed with some yummy Blonde Balsamic Dressing which was a really nice contrast to the creamy lasagne. If you think you'd still be hungry then the recipe is easily doubled.

Prep Time: If your chicken and lasagne are already cooked then the prep should only take you 10-15 minutes
Cooking and Rest time: 40 minutes

What you need:
Half a cooked chicken, shredded
380g tin of spinach
Reserved juices from the chicken, fat skimmed off
300ml reduced fat crème fraiche
1/4 nutmeg, freshly grated
Salt and pepper
Approx 250g lasagne, cooked
50g freshly grated parmesan


What to do:
1. Preheat the oven to 180 degrees Celsius.
2. Drain the spinach really well and squeeze out all the excess water. Put this in a large bowl with the shredded chicken and mix well.
3. Mix the chicken juices with the creme fraiche. Add the grated nutmeg and season well.
4. Spread a couple of spoons of this over the bottom of an oven dish and add a layer of cooked lasagne. Reserve a couple more spoons of the cream for the top.
5. Mix the rest of the cream in with the chicken and spinach and spread half of the mixture over the lasagne.
6. Add another layer of the cooked pasta, if you're feeding hungry people then double up the pasta to fill them up.
7. Spread the rest of the chicken mix over this and top again with cooked lasagne.
8. Spread the cream you reserved earlier over the top and sprinkle the grated parmesan over the whole thing.
9. Pop it in the oven for 35 minutes. When the time is up take the lasagne out and let it stand for 5-10 minutes. This will help the layers to stick together and make the lasagne easier to serve.

Enjoy with a salad and if you want some garlic or crusty bread. Cassie xx

You can find this post and many other over at Snippets Of Inspiration here.

Make a Dress Up Dolly: The Dolly


For Christmas this year I made two of my nieces and my daughter their own dress up dolly. It was fun to make and fun to play with. I especially enjoyed making the dollies their own super hero suit! I had seen a version before (no superhero suit though) that I think was called 'flats' but I cannot find the link any where so I have decided to write my own tutorial for those of you who would like to make one for the little girls in your life. It is broken down into 2 parts: the dolly and the clothes. I have made 3 dollies so some of the photos show all three but obviously you can just make one or two if you want to.

You Will Need:
Flesh coloured felt
Hair coloured felt (I used brown and orange to coordinate with their hair but you might need yellow or black)
Iron-on fusible bondaweb
Backing fabric
Velcro (just the prickly side)
Hot Glue

Method:
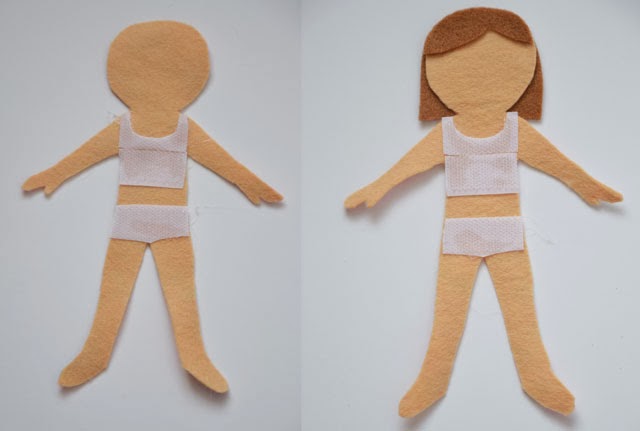
First of all make yourself a template, feel free to print out one of my pictures as a guide or just fold a piece of paper in half and draw half a person and then cut it out. Next iron some fusible bondaweb onto your backing fabric and then draw around your template onto the paper side. Cut these pieces out and then remove the paper. Put the side to stick face down onto your flesh coloured felt, cover over with a tea towel or some other fabric and iron the person to the felt. The felt won't survive under the heat of the iron without the tea-towel. When it has fused cut out the person again. You should now have your felt person fused to your backing fabric.


Now you need to make the 'underwear'. Using your template, measure some velcro to cut out knickers and a vest. You will probably have the vest in two pieces. Then use your glue gun to stick them on. I stitched a line around the neck line, vest hem and waist band using my sewing machine to make them extra secure but this is not totally necessary.


Next cut out your hair pieces using your template as a guide from the right colour felt and again glue these on. Your dolly is complete! Hold on to your template as you will need this next week to make the clothes. Zoe xx

You can find this post and many other on Snippets Of Inspiration here.

Photo Friday Challenge


Have you ever seen the Instagram weekend hashtag project? If you're on Instagram try following the 'Instagram' account where they set a weekend challenge to take a particular photo or video. I always want to join in but to be honest I never get round to it so I have been thinking about setting a similar challenge for myself. Then this Christmas I was given the 'A Beautiful Mess Photo Idea' book written by my favourite bloggers at A Beautiful Mess. It has lots of ideas for photos I would like to try but it could easily be something I read once and never actually do so I'm going to set myself one photo challenge per week this year.  This is going to take the form of the 'Photo Friday Challenge'. This is a self imposed challenge I am going to set each week.  Some of the ideas will be inspired by the book, others from the weekend hashtag project and others will be more focused on learning new camera functions or techniques in Photoshop.

Each Friday I'll share with you my photo that I took for the previous weeks challenge and let you know what I learnt from that challenge. Then I will set the challenge for the following week with the rules. (All self imposed so its possible I'll bend them from time to time!)

If you want to join in please do! Every challenge will be suitable for a beginner.  For most of the challenges all you'll need is a basic camera and some imagination. Occasionally you might need a DSLR or some editing software. You don't have to do every single challenge along with me but if you try out one or two let me know by commenting and leaving a link to your photo. Or you can share your photo with me via Instagram or Twitter (@zoeblofeld) or on Google+ (+Zoeblofeld).

General rules:
1. In general only minimal editing allowed. The idea is to practise taking photos that optimise what I have at hand so the post production can be kept to a minimum. So think about the light, the framing (minimal editing includes minimal cropping) and the background as well as your subject. If the challenge is to learn a new way to edit then obviously this rule won't apply.
2. Any camera can work unless that challenge says otherwise. It's not about having a fancy camera necessarily but about pushing myself (or yourself) to take better photos with what's available. 
3. Try to make each photo imaginative. 
4. Take a new photo for each challenge and not use an old photo that is stored on my computer. 

So those rules apply every week (unless stated otherwise in the challenge) and the following rules apply to just the first weeks challenge. 

Challenge 1: Simple Selfie (Experiment with light)
Camera: suitable for any camera
Software: none needed
Other equipment: a tripod, self timer or camera remote could be handy but not essential. 

Rules:
1.Take a photo of yourself. You must be the taker of the photo and you must appear in the photo. 
2. Try out different lighting, full sun, partial sun, shade, evening sun, inside lighting etc. 

If lighting is the most important aspect of any photograph then we should get this nailed first. So its just a simple one to get us started. Let me know if you'll be joining me. Zoe x
Related Posts Plugin for WordPress, Blogger...