Showing posts with label Circle Skirt. Show all posts

Denim Skirts and Blogging Habits

Hey everyone. It's been a little while between posts recently around here and that has kind of taken me by surprise. Blogging used to be one of my favourite things about DIY projects, I couldn't wait to finish it so I could get it up on the blog. I am taking a more relaxed approach at the moment and I think it's likely I'll continue this way. I am enjoying posting just occasionally about what I make and I am definitely taking blogging a little less seriously, it'll be quite light hearted, infrequent and more 'look what I made' than 'here is how you can do this' for now. 

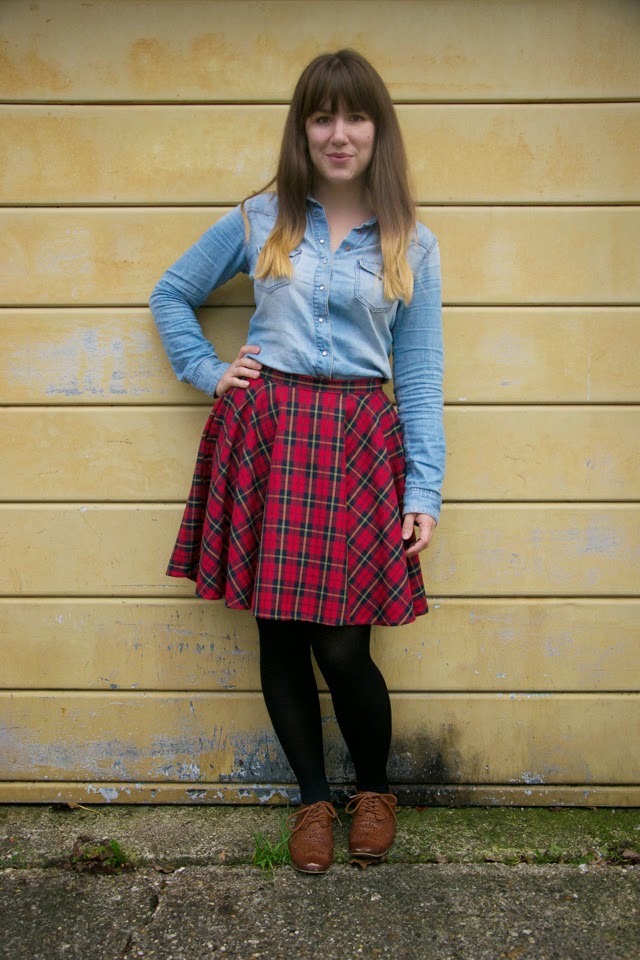
I have still been making things though and this skirt was promised a couple of weeks ago here. It's just a simple circle skirt made with some leftover fabric from my two-tone denim dress.

I think I was feeling particularly self-conscious about being photographed on this day though because I don't look at all relaxed in these photos. Well except the one at the top but you can't actually see most of my face in that one, I guess that's why I liked it. I have been getting much more comfortable about having my outfit photos taken but this was just one of those days.

There is little more to say about this skirt so I think I'll just leave it there for now. I am still deciding what I am planning for me-made-may this year but I'll let you know when I do. Zoe x

Tartan Circle Mini Skirt

Tartan mini circle skirt
I have a secret to tell you. I have a huge girl crush on Jenna-Lousie Coleman aka Clara Oswald the Doctors companion. When I saw her wearing a red tartan skirt a while back I knew that I was going to have to make one for myself. So I did. I had enough fabric left over from my tartan playsuit that I could make myself a circle skirt.

Tartan mini circle skirt mid swoosh
I bought a little extra fabric on purpose in case I ended up having to recut some of the pattern pieces if I totally got the sizing wrong. Luckily I did not and had enough for a full circle skirt. These are my favourite because they are extra swooshy (see awkward photo above- it is very difficult to get a photo of the skirt mid swoosh). I am more into a midi skirt to be honest but I thought the tartan would look a bit frumpy if it was too long so mini works out perfectly for this fabric.

Tartan mini circle skirt
Once again I used the By Hand London circle skirt app (the BHL ladies are my other girl crush). I will make many more of these super flattering, lovely swooshy and amazingly quick to sew up skirts. If you have never made one I don't know what you are waiting for. I even hand stitched the hem on this one (this part wasn't quick) but the project still only took one evening. I love tartan, I love circle skirts and I love Jenna- Louise Coleman. It's been good to get that off my chest. Whew. Zoe x

Make a Circle Skirt // Sew the Waistband and Hem

Today is the final part of sewing up a circle skirt. Just need to make a waistband and sew it on, then hem your skirt. You can find the previous sections here and here. Let's start with the waistband.

Measure the size of the un-stretched waistband of the skirt you have made so far and add 5cm to this length. Out of your fabric cut yourself a rectangle that measures 10cm (4 inches) by this length you just calculated. This will be your waistband. Start by sewing the shorter ends right sides together and then pressing open your seam.

You'll now have a big loop of fabric that should be the same size as the waist of the skirt. With the good side of the waistband touching the inside of the skirt, line up your waistband seam with one of your side seams. Pin this in place and then zig zag stitch the waistband to the skirt, as above.

When they are attached together, turn your skirt the right was out. Fold and press the waistband up (as above). Now fold the raw edge of the waistband down over the raw edge of the skirt and then under itself pinning it in place. Now, starting at the side seam, top stitch this down...

 … so that your zigzag stitch goes back and forth over the edge of the waistband. That is it, your waistband is done.

Now to sew the hem. Because the bottom of your skirt is a curved edge you will need to do a really narrow hem. Luckily, since the stretchy fabric won't fray, you don't need to turn the bottom over twice like you normally do on a hem, once will be plenty.

So try on your skirt and check its the right length. If you'd like it a little shorted then carefully trim off however much you need to to make it the right length, keeping it even all the way around. Then take your iron and press the bottom seam up and into the skirt (so wrong sides together) by 1/4inch or half a centimetre. Pin it in place, then sew zigzag topstitching back and forth over the raw edge of the fabric. Start on side seam and sew all the way around until you have hemmed the whole skirt.

And then you have made yourself a skirt! Wowee! This is such a great feeling right there that you will want to go and show it off to every one. Plus circle skirts are, without a doubt, the best for twirling so don't forget to do a big twirl to show off your skills. Happy twirling. Zoe xx

Make a Circle Skirt // Cut Your Fabric and Sew Your Side Seams

Have you got your fabric? Good, It's time to make it into a skirt! So I hope you wrote down your waist radius from the Circle Skirt App and the length of your skirt? Well in case you didn't I have added the link again, it can be handy to have this open too while you cut so you can see what cutting layout they recommend. If you are making a half circle skirt or a quarter circle skirt you will only need to draw your circles once, but if you are making a full circle you will need to do it twice. Either way the idea is exactly the same.

So fold your fabric according to the apps instructions. To help you understand how to cut your fabric my waist radius is 12cm.

In the correct corner of your fabric (mine is folded at this corner but yours won't be if you're doing a quarter circle). Then take your tape measure and your dressmaking pen (or chalk if thats your thing) and measure your radius from the corner. You can see I have made a mark at the point that is 12cm away. I have then made other marks that also measure 12cm away in different directions. Do this to yours too.

When you have enough marks, join them up to make a curve:

Then repeat this step for the bottom of the skirt. This time the measurement will be your waist radius (i.e 12cm) PLUS the length you want your finished skirt to be (61cm) PLUS seam allowances (1.5cm) to give a total radius (64.5cm).

Use this measurement to draw the curve for the bottom of the skirt. Now cutting stretchy fabric is a little tricker than cutting wovens because it stretches as you cut. So if you have a rotary cutter then you can use that to avoid this problem. For those of you that don't have a rotary cutter (probably most of you) you can just use your normal dressmaking scissors. Since you have drawn the cut line on the fabric you don't need to worry too much about stretching it because you can just cut along the line. Just try to keep your scissors as close to the cutting surface as possible rather than lifting it up as your cut.

Now is a good time to remind yourself of what to do when sewing with stretchy fabrics.

If you're making a full circle skirt sew up one side seam, if you are making a quarter or half circle skirt you can skip this step because there is only one side seam. Once you only have one side seam left to sew, hold the skirt up around your waist. You'll find it stretches quite a bit and overlaps some. You will need to trim down one of the edges to allow for this overlap, other wise your skirt will fall down when you wear it! (Sadly photographing this step proved too tricky so I can't show you :( ) Make sure you account for your seam allowance to leave about 3cm of overlap.

Finally sew up the other side seam. And…. um….. wow! It's starting to look like an actual piece of clothing! I love that step, every clothing project has one, the moment that it changes from some random pieces of fabric to something that actually resembles an item you might wear.

All there is left to do is to sew a waistband and hem your skirt (come back next week for this). No need to finished your edges because they won't fray on stretchy fabrics! Winner. See you soon. Zoe xx

Full Midi Circle Skirt Love Affair

I am in love. When thinking up a project that would be easy for beginners to make but also really wearable I settled on a circle skirt (you can now see the instructions here). I love my half circle skirt and wanted to make myself another one but also they are SO FLIPPING EASY to make I couldn't think of anything easier. The tricky part of course for a skirt is the fastening, both zips and buttons tend to freak beginners out, so to make it the easiest project ever it doesn't even have a zip or buttons. That's right you heard me correctly, it's a stretchy skirt with no zip or buttons. This, I think, is why I am so madly in love. It is so comfortable and I love how it looks so I can't lose.

Also it's crazy fun to twirl in, I could do this all day when I wear it:


Well truthfully I tried spinning in it to make a gif of a spinning circle skirt for you guys but got so dizzy it left me unable to do anything for the rest of the evening. So when you have made one try to limit the spinning a little.

I have a few others things to share with you before I go through how to make one of these beauties so you'll have to sit tight for now. If you fancy making one though and haven't already, get to know your sewing machine a little by going through the first few session in Sewing School and then you will be all set to make one too.

Ciao for now, Zoe xx

Make A Circle Skirt // Buy Your Fabric

It's time to start the second of my 'step-by-step' beginner sewing projects. The first were these cushions but I know many would-be sewists would really prefer to make their own clothes than their own decor. This project is great for beginners because

1. It doesn't have a Zip or Buttons
2. It's very easy to wear
3. There are different options for what shape and length so you can adapt it to your own style
4. There is a handy 'circle skirt app' to work out how much fabric you need and how to cut it up

PLUS there are loads of stretchy fabrics out there that would work well for this skirt. This first step is instructions for which sort of fabrics will work well, and which will be easier to work with for beginners. Working with stretchy fabrics can be very easy but only if you buy the right kind of fabric. So without further ado let's see what you need to look for.

Knits
As I mentioned before when I wrote about fabrics there are two ways that a fabric can be stretchy. The first option is 'knitted' fabrics. These fabrics are formed with non-stretch threads that are then combined together in a way that makes the finished fabrics stretchy. This can be an excellent option for beginners because they tend not to be too stretchy. Look out for terms like 'double knit' if you want something thick and heavier or 'single knit' for something on the lighter side. They should be made from 100% cotton (or other non stretchy material). My skirt is made from a double knit. I have been able to wear it through the summer but it's warm enough for autumn and winter too when I wear it with tights.

Stretch
The other kind of stretch fabric is made from stretchy materials. They are usually made up from a combination of cotton and lycra (the brand name we commonly use for elastine or spandex). When starting out you will need to find something with a small percentage of lycra, 3-5%. This will give you enough stretch to pull the skirt up over your waist but small enough that it won't fall down again. Plus small stretch means its easier to sew with. Be careful though that you don't confuse the percentage of lycra with the 'stretch percentage'. The stretch percentage of a fabric is how much bigger it can be stretched to and then go back to its original size. Also try not to get something too thin as this also makes the sewing more difficult, not to mention you'd be able to see your knickers through your skirt, oo-la-la!


How Much
The only question left remaining is how much fabric to buy? You will need to decide on what kind of skirt you want to make, 1/4, half or full circle (my red one is a full circle) and what length you want it to be. Then when you have decided head over to the By Hand London Circle Skirt App and pop in your details. All you need to know is you waist measurement and then pick your options. They will tell you the radius of your waist (write this down for later) and the length of your skirt (write this down too). Then buy your fabric and when you have it home WASH IT!

I know there is no need to shout, but seriously wash it as soon as you get it. Stretch fabric is particularly prone to shrinking so you really must prewash it and the sooner you do it the sooner you'll be ready to start cutting and sewing.

Exciting stuff. Come back next week and we can sew it together (It's so quick you'll be done before yo know it). This is what you can expect:

1. Cut Your Fabric and Sew The Side Seams
2. Sew on a waistband and hem your skirt

Thats all there is too it. See you then. Zoe x

My First Ever Circle Skirt!


I am not exactly sure why I have never made one of these before. I love my new circle skirt. Well technically a half circle skirt. I just wanted another wardrobe staple and thought I would try out a new pattern with the plain blue fabric I had, it was a good choice. This was so easy to make and is equally easy to wear.


Even though I am pretty good at maths I was feeling lazy. I used this 'Circle Skirt App' to work out the dimensions for me and left all the thinking to someone else. Go have a look. The Lovely ladies at By Hand London have also included instruction for how to sew it together. There is little left for me to add except: what are you waiting for?


If you haven't started making your own clothes yet but you do know the basics of sewing then this is a pretty good project to start on. I am wearing mine today as part of my Me-Made-May challenge, its going well so far. It is so fun to spin in! Zoe xx
Related Posts Plugin for WordPress, Blogger...