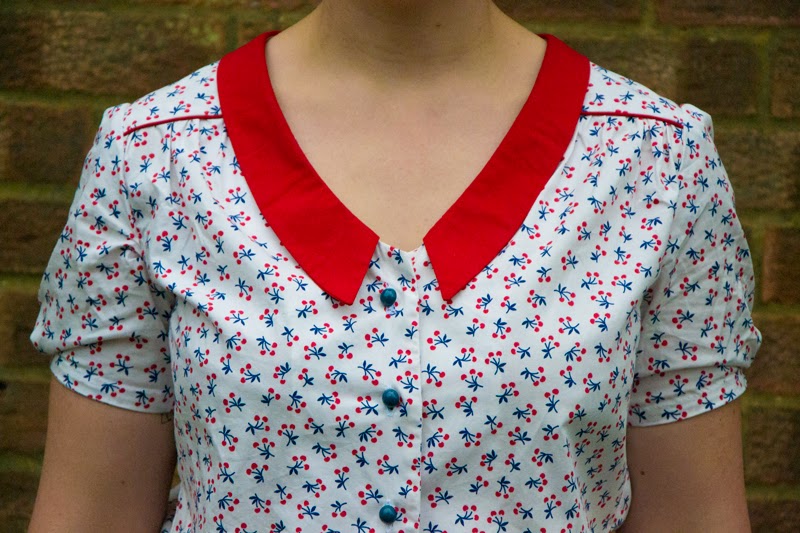
My Mimi Blouse

So here it is, my first Mimi Blouse. This is my first completed item from Love At First Stitch and I am so proud of it! I think it may just be the best sewing I have ever done. It has piping and everything!


I really enjoyed making it, the instructions were easy to follow and I learned some new techniques which is always good. The fabric I used is a cotton poplin so a little heavier than the recommendation but I'm happy with it. I'll probably try something lighter if I make it again.

I love the back, I think the gathers here are lovely. I am pleased I went to the effort of adding the piping because it breaks up the back nicely and highlights these gathers.


I have two small things that I would change if I could. I would prefer if it were a little more fitted around the waistline so I will probably mostly wear it with skirts or trousers with a high waist and tuck it in. Also the cuffs of the sleeves are a little tight so I will make them bigger next time.

I have already started making something else from Love At First Stitch and I can't want to share it! Zoe x

Sewing School // What Would You Like to Learn?

Do you sew yet? Maybe you did a few years ago but haven't even glanced at your sewing machine since. Perhaps you haven't ever turned on a sewing machine and really want to but are nervous about what might happen. I've had a few readers say to me recently that they love the idea of being able to sew but just don't know how to use their sewing machine.  In a few weeks time I am planning on sharing some absolute basic sewing tutorials. The kind of things that most sewers don't even have to think about now when they sew. Before I start sharing these I wanted a bit of feedback from you! It would be really great if you could comment below and answer a few questions for me. (Even if you sew already your feedback would be great).


If you consider yourself a beginner (or before a beginner maybe) what would you like to learn? Once you have learnt how to use the sewing machine what would you want to make? Would you be aiming for something simple like a cushion cover or would you prefer to aim for something larger like a quilt? Or perhaps you want to go all out and aim for your own handmade outfit? Let me know what you would like to work towards and anything you are desperate to find out on the way.

If you have been sewing a while and would place yourself in the intermediate/master of all things sewing category, what did you learn first? Was this a good place to start or in hindsight would you have tried something different? What lessons would you consider to be the most important for an absolute beginner?


If you have anything else to add please just add it in to your comment. Thanks so much. Zoe xx

Me-Made-May So Far


Here a few snaps of some of my outfits choices for Me-Made-May this year. You might remember my earlier post where I pledged (along with other sewing bloggers all over the place) to wear one item of hand made each day during May. These are some of my favourites from so far. They are in no particular order and I haven't shown you every day but you get the idea. From top to bottom the hand made items are:

1. Half Circle Skirt
2. Gingham Peplum top
3. Peter Pan Collar Sorbetto
4. Vintage Floral Elisalex
5. Chambray Elisalex

I've also worn my DIY infinity scarf, my spotty pencil skirt, my green sleeves sorbetto, my button back top and my polly top. Also my daughter wore her refashioned top that I made last year:

I have almost run out of items to wear already so I will be sewing a few more but also wearing repeats for most of the rest of the month. Maybe next year I will manage something different every day. I am learning lots though and at the end of the month I will share my lessons from my challenge. Zoe xx

How to Make a Peplum Top (From Any Fitted Bodice Pattern)


As promised today I am sharing with you instructions to make your very own peplum top. I have made mine using the bodice pattern for the Elisalex dress, but you can make one from any fitted top or dress pattern that includes a bodice (i.e not a shift style dress or a shirt pattern). I will try and be as detailed as I can but if you have any questions just ask.

Sewing level: Intermediate, includes a zip and drafting your own half circle peplum.

What you need:
Bodice pattern
1.5m of fabric approx
Invisible zip
Calculator with a pi function (don't get scared about this though)
Sewing Machine
Matching thread
Tape measure
Dressmakers pen/chalk

What you do:
Step 1: First of all cut out your pattern pieces for you bodice, front, back and sides and sew them together according to the instructions in the pattern which they came from but leaving the back seam open. Once you have sewn up the shoulders and your side seams and pressed all your seams try it on and pin it shut to check it fits. Make any alterations you need to but a nice fitted waist will really exaggerate your peplum.

Step 2: Take your top off again. Measure around the waist of the bodice, from one side of the back opening all the way around to the other. Write this measurement down and label it 'a'. This will be the length of the circumference of your peplum. Don't worry if you are no good at maths, I will break it down for you. If you are interested in understanding how to work it out, read the next paragraph, if you would rather just type the numbers in to your calculator then skip over 1 paragraph.

Calulate the radius of your peplum:
My peplum is a half circle not a full circle, I think this gives the peplum just the right amount of flair to keep it flattering. The measurement that you have written down is therefore half the length of the circles circumference, so start by doubling it to get 2a. Now you need to use this to work out the radius of the circle. We have a handy formula linking the circumference and the radius of a circle: circumference = 2 x pi x radius. This tells us the circumference if we already know the radius so we need to rearrange to get: radius = circumference/(2 x pi) or radius = (2a)/(2xpi). But we can simplify this by cancelling the 2's. So type into your calculator a/pi

For those of you not interested in the maths type into your calculator your measurement 'a' divided by 'pi'. Write this measurement down as 'r' (for radius).

Step 3: Now you need to work out how long you want your peplum top to be, so trying on your bodice, measure from the bottom of the top down to where you would like it to finish. Add on your seam allowance for the top and the bottom. Write this measurement down as 'l' (for length).

Step 4: Next you need to draw out your half circle onto your fabric. Fold a rectangle of your fabric in half width-ways. Hold the end of your tape measure (near the 0cm mark) in the corner near the fold and measure out from here your radius you calculated 'r'. Using your dressmakers pen mark a point that is 'r'cm from the corner. Keeping the end of the tape measure in the same place, move the measurement 'r' around and mark several other points to form a quarter circle shape. You are using your tape measure like a pair of compasses. Join your dots up to make a quarter circle, this line is what you will attach to the waist of your bodice. When you have cut it and opened out your fabric you will get the half circle instead of the quarter circle.

Step 5: Now add together the numbers you wrote down 'r+l'. This total is the radius of the bottom of the peplum. Keep the end of the your tape measure (again the 0cm end) in the same corner as before and this time mark points on the top that are 'r+l' cm away from the corner. When you have several of these points drawn on your fabric join them up into a smooth curve. This line is the bottom of your top.

Step 6: Now cut along both of these curves that you have just drawn through both layers of fabric. When you have finished fold it out and you will see that you now have a semi circle arc or a rainbow shape.

Step 7: Pin the shorter curve of your 'rainbow' to the waist of your bodice right sides together. Match up the end of the 'rainbow' with the back seams. Stitch this all the way around. Press your seam up towards the bodice.

Step 8: Sew an invisible zip into the back of the top and then sew together the back seams. Make sure your invisible zip comes lower than the smallest part of the waist or you won't be able to get it on and off!

Step 9: Finish off your top by hemming the bottom of the peplum, use a roll hem or a very small 1/4 hem because its a curve. If you have sleeves as part of your bodice pattern add these too if you haven't already.

Thats it! You have made yourself a very flattering peplum top.

Now just add a bow and you're good to go! Well the bow is optional. Have fun! Zoe xx

PS, normally I do try to get more photos but the gingham didn't work well for a photo tutorial so you will have to just accept my instructions, do ask if they're not clear. x

Gingham Peplum (and my thoughts on Love at First Stitch)

I have done quite a bit of sewing over the last few weeks and one thing I am particularly proud of is my gingham peplum. I know I am a pit late to the peplum game (like 2 years) but the shape is just so flattering that who cares if it's on its way out. I was tempted to make a crop top to keep up a bit but if I am honest I know I would never wear it.

I am also wearing my brigitte scarf which I made to help Tilly (of Tilly and the Buttons) celebrate the launch of her book. Which I am very excited about:

This book is a beginners guide to sewing which teaches sewing techniques through projects. The first project in the book is the Brigitte scarf and as you work your way through the book each project introduces new techniques. It is a lovely book for beginners but it also includes 5 pull out patterns for the more complex garments so its a great book for a 'more than a beginner but not quite a pro' like me too. I am part way through the 'Mimi Blouse' at the moment and it is challenging me, so it is more than just a total beginners guide.

But the instructions are very clear so it really is suitable for someone who has never even turned on a sewing machine before. There are step by step tutorials for each garment but also guides to what to buy and how to shop for it. What is more, its absolutely beautiful. Clearly Tilly and the producers of the book have worked hard to make it aesthetically pleasing as well as useful. I am really looking forward to making more of the projects. If you want to learn to sew its great place to start.

You can read more about Tilly's book here. Plus next week I am going to go through how I made this peplum top. Zoe x

(PS here is the tutorial for the peplum)

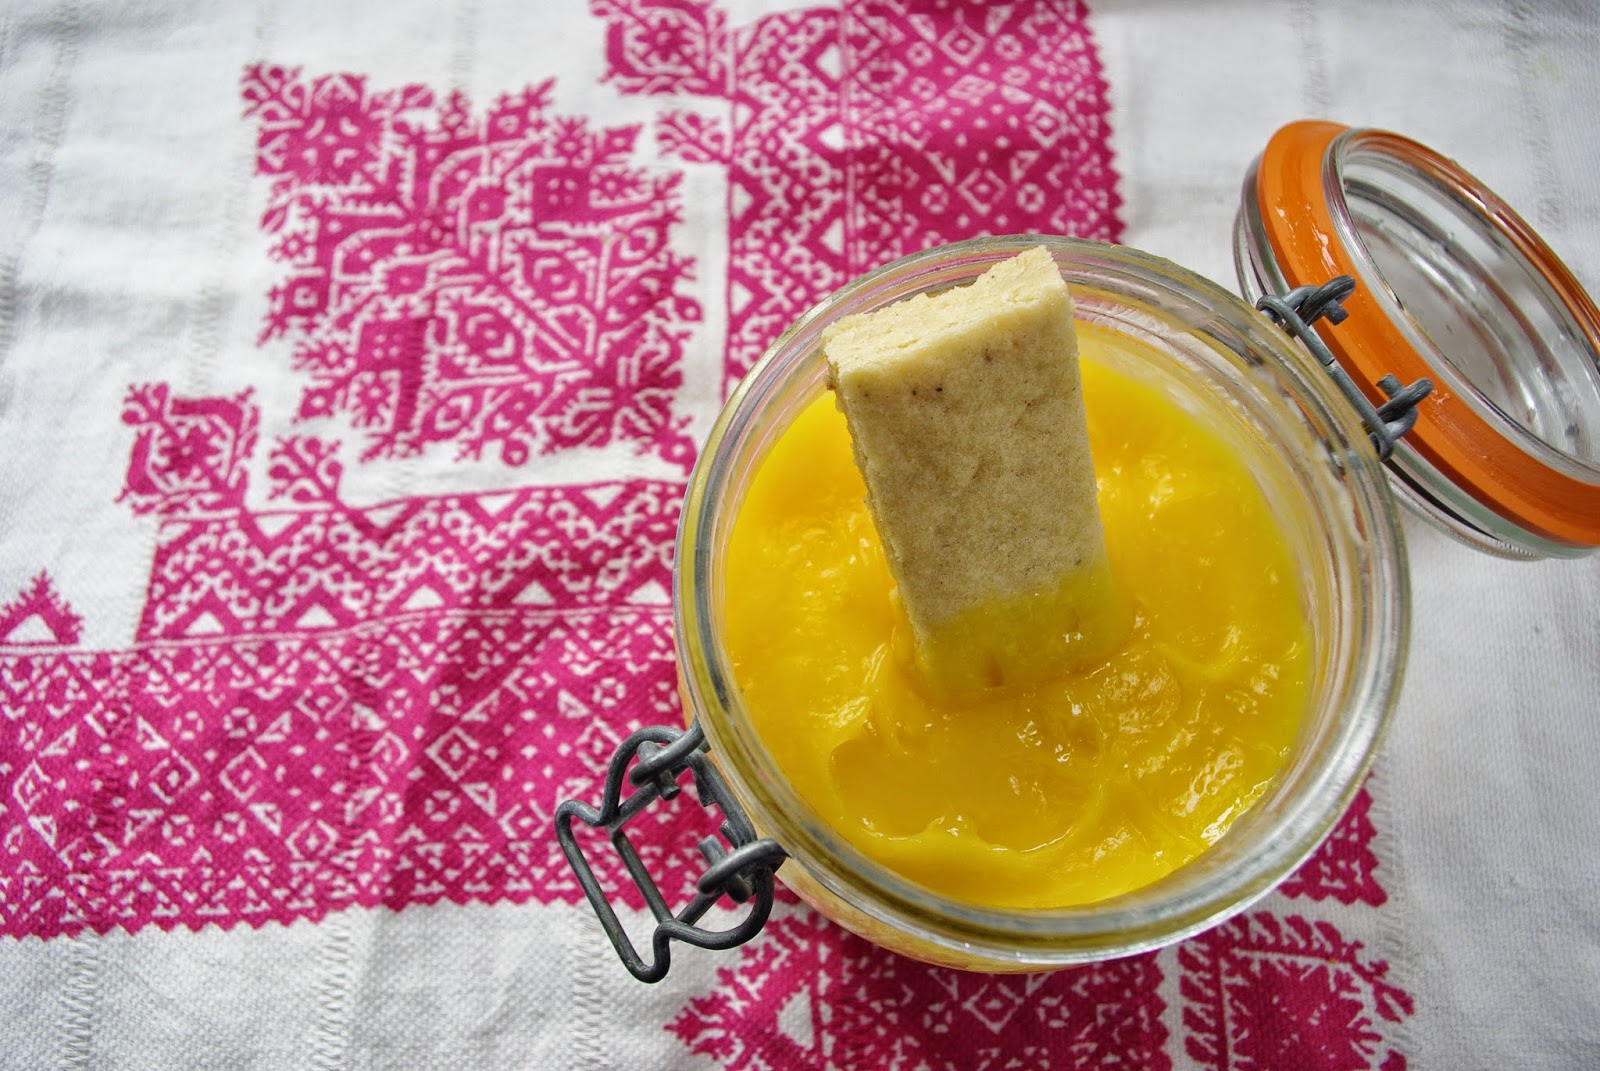
Dished Up: Cardamom Shortbread and Lemon Curd


My sister in law bought me a subscription for delicious magazine for Christmas. When I was flicking through it the other day I came across a recipe for cardamom churros and lemon curd. Churros are Spanish and similar to a doughnut. I have made doughnuts before and they were delicious but I wanted something to take away for the weekend and anything deep fried doesn't keep well (and of course is very unkind on the hips) so decided to adapt a recipe and make some cardamom shortbread. I stuck with the delicious recipe for the lemon curd. Having used Delia's recipe before I was surprised to find this one actually produced a smoother result with just as much flavour and seemed to set better too. For the shortbread recipe I went once again to woman's weekly.


Prep time for the shortbread: 20 minutes
Cooking time: 25 minutes
You can make the lemon curd while the shortbread is in oven but if you want to eat it immediately you may want to do this the day before as the curd needs chilling time.

What you need (shortbread):
12 cardamom pods
250g Melted Butter
1/2 tsp vanilla essence
55g Caster sugar
55g Icing Sugar
50g Cornflour
350g Plain Flour

What you do:
1. Heat an oven to 160 Celcius and grease and line a 20 by 30cm baking tray.
2. Split the cardamom pods and place the seeds in a pestle and mortar. Discard the cases and grind the seeds.
3. Beat the melted butter, vanilla, sugars, cornflour and ground cardamom in a mixing bowl with and electric mixer until thick and smooth.
4. Stir in the sifted flour and press the mixture into the prepared tin.
5. Bake for 25 minutes until firm. Slice it into 25 fingers straight away and leave in the tin to cool completely.

For the lemon curd you need:
Zest and juice 2 large unwaxed lemons
85g unsalted butter
225g caster sugar
3 medium eggs, lightly beatenam
A sterilised jam jar (fill one with boiling water or put it through the dishwasher)

Place all the ingredients in a large heavy-based saucepan and heat gently, stirring all the time.
Keep the heat really low as if it gets too hot the eggs will curdle. When the curd is thick enough it will coat the back of a soon and a trail will be left if you run your finger through it. remember it will thicken more on cooling.
Poor the crud through a sieve into your prepared jar and top with some clingfilm touching the surface to prevent a skin forming.

When both have cool completely dip away and enjoy!
Cassie xx

My First Ever Circle Skirt!


I am not exactly sure why I have never made one of these before. I love my new circle skirt. Well technically a half circle skirt. I just wanted another wardrobe staple and thought I would try out a new pattern with the plain blue fabric I had, it was a good choice. This was so easy to make and is equally easy to wear.


Even though I am pretty good at maths I was feeling lazy. I used this 'Circle Skirt App' to work out the dimensions for me and left all the thinking to someone else. Go have a look. The Lovely ladies at By Hand London have also included instruction for how to sew it together. There is little left for me to add except: what are you waiting for?


If you haven't started making your own clothes yet but you do know the basics of sewing then this is a pretty good project to start on. I am wearing mine today as part of my Me-Made-May challenge, its going well so far. It is so fun to spin in! Zoe xx
Related Posts Plugin for WordPress, Blogger...