Showing posts with label Recipes. Show all posts

Dished Up: Cardamom Shortbread and Lemon Curd


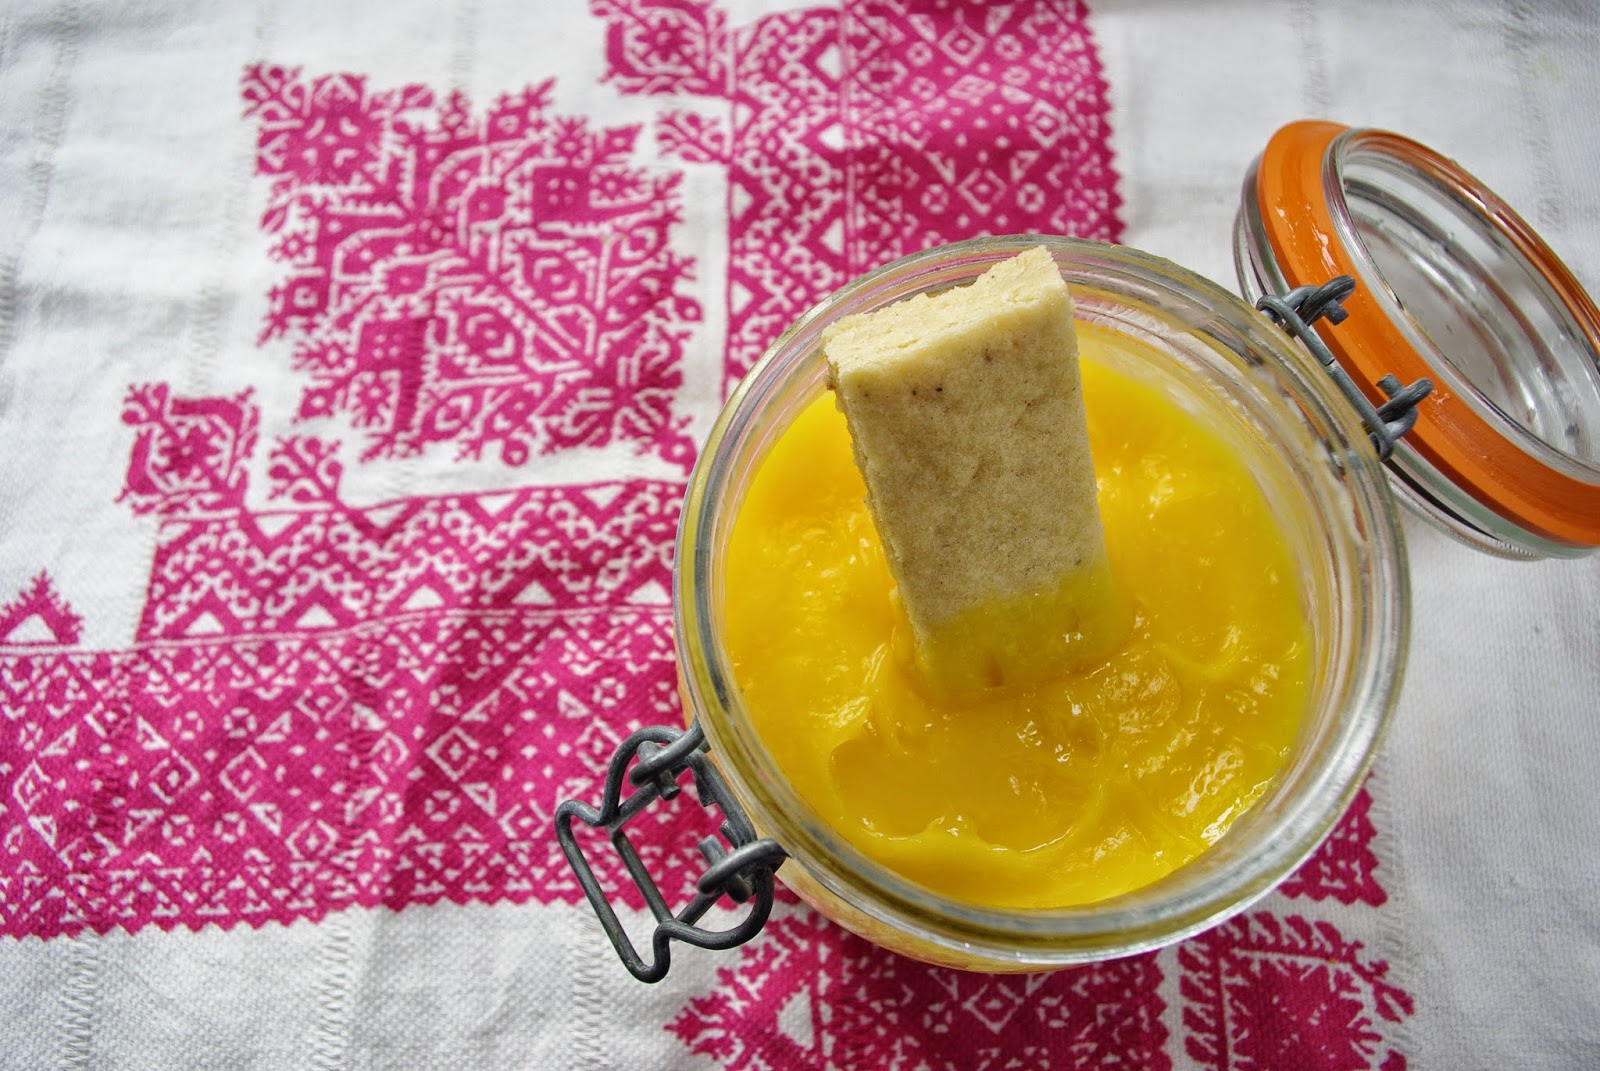
My sister in law bought me a subscription for delicious magazine for Christmas. When I was flicking through it the other day I came across a recipe for cardamom churros and lemon curd. Churros are Spanish and similar to a doughnut. I have made doughnuts before and they were delicious but I wanted something to take away for the weekend and anything deep fried doesn't keep well (and of course is very unkind on the hips) so decided to adapt a recipe and make some cardamom shortbread. I stuck with the delicious recipe for the lemon curd. Having used Delia's recipe before I was surprised to find this one actually produced a smoother result with just as much flavour and seemed to set better too. For the shortbread recipe I went once again to woman's weekly.


Prep time for the shortbread: 20 minutes
Cooking time: 25 minutes
You can make the lemon curd while the shortbread is in oven but if you want to eat it immediately you may want to do this the day before as the curd needs chilling time.

What you need (shortbread):
12 cardamom pods
250g Melted Butter
1/2 tsp vanilla essence
55g Caster sugar
55g Icing Sugar
50g Cornflour
350g Plain Flour

What you do:
1. Heat an oven to 160 Celcius and grease and line a 20 by 30cm baking tray.
2. Split the cardamom pods and place the seeds in a pestle and mortar. Discard the cases and grind the seeds.
3. Beat the melted butter, vanilla, sugars, cornflour and ground cardamom in a mixing bowl with and electric mixer until thick and smooth.
4. Stir in the sifted flour and press the mixture into the prepared tin.
5. Bake for 25 minutes until firm. Slice it into 25 fingers straight away and leave in the tin to cool completely.
For the lemon curd you need:
Zest and juice 2 large unwaxed lemons
85g unsalted butter
225g caster sugar
3 medium eggs, lightly beatenam
A sterilised jam jar (fill one with boiling water or put it through the dishwasher)

Place all the ingredients in a large heavy-based saucepan and heat gently, stirring all the time.
Keep the heat really low as if it gets too hot the eggs will curdle. When the curd is thick enough it will coat the back of a soon and a trail will be left if you run your finger through it. remember it will thicken more on cooling.
Poor the crud through a sieve into your prepared jar and top with some clingfilm touching the surface to prevent a skin forming.

When both have cool completely dip away and enjoy!
Cassie xx

Dished Up: Broccoli and Bacon Salad

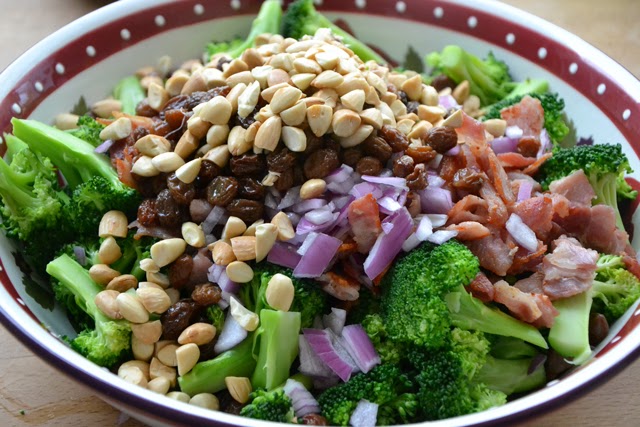
I adore barbeque season. The joy of eating outside combined with a plate loaded with different flavours is my idea of heaven. And our family sure know how to do a bbq! I love to try out new recipes for both salads and desserts but there is one dish that we bring out every year; Broccoli and Bacon Salad.  Just this salad alone provides sweet, salty and tangy delights and 3 of your '5 a day'. Our church provides some mean catering for weddings and this salad is often on the menu. A friend brought the recipe over from America so it's original source is unknown. If the dish is good enough for weddings is definitely good enough to grace your menu this summer.


What you need:
3 medium broccoli, cut into florets
1 medium red onion, finely chopped
1-1.5lb bacon
1/2 cup of toasted flaked or roughly chopped almonds
3/4 cup raisins, soaked in water for an hour or overnight
1/2 cup sugar
1 1/2 cup mayonnaise
1/4 cup vinegar


What you do:
1. Blanche the broccoli in boiling water until it is tender, about 5 minutes.
2. Chop the bacon into cm cubes and fry it until crisp.
3. Put the broccoli and bacon in a large bowl with the chopped onion, toasted almonds and soaked raisins.
4. For the dressing mix together the sugar, mayonnaise and vinegar until smooth.
5. Just before serving pour the dressing over the salad. Gently fold the dressing through salad mixing the ingredients and covering them in the dressing taking care not to break up the broccoli. Serve immediately.

If you're allergic to nuts the almonds can easily be substituted with pumpkin seeds.

Our Mum made the broccoli salad in the photos and I was on pudding duty so I made a chocolate and coconut banoffee pie from the BBC Good Food website. If you like sweet desserts you should try this but read the comments as getting the coconut cream thick enough can be challenging. we had it alongside a lemon cheesecake and some summer fruits. One dessert sometimes simply isn't enough.
Cassie xx

Dished Up: Chocolate Malt Biscuits

I made some malt loaf recently. The aim was to make something that I'm not that keen on so that I wouldn't be tempted to eat it. Unfortunately it turned out that my family weren't that keen on eating it either (I did find some kind friends who helpfully finished it and assured me that it was in fact nice malt loaf). Nonetheless I was left with most of a jar of malt extract, a curious substance that I bought from a health shop that in form is very like runny honey and in smell is unsurprisingly reminiscent of malteasers. I figured if I substituted malt for honey in a recipe I could use the extract. Honey can be used in many things but I didn't think that 'Malt and Mustard Chicken' would be too much of a hit so I pulled out an old faithful cook book to see what honey biscuit recipes I could find. Well you could knock me down with a feather but the old faithful had a recipe for Malt Biscuits! Naturally I didn't leave the recipe completely untouched but the basic ingredients are the same.

The original recipe is from Australian Women's weekly Big Book of Beautiful Biscuits and makes around 45. If half of this is enough then you can freeze some of the dough after step 4. When you want to make the rest, get the dough out and leave at room temperature until you can slice it and then complete the rest of the steps.

The whole process including chilling can be done in an hour if you are pretty speedy and use the freezer. If you like more leisurely baking then give your self at least on hour and a half although hands on time is a lot less than this.

What you need:
125g Butter
110g Caster Sugar
1 egg
2 Tbsp Golden Syrup
2 tbsp Malt extract
375g Plain Flour
1/2 tsp Bicarbonate of soda
1 1/2 tsp Cream of tartar
200g Plain Chocolate

What you do:
1. Beat the butter, sugar and egg in a freestanding mixer until smooth. Add the syrup and the extract and mix until combined.
2. Sift in the dry ingredients and beat until the mixture comes together as a soft dough.
3. Roll some clingfilm out across your work surface and place the dough on top.
4. Shape the dough into a long sausage (or two shorter ones) about 5cm in diameter, wrap the film around it and place it in the fridge for 30minutes or the freezer for 15minutes. (The dough is very sticky so you may find it useful to do some of the shaping when the film is already wrapped around the dough).
5. While the dough is chilling heat the oven to 160 celius and line some baking trays with non stick paper.
6. Take the chilled dough out the fridge, cut the sausage into 0.5cm slices and place them onto the prepared trays a couple of cm apart. Bake for 16 minutes or until golden brown. Leave to cool on the trays.
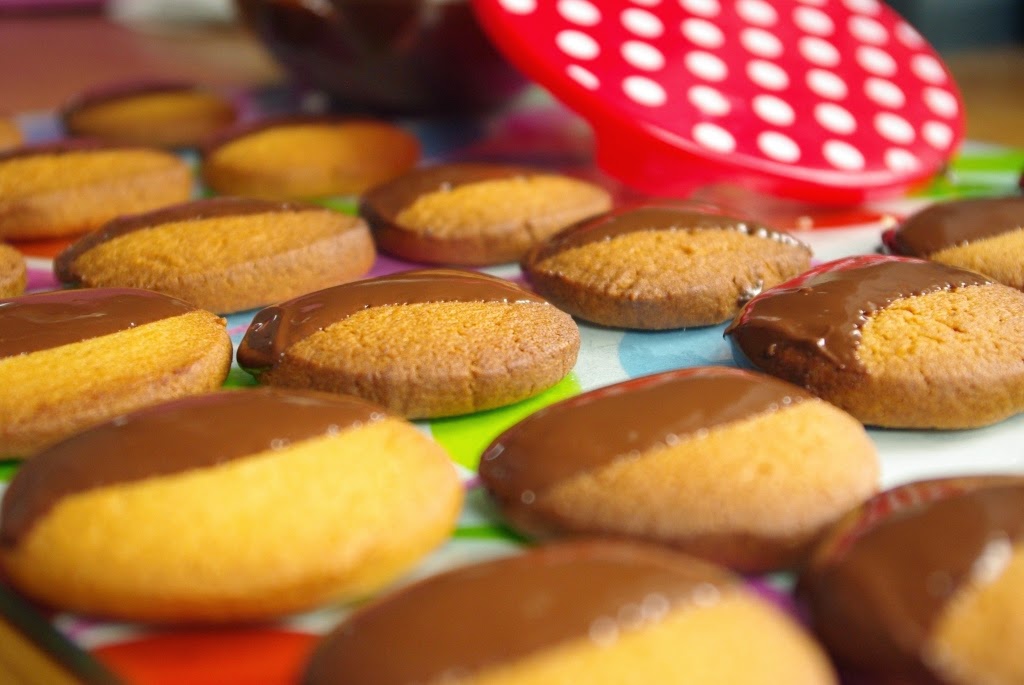
7. When the biscuits have completely cooled melt the chocolate gently and dip half the front of each biscuit into the chocolate. Place the biscuit back on the non-stick tray and leave to set.


So far these are going down a lot better than the malt loaf. Cassie xx

Dished Up: Top Hats


For my daughter's birthday I was keen to make a little treat for her to give to the children at preschool. Naturally she was keen to help! So together we made some Top Hats. These are not a new recipe but something that Zoe and I had as children. They are really easy to make but quite delicious whether you are 3 or 30!

What you need:
200g Chocolate
35 Marshmallows
35 Smarties
mini cake cases

What you do:
1. Melt the chocolate in a glass bowl over a pan a barely simmering water. Make sure that the bowl does not touch the water. When the chocolate is all melted turn the heat down but leave the chocolate over the pan and stir it often.
2. Place about a teaspoon of the chocolate in a cake case. Push a marshmallows gently into the chocolate.
3. Dab a small blob of chocolate on top of the marshmallow and top with a smartie.
4. Repeat until you run out of chocolate and leave to set. If you cant wait to eat them then pop them in the fridge to speed up the process.


The recipe should make around 35 Top Hats which give you just enough for a class of children with a few spare for you to enjoy with a cuppa. Cassie xx


Dished Up: Houmous

Houmous is a favourite in our house. It is always thought of as a treat when we have pitta bread, cucumber and dip for lunch. Not that long ago I catered for a friends wedding and had some tins of chickpeas left over. When I say some, I mean 20! As you can imagine I've been trying all kinds of creative things to use them up. Making houmous therefore was a no brainer. I tried a couple of recipes and wasn't happy with the finished result so threw together a few different things and came up with this recipe.

I guess most people would know that houmous is made with chickpeas but the other distinctive flavour is tahini, or sesame paste. You should be able to get hold of tahini in most major supermarkets. The one I have bought looks like a jar of peanut butter. All the other ingredients are store cupboard basics. It's super easy to make and not only is it packed with flavour, it lasts longer than the shop bought ones. They always say eat within three days and seem to go 'fizzy' very quickly.

What you need:
4 tbsp Olive Oil
1 onion, finely chopped
1 tin chickpeas, drained and rinsed
Zest and juice of 1 lemon
2 garlic cloves, roughly chopped
2 tbsp tahini
Smoked paprika (optional)

What you do:
1. Heat 1tbsp oil in a pan over a medium heat. Add the chopped onion and soften until translucent, 5-10 minutes.
2. Put the remaining ingredients in a food processor with the rest of the oil. Add the cooked onion and whizz to a purée.
3. Put in a serving dish and sprinkle with smoked paprika if using. Enjoy with some crudités or slather in a sandwich with some roasted vegetables.

Easy Peasy! Enjoy.
Cassie xx

Chocolate Fudge Icing Recipe (for Extra Indulgent Brownies)


This week I'm all about the sweet treats. I was supposed to be taking a savoury snack with me out last night but I just needed something sweet to help me endure the rain. I made some brownies and they were looking OK:

Normally I would be really pleased to take these with me and to eat them but I wanted something with a bit more wow factor. You can find the recipe for these brownies in an Usborne Children's recipe book but any brownies would work for this. The recipe I am sharing is for the icing (adapted from this recipe here). You can also enjoy this icing on cakes (or straight from a spoon!) and it goes on nice and smoothly so it always looks great even if you can't normally make your icing look smooth.

What You Will Need:
Brownies
55g Butter
3tbsp milk
200g icing sugar (sifted)
30g cocoa powder
Strawberries (half a strawberry for each brownie)

What To Do:
1. Mix all the ingredients together in a heatproof bowl over a pan of simmering water. After a few minutes the mixture will turn smooth and glossy. Remove the bowl from the heat.
2. When the icing has cooled slightly, add about 1 tablespoon of icing to the top of each brownie, covering the tops and spreading it into the corner. It's ok if it starts to pour over the edges a little but don't cover the edges over completely.
3. Hull your strawberries and cut then in half. When the icing is mostly cool and starting to set pop half a strawberry on top.


And don't they look delicious? In fact they don't just look delicious they really taste it too. Nom nom nom. Zoe x

Dished up: Chilli Beef Quesadillas


Quesadillas are a favourite in our house. For us they are a welcome alternative to pasta, rice and potatoes and are nice and easy for our children to eat as they are essentially a fancy sandwich.

I first discovered them on BBC Good Food site. They are traditionally a Mexican food so the fillings reflect that but the ones I first made were filled with sweet potato, feta and chorizo and were absolutely delicious. Often I'll use a cooked chicken, as I did in the chicken and spinach lasagne and throw it in with some onions, peppers, spicy BBQ sauce and some cheese. You really can fill them with anything. Most recently I followed a recipe for a chilli beef filling and it was one of those times that while I was eating I found myself thinking, I could do a much better recipe than this.So here is my attempt.

What you need:
8 tortilla wraps
500g beef mince
Olive oil
1 onion finely chopped
1 clove garlic, finely chopped
1tsp paprika
1tsp cumin
1tsp chilli powder (hot if you can handle it)
200ml beef stock
250g passata
100g cooked sweetcorn
200g cheddar (coarsely grated)

Just a little note on the wraps for those of you in the UK. Tesco do some excellent value wraps. They are just as good as the normal ones but a little smaller. For this recipe they are perfect. If you buy the slightly more expensive ones you may find you only have enough beef to fill 6. If you're feeding 4 adults it will save arguments if you have 8 so make a little more!

Prep time: Give yourself an hour to make the sauce and assemble the quesadillas. This isn't all hands on time. Mince is a cheap cut so cooking it for longer always does it good. Even better, make the sauce in the morning or the night before to allow the flavour of the spices to develop.
Cooking time: 10-20 minutes depending on how big your griddle pan is.

What to do:
1. Heat the oil in a large frying pan over a low heat. Soften the onion so it is cooked but not coloured. About 10 minutes. Add the garlic and spices and cook for a further minute.
2. Turn up the heat and add the beef. Break it up with a spoon and turn it over until all the meat is browned.
3. Add the stock and the passata and bring the sauce to a simmer. Leave over a low heat for 40 minutes or until your sauce is quite dry.
4. Season really well and stir through the sweetcorn. Remove from the heat.
5. Lay your wraps on your work surface and divide the sauce between them, spreading it out to cover half of each wrap. Meanwhile heat up your griddle pan. (A frying pan works fine but you won't have any fun stripes on your quesadillas.)
6. Sprinkle the cheese over the meat on each wrap and fold the wrap in half giving it a good press to stick it down.
7. When your pan is really hot, dry fry the quesadillas for a minute or two on each side, fit two in the pan at time if you can. Cut them in half to leave you with quarter circles and serve with a salad, potato wedges or both!

If you do have any left over though they are great for lunch the next day. Cassie xx

Homemade Hot Spiced Apple

The other night I had dinner with some friends and we were served some delicious hot spiced apple to drink. I loved it so much I decided to try and devise a homemade recipe for it. This a wonderful and alcohol free alternative to serving mulled wine so if you have any hosting to do over the next few weeks you should consider making some. It is spiced with similar flavours to mulled wine so its a nice drink to experiment with your own mix of spices. Here is what I used:


Ingredients
1.5l Apple juice (not shown)
Peel of one orange
Cinnamon stick
2 star anise
1 vanilla pod
1/2 tsp ground nutmeg
6-8 cloves
Squeeze of orange juice (not shown)

Method
Slice open your vanilla pod so the flavour can come out a little more then simply put all these ingredients into a large pan. You may want to break up one of the star anise to give it some extra flavour too. Heat gently until you have a hot beverage ready to serve.  The delicious smell will make your house feel very Christmassy.


You can pour it into a jug to serve or just ladle it straight into your glasses, try not to let the solid ingredients go in the glasses though!

As this is my last post before Christmas I want to wish you all a very Happy Christmas and I hope you have lots of Joy over the season. Zoe xx

Dished up- Salmon and Broccoli Pie

We recently had a great day out at the Wisley garden's taste of autumn festival. My husband and his hollow legs needed a snack half way around so he bought himself a salmon and broccoli pie. Just a snack you know. I had a nibble and I have to say it was yummy and was inspired to make something similar at home. When I had a quick look online I couldn't see a recipe I fancied so thought I'd have a go at one myself.

What you need......

For the pastry
  • 110g Butter
  • 175g Plain Flour
  • Salt
For the filling
  • 3 skinless salmon fillets cut into 2.5cm cubes
  • A small head of broccoli cut into florets
  • 1 pint milk
  • 50g butter
  • 50g plain flour
  • Salt and pepper 
  • Zest of 1 lemon
  • Juice of half a lemon
  • Egg
What to do....
  1. Make a batch of Delia's quick flaky pastry and pop it in the fridge for 30 minutes. 
  2. While it's chilling preheat the oven to 180 degrees celcius, put your broccoli in some boiling water for 4 minutes. The broccoli should be barely cooked otherwise it will be soggy after going in the over. Drain really well.
  3. You can use the same pan to make the béchamel sauce. Put the milk, butter and flour in the pan over a low heat. Stir with a balloon whisk continuously until the sauce is thickened. Stir through the lemon zest and juice and season well to taste.
  4. While the sauce is still hot stir the salmon chunks into it. The residual heat in the sauce will begin to cook the salmon meaning you don't have to precook it and leaving the fish lovely and moist. 
  5. Roll out two thirds of the pastry at gently as you can to about the thickness of a pound coin and line a 25cm pie dish. Line with baking paper and fill with baking beans. Bake for 15 minutes then remove the beans and paper and return to the oven for a further 3 minutes. 
  6. Stir the broccoli into the sauce with the salmon. Roll out the remaining pastry and cover the pie with it sealing with egg wash. Trim the edges and decorate as desired with the pastry scraps, piercing a hole in the top to let steam out. Paint with the egg wash and pop it back in the oven for 30mins. 
  7. Let the pie rest for 5 minutes before serving.

We had the pie between 2 adults and two small children but if you serve it with either new or mashed potato and some green beans I think you could easily stretch it to serve 6 adults. 

Hope you enjoy it as much as we did. Cassie xx

Dished Up: Jambalaya

Jambalaya is one of those words I've heard a few times but had never eaten and to be honest, I didn't even really know what it was. So when I stumbled across this recipe recently on the delicious magazine website I thought I'd give it a go.

Jambalaya come from New Orleans. The story goes that the spanish were trying to make paella but couldn't get hold of saffron and substituted it with tomatoes. The Caribbean influence in the area led to the edition of spices and jambalaya was the result. As for the name there is an old wives tales that tells of a travelling gentleman who stopped by a New Orleans inn which had little food remaining from the evening meal. The innkeeper instructed the cook, "Jean, balayez!" or "Jean, sweep something together!" in the local dialect. The guest pronounced the resulting hodge-podge dish as "Jean balayez." I don't know if it's true but I love the story so I like to think so.

When I was prepping the dish I just loved the beautiful array of ingredients. Just look at the colours! This recipe actually does use raw prawns but my recommendation would be to always by prawns raw. They take moments to cook and are so fresh and tasty, that for me it's a no brainer. 

The dish was yummy. It went down a storm with the family. Not too spicy for the children, who kept stealing prawns from my plate! Definitely one to make again.

I even remembered to serve the garnish with it. I can't tell you how many times I've gone in the kitchen to clear up after dinner and found a little bowl of something I was supposed to sprinkle on at the end.

So if you ever pop in to see me just call me 'Jean' and I'll balayez something for you. 
Cassie xx

And a Happy Thanksgiving to all our readers in the USA from both of us! xxx


Rocky Road (no bake) Cheescake


I am a little bit obsessed with rocky road, I'm still on the hunt for the best rocky road recipe but this takes rocky road to a whole new level of indulgence. It has all the main components of rocky road: biscuit, chocolate, marshmallows and nuts. But the extra ingredients make it a delicious pudding.

This is what I used:
280g chocolate chip cookies,
100g butter
300g dark chocolate
300mls double cream
100g caster sugar
200g full fat cream cheese
6 large marshmallows
50g crushed macadamia nuts (optional)

This is what I did:
First I crushed the biscuits in a bag with a rolling pin, if you have a food processor do it in there, its much faster. I removed about a cupful of this mixture to save for later. Then I melted the butter and mixed with the crushed biscuits. I pressed this mixture into a lined 22.5cm springform tin and put it in the fridge for a few hours.

To make the top I mixed together the cream, sugar and cream cheese until it it all came together and there were no cheese lumps. I melted the dark chocolate (over a pan of simmering water) and then poured about 1/4 of the cheese mixture into the chocolate and stirred. Once it was thoroughly mixed I poured in the remaining cheese mixture. I left this in the fridge over night. When this had set I melted the marshmallows in a pan with a little butter and drizzled it over the top.

Then I removed the cheesecake from the tin and put it on my serving plate. Finally I took the remaining crushed biscuits and combined them with the nuts and I gently pressed this mixture around the sides of the cheesecake.

I served this with mini marshmallows and it went down a treat. If you are having a dinner with friends you should make this, your guests will love it. Zoe xx

Dished Up: Sticky Toffee Cake


Two things that I love are sticky toffee puddings and bonfire night. Let's be honest who doesn't love a good sticky toffee pudding? So after playing around with a few recipes I came up with this Sticky Toffee Cake to serve up as a sparkling treat as we remembered gunpowder, treason and plot this year.
You may find the icing a little tricky if you've never made a caramel before but this video will give you an idea of what to expect. And believe me, it's worth getting right!

What you need.....
200g Dates, chopped
200ml Strong Tea
1tsp Bicarbonate of Soda
125g Butter
200g Demerara Sugar
1tsp All Spice
250g Self Raising Flour
3 Eggs
2tbsp Golden syrup
And for the icing....
125g Caster Sugar
80ml Double cream
160g softened Salted Butter
200g Icing Sugar
Sparklers (optional)

What you need to do.....
1. Start off making a dry caramel by melting the caster sugar in a heavy based pan. Once the sugar has melted, cook it to look like a strong tea. 
2. When the colour looks right quickly pour in the cream and beat it in. You have to do this carefully as it will really bubble but you need to stand back and mix at the same time or you'll end up with just a hard lump. If you have a bit of a lump keep it over a low heat and melt it slowly. Set this aside and let it cool completely. You can put the pan in some cold water like this to speed up the cooling process.

3. Preheat the oven to 180 Celsius and grease and line a 20x30cm tin. In a small pan bring the tea to a simmer and stir in the chopped dates. Simmer for 5 minutes then turn off the heat and stir in the bicarbonate of soda.
4. Beat the butter and the Demerara sugar until it's pale and creamy. I did this in my freestanding mixer. Then mix in the flour, spice, eggs and golden syrup. Fold in the date mixture and pour into the tin.  Don't worry if it looks a little curdled. Bake for 30-35mins until a skewer comes out clean. Leave to cool.
5. When the cake and the caramel are both completely cool make the icing by beating the salted butter and the icing sugar for 5 minutes with an electric mixer until really light and fluffy.

6. Beat in the caramel and slather the icing over the cake. Cut into squares and enjoy with your sparklers. (Don't worry though, if you haven't got any it's just as tasty without!)

Happy Bonfire Night, Cassie xx

Dinosaur Birthday Cake

Dinosaur Birthday Cake

This week my littlest boy turned 1. While I am no expert on the subject, I love to make fun birthday cakes for the kiddos. For his birthday we went to the Natural History Museum in London and he spent the whole day roaring like a dinosaur so I had to make a dinosaur cake. I was inspired by this cake I saw on Pinterest although mine is on a much smaller scale. I baked a chocolate cake in a round metal bowl and used the left over mixture to make cupcakes. My favourite recipe for chocolate cake is from this book from the Primrose Bakery, the chocolate sponge is really tasty and moist. It went down a treat and he loved it. And of course he made a huge mess while eating it. Just like 1-year-old's should. Zoe xx

Dished Up: Rabbit!

When I watch TV cooking shows I find myself confused. I watch 'Come dine with me' and end the show thinking I am the best cook in the world. But then I watch 'Masterchef' decide actually I know nothing about food.

The other thing that Masterchef never fails to do is inspire me to try cooking something new. This time it was rabbit. I found a recipe on BBC Good Food website (I get a lot of recipes from here) for Braised Rabbit Pappardelle and popped to the butcher to pick up a bunny. Any butcher should have rabbits in stock although you may find they are frozen, mine was, so take account for that if you are planning to serve it on a particular day.

The recipe, which you can find here, suggests you get the butcher to joint your rabbit but where's the fun in that? I found this video on YouTube and followed the instructions to cut the rabbit up. It was pretty simple and if I ever want to go on Masterchef, I'll have to know how to do these things, he he he.


It's not a quick recipe so I prepped all the ingredients and braised the rabbit in the early afternoon while I was home. That way I could rush in at half 5 after the tinkers swimming, cook the pasta, reduce the sauce and serve up a hopefully delicious meal at 6. 


After a couple of mouthful the husband complimented me on the delicious meal. It was really tasty! However his eating did slow down when he found out which mammal was on his plate. For me, although the sauce was scrummy, the rabbit was quite dry and tough which was surprising after braising it for an hour. So I wont be rushing out to try rabbit again in a hurry but might have a go at the recipe with some chicken or maybe duck next time. Cassie xx

Angry Birds Cake

At the weekend it was Boaz's party and I made him an angry birds cake of course. You probably already saw the crocheted angry birds I made for him and he loved these. I modelled the birds and pigs out of fondant icing for this cake.

While I am not cake making expert I have learned a thing or two about icing over the last few years so here are my top tips:

1. You don't need lots of fancy equipment to make decent icing figures, I usually just use my hands and a knife. Sometimes I use the knife handle to make blunter dents and I have used cocktails sticks too but nothing fancy or expensive.

2. Be careful not to let your hands get too sugary, if you do then it starts to all stick and can undo alot of good work. You can wash your hands occasionally as long as you dry them thoroughly afterwards.

3. Black icing is very tricky to use so be very careful with it, and the dye in gets all over the place (see the marks on the top of this cake)

4. Lastly but most importantly don't expect your first (or second or third...) to look exactly like you're hoping. As with all craft this is about practice and experience and they'll get better as you make more. Plus kids are happy if it even vaguely resembles whatever it is you're aiming for.

Its not the fanciest cake in the world but he loved it. Happy Birthday Boaz! Zoe xx

Dished Up: A Whole Lot Of Apples


Today we welcome Cassie back to Tadpegs. You have met her before when she wrote about the crocheted camera case and this is the first in a series of posts Cassie will be writing about food we are calling 'Dished Up'. Enjoy!

I am a girl who LOVES summer so it is really good for me to be reminded of the joys of autumn to ward off those post summer blues. A friend helped with this recently as she gave me a lovely large bag of apples from the tree in her garden. So one beautifully sunny afternoon I sat in my garden and set to work peeling them.

The husband loves stewed apples so I just threw most of them in a big pot with a glass or two of water and cooked them down. I like my apples quite tart so I didn't add any sugar until they were all cooked and then added some to taste. make sure you keep an eye on the apples though and stir them regularly other wise they will catch on the pan.

I filled couple of tubs with the apple and put them in the freezer ready to pull out and whip into a crumble when we're entertaining over the winter. Some was reserved just to eat that night and I even had some cream in the fridge for the more decadent (and fast metabolismed) in the family to have with theirs.

I also used some of the apples to make a Squidgy Spiced Apple Cake. You can find the recipe here. In fact I made two. It was really easy to make and came out deliciously moist and tasty. I served one at our church house group and it went down a treat. The other is in the freezer all ready for our Nearly Christmas Mini Craft Fair which you'll hear about in a few weeks.


Thankfully there was a piece left for me to sit down after a morning running around with the tinkers and enjoy with a cup of tea. Cassie xx

Rocky Road: Back to Basic


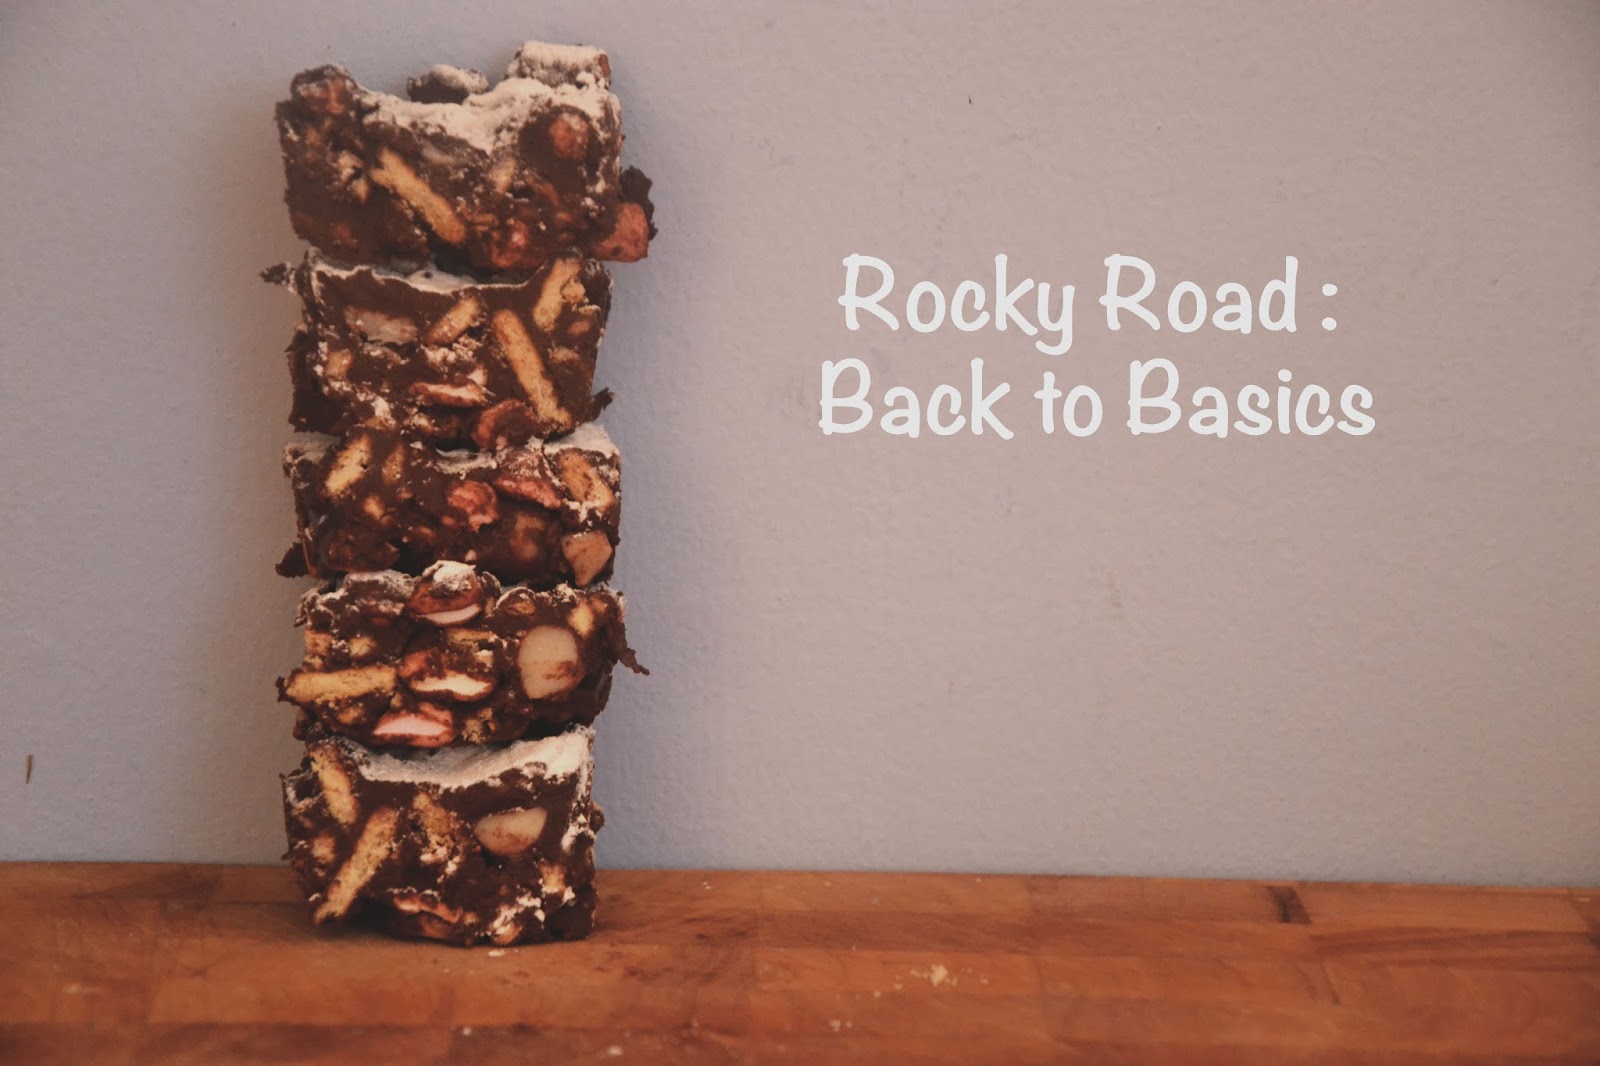
I have mentioned before how I am a little obsessed with Rocky Road (see here). Its the cake I would always choose to eat from a coffee shop, a cake I love to eat because its so deliciously indulgent and the cake I would choose to make if I could only make one kind of cake for the rest of my life. Nom Nom Nom. I have been trying to find my own perfect recipe for Rocky Road and have made several attempts that were a total FAIL. So I went back to the start and looked up Nigellas recipe that can be found here. I have then adapted this very slightly to make them more chocolatey and added some nuts.

I used:
400g Dark Chocolate
125g Soft Butter
3 tbsp Golden Syrup
200g Rich Tea Biscuits
100g Macadamia Nuts (optional or replace with your favourite nuts)
100g Mini Marshmallows
2tsp Icing Sugar

To make these I simply melted the chocolate, butter and syrup in a pan. Once melted I removed three scoops of this and put it aside. I crushed the biscuits and nuts in a bag with a rolling pin until I had some crumbs and some chunks and then mixed with the chocolate mixture. Once all mixed I added the marshmallows and put all this into a baking dish, the chocolate that was set aside was spread over the top. I refrigerated it for a couple of hours, then cut into 20 pieces and sprinkled the icing sugar over the top.

So I am going to play around with this recipe and make further alterations and everytime I land on a good on I will share it with you. Enjoy eating this yummy scrummy (doesn't results in a small tummy) Rocky Road. Zoe xx

White Chocolate Chip Ice-Cream (No Ice-Cream Maker Needed)

White chocolate chip icecream in a bowl with strawberries
This has to be the easiest and sweetest ice-cream recipe ever. I don't own an ice-cream maker so when I stumbled upon (aka found via pinterest) this recipe I had to try it. The recipe only uses three ingredients to make vanilla icecream but I thought it would be more fun to add in some white chocolate chips, so I also used 200g chopped white chocolate.

Ingredients for white chocolate chip icecream


If I am honest this is a little on the sweet side for me so I would probably use dark chocolate instead of white to balance it out a bit next time. That said the Husband and Kiddos loved it.

Homemade white chocolate chip icecream
Now I just need to figure out how to make other flavours with this as the basic recipe and then I will never need an ice-cream maker. Zoe xx
Related Posts Plugin for WordPress, Blogger...