Showing posts with label Angry Birds. Show all posts

Angry Birds Cake

At the weekend it was Boaz's party and I made him an angry birds cake of course. You probably already saw the crocheted angry birds I made for him and he loved these. I modelled the birds and pigs out of fondant icing for this cake.

While I am not cake making expert I have learned a thing or two about icing over the last few years so here are my top tips:

1. You don't need lots of fancy equipment to make decent icing figures, I usually just use my hands and a knife. Sometimes I use the knife handle to make blunter dents and I have used cocktails sticks too but nothing fancy or expensive.

2. Be careful not to let your hands get too sugary, if you do then it starts to all stick and can undo alot of good work. You can wash your hands occasionally as long as you dry them thoroughly afterwards.

3. Black icing is very tricky to use so be very careful with it, and the dye in gets all over the place (see the marks on the top of this cake)

4. Lastly but most importantly don't expect your first (or second or third...) to look exactly like you're hoping. As with all craft this is about practice and experience and they'll get better as you make more. Plus kids are happy if it even vaguely resembles whatever it is you're aiming for.

Its not the fanciest cake in the world but he loved it. Happy Birthday Boaz! Zoe xx

Crochet Angry Birds: Pig and King Pig Free Pattern

So I have finally made the last in the Crocheted Angry Birds series. I have already made red bird, yellow bird and blue bird, but of course we need some pigs too. For any one who hasn't seen/played angry birds this probably sounds totally nuts but trust me, you need pigs.


 I made two pigs in exactly the same way and then stuck a crown on the top of one to make him King Pig.


The body for them both is exactly the same as red bird except it is green. So take your DK green yarn and a 4.5mm hook then follow this pattern in the round:

Round 1: Ch6 and then ss into the first ch to form a ring
Round 2: 2dc into each st
Round 3: 2dc into next st and then 1dc into next st, rpt until the round is finished
Round 4: 2dc into next st and then 1dc into next 2st, rpt until the round is finished
Round 5: 2dc into next st and then 1dc into next 3st, rpt until the round is finished
Round 6: 2dc into next st and then 1dc into next 4st, rpt until the round is finished
Round 7: 2dc into next st and then 1dc into next 5st, rpt until the round is finished
Round 8: 2dc into next st and then 1dc into next 6st, rpt until the round is finished
Rounds 9-11: dc into each st from the previous round
Round 12: dc 2 st together, dc into next 6dc, rpt
Round 13: dc 2 st together, dc into next 5dc, rpt
Round 14: dc 2 st together, dc into next 4dc, rpt
Round 15: dc 2 st together, dc into next 3dc, rpt
At about this stage you'll need to stuff the body, fill it with some rolled up wadding (batting) or use cotton wool if thats all you have handy.
Round 16: dc 2 st together, dc into next 2dc, rpt
Round 17: dc 2 together, dc into next dc, rpt
Finished the ball by dc crocheting together 2 stitches until it is complete. Make 2 if you want to make 2 pigs.


Then you need to make the nose, this is very simple:

Round 1: ch4, ss into first ch to form a ring
Round 2: ch3, then 11 tc into the ring then ss together the ch3 and the 11th tc
Round 3 and 4: ch2, dc into each st form the round below (11 total) and ss together the 11th dc and the ch2. Make two if you want two pigs.


Then you can make the ears which are also very simple:

ch5, put 4 tc into the 3rd ch and then ss into the 1st ch. Make 2 for each pig.


Once you have done these you can get some black yarn and using your yarn needle embroider on a few details, so the blacks in the ears and the nostrils. I also made some eyebrows out of the black yarn by simply chaining 4 but when I came to sewing these on I didn't think they looked right so I left them off.


But now all you need to do its stitch it all together. I put the ears of one pig right over to one side so I could also glue a crown on, this crown was just cut out of felt and then hot glued together and hot glued to the pig. One of the good things about making the pigs is they are all a bit wonky on the game so even if you don't get them perfect they'll probably look like the ones in the game.


Now I just need to wrap them up and hide them until birthday time. I always get really excited about giving gifts, especially handmade ones, so I hope I can wait until his birthday. Hehe. Zoe xx

Crochet Angry Birds: Yellow Bird

With my sons birthday fast approaching (is it really October tomorrow?) I have been finishing of the angry birds that I will give him (See here and here for the red and blue birds). This is the final bird I am making but I will be making some piggies too, you can't play angry birds without the pigs. To make the yellow bird first you need to crochet two diamonds. So using your yellow dk yarn and a 4mm hook follow this pattern:

Ch3, DC into the first chain, turn.
Ch2, 2DC into the next st, turn.
Ch2, 2DC into the next stitch and then 1 DC into the subsequent stitch, turn.
Ch2, 2DC into the next stitch and then 1 DC into the subsequent stitches, turn.

Continue in this manner until you have a triangle (half the diamond) that you think is large enough. My widest row had 14DC's altogether. Now you need to start making the diamond smaller again. So instead of putting 2 DC into the first stitch, you miss it out and just do one DC into each of the subsequent stitches. When you have only 2 DC's in the row turn and then ch2 and ss into the other DC to make it a nice pointy diamond.

Make two of these. Then you need to stitch them together to make a pyramid. Put them together like this:

And then stitch these sides together, continue round until you have only one side left to stitch, stuff with wadding, then stitch together the last edges. Then you should have a yellow pyramid that looks like this:

After making this body you need to make a nose, to do this find a slightly darker yellow yarn or an orange yarn and follow this pattern:

Ch8, ss into the first ch to form a ring,
Ch2 and then DC into the next stitch, 
Skip a stitch and DC into the next 2 stitches. Repeat this step until you have made a little cone.

When you have made these, you need to make the hair and tail. These are the same as each other so you get your black yarn and make two of these:

Ch6, turn, skip the first 2ch (these are the first DC) and DC into the other 4 stitches, this returns you to the beginning.
Going out from your starting stitch repeat the first step: Ch6, turn, skip the first 2ch (these are the first DC) and DC into the other 4 stitches. Then repeat this again : Ch6, turn, skip the first 2ch (these are the first DC) and DC into the other 4 stitches.

I then tied together the ends. You can see in the picture above the top one is tied and the bottom one isn't and by tying them it gave the shape I was after. Then you stitch the hair and beak onto the bird.

I then made the eyes and the eyebrows out of felt and stitched these on too. So now I have three birds complete:

I will be making the pigs soon too, hopefully by the end of the week so come back if you want to see those. Zoe xx

Crocheted Angry Birds: Blue Bird

As you saw a few weeks ago I have been working on some crocheted angry birds for my eldest son whose birthday is in October. I already shared with you the red bird and today I finished the blue bird. Well actually I made three blue birds because they are only little and quick and also because in the game when you make blue bird fly if you tap the screen he splits into three.

Making this bird if very similar to making the red bird so I won't go through all the instructions. The bird itself is smaller than red bird though so I will write the pattern for this here. So use a DK blue yarn and a 4.0mm crochet hook (english stitch terms used of course.)

Round 1: ch6, ss into first st to form a ring
Round 2: 2 dc into each st (12 total)
Round 3: 2 dc into 1 st, then 1 dc into next rot all the way around (18 total)
Round 4: 2dc into 1 st then 1 dc into next 2 st, rpt all the way around (24 total)
Round 5-8: 1dc into each stitch. After this round stuff your angry bird with wadding (batting) or cotton wool if thats all you have handy.
Round 9: dc 2 st together then 1dc into next 2 (total 18)
Round 10: dc 2 st together then 1 dc into next st (total 12)
Continue to dc two st together until you come to the end.

When you have done this tie in your ends. You can make the tail and the 'hair' in the same way as these instructions and the eyes are again made out of felt. Blue bird in the game has little bags under his eyes so I tried this on one, he didn't look quite how I hoped and then I lost my brown felt somewhere so I didn't do the same with the other two birds but you can if you'd like. Just stitch on two little brown triangles of felt that slightly overlap the eyes.

The nose is also slightly different to red bird. Using your yellow yarn you ch2, then 2 dc into the first ch, then 2 dc into each of these st. then 2 dc into the each of these st. Continue this until you think you cone shapes nose is large enough, I think I did 4 rounds.

When you have done that stitch all the pieces together:


Then make 2 more:


So now you have the red bird and the blue birds complete, next I will make the yellow bird. Have fun. Zoe xx

Update: click here for yellow bird and here for pig and king pig.

Crocheted Angry Birds: Red Bird

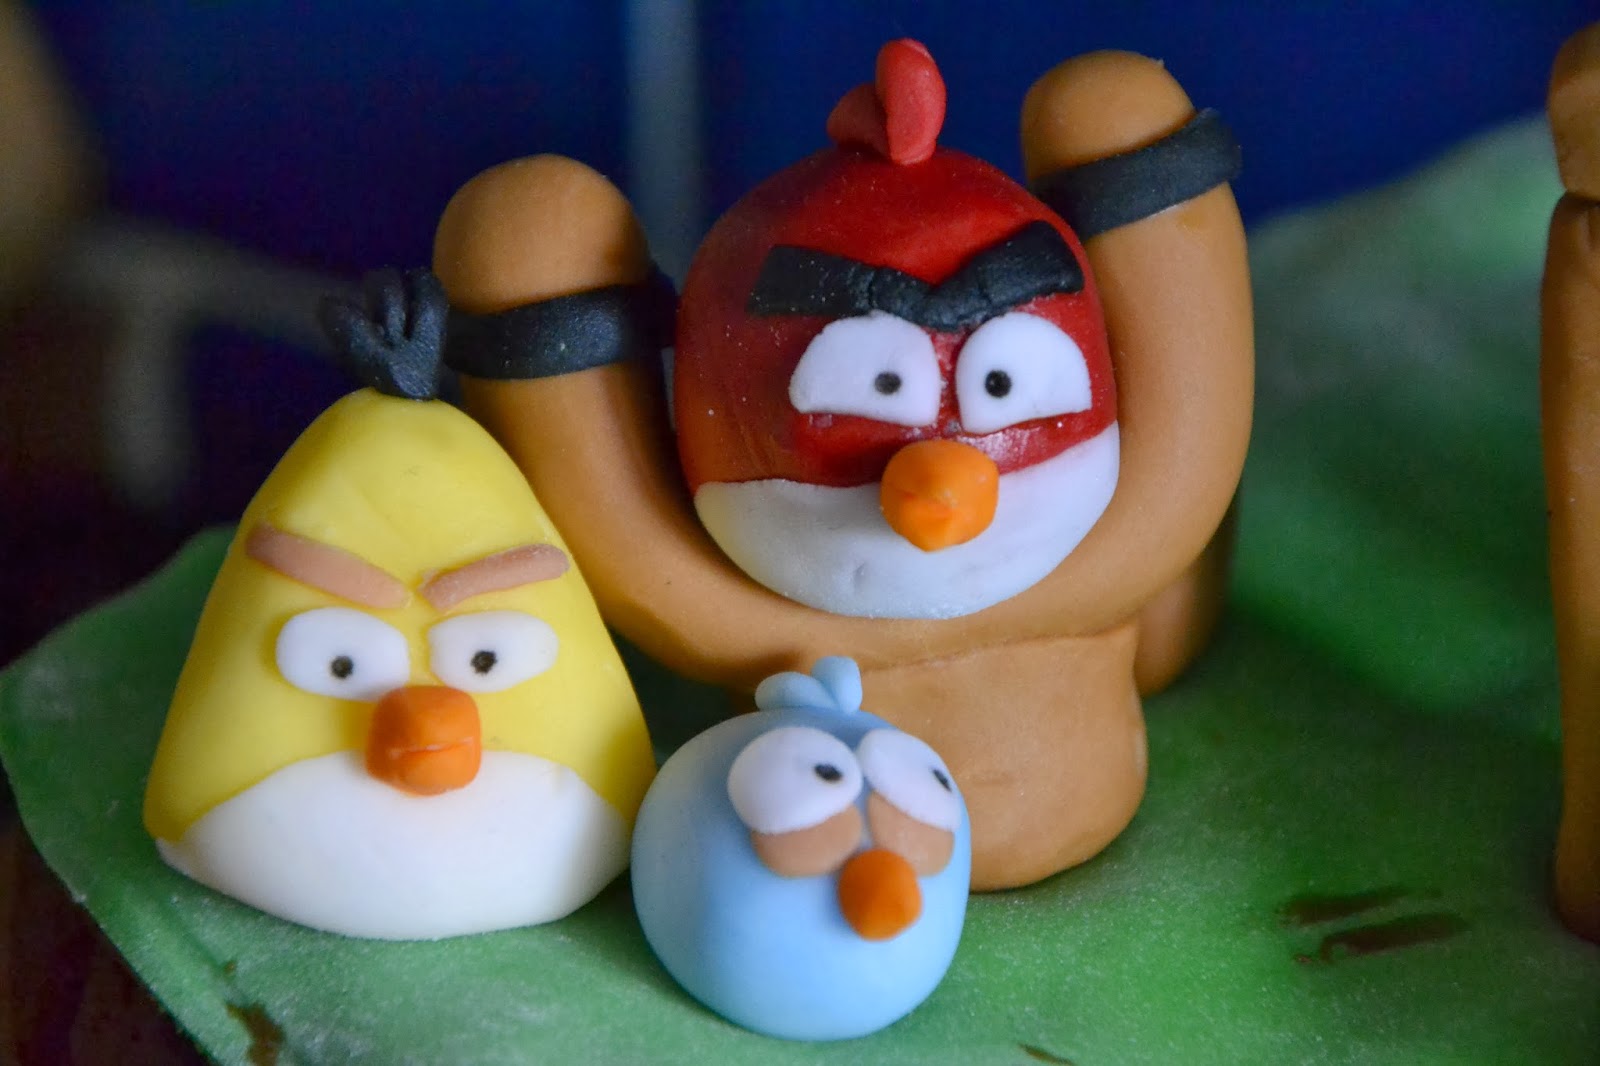
As much as I enjoying making pretty quilts and clothes for my daughter and I, I also have two sons. My eldest is currently totally obsessed with Angry Birds and so I decided to crochet him a set of Angry Bird characters for his birthday. His birthday isn't until October but when I get an idea I like to get started straight away, plus I have lots of other things to do before then too so why not get going?

I have made up the pattern for 'Red Bird' myself so I thought I would also include this pattern here, just in case any of you ever find yourself needing to make him. I am using the english stitch names and I worked in double crochet (The American Single crochet). I used double knit yarn and a 4mm hook.

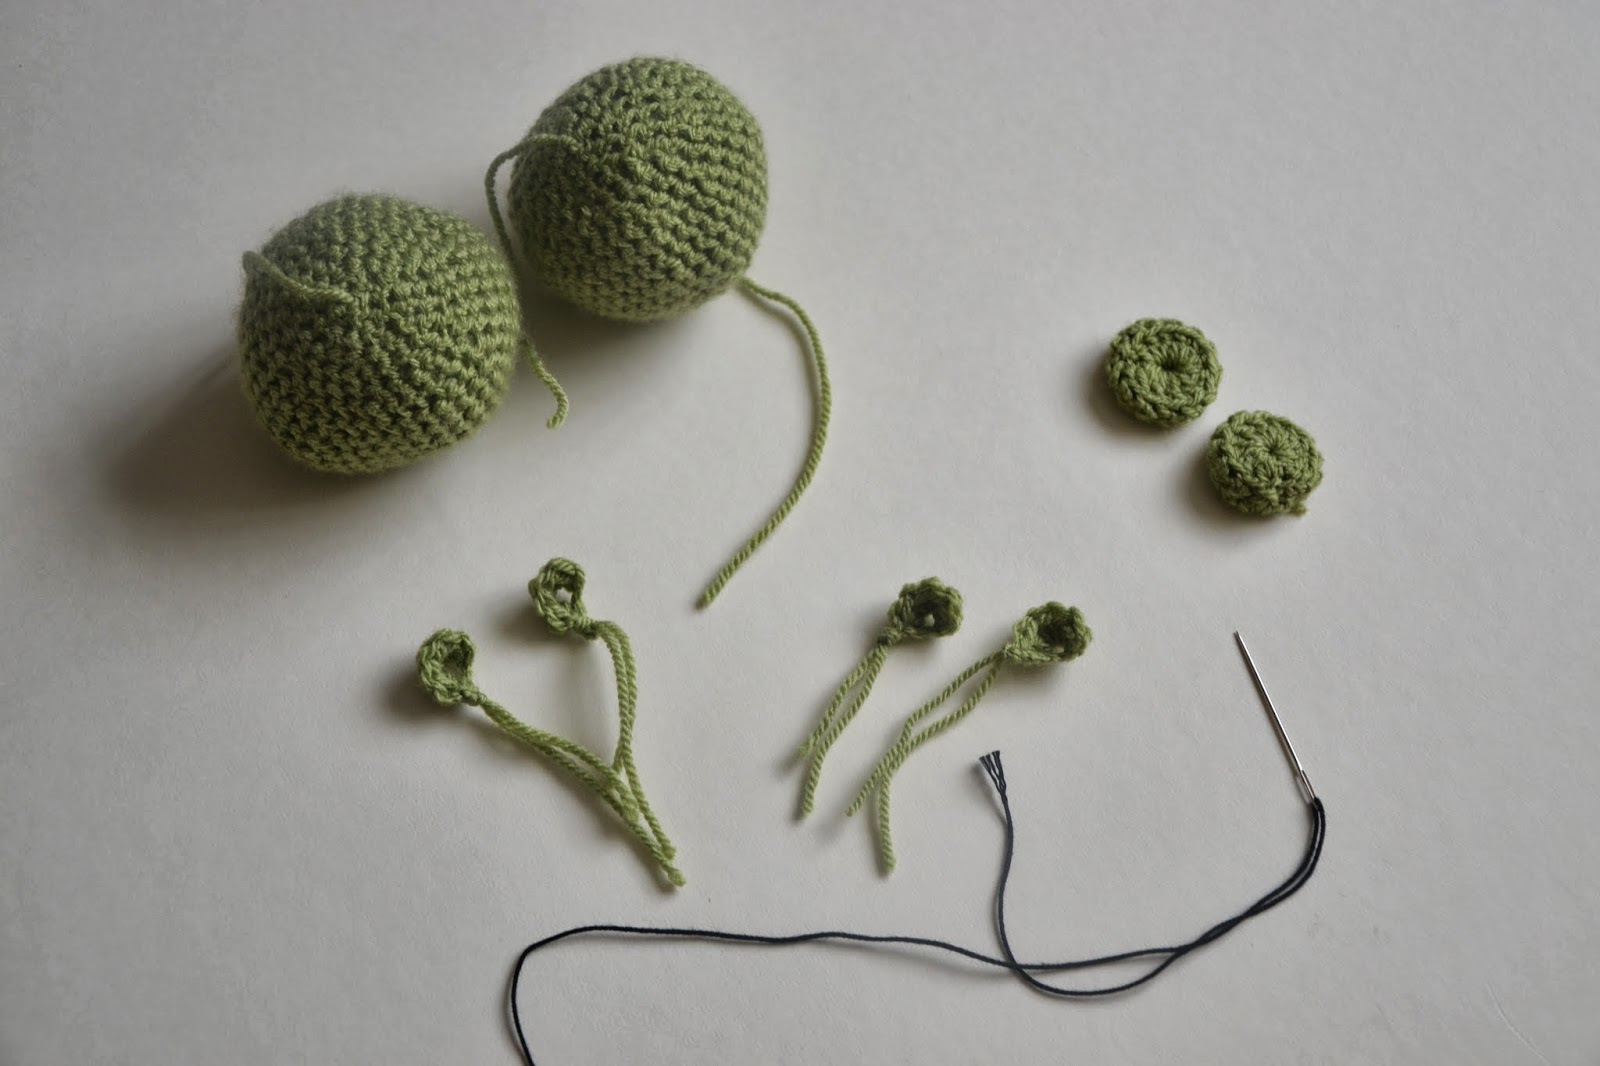
First start with the body, this is worked in the round and I started in a pale brown.
Round 1: Ch6 and then ss into the first ch to form a ring
Round 2: 2dc into each st
Round 3: 2dc into next st and then 1dc into next st, rpt until the round is finished
Round 4: 2dc into next st and then 1dc into next 2st, rpt until the round is finished
Round 5: 2dc into next st and then 1dc into next 3st, rpt until the round is finished
At the end of this round cut the brown yarn and tie in some red yarn
Round 6: 2dc into next st and then 1dc into next 4st, rpt until the round is finished
Round 7: 2dc into next st and then 1dc into next 5st, rpt until the round is finished
Round 8: 2dc into next st and then 1dc into next 6st, rpt until the round is finished


Rounds 9-11: dc into each st from the previous round
Round 12: dc 2 st together, dc into next 6dc, rpt
Round 13: dc 2 st together, dc into next 5dc, rpt
Round 14: dc 2 st together, dc into next 4dc, rpt
Round 15: dc 2 st together, dc into next 3dc, rpt
At about this stage you'll need to stuff the body, fill it with some rolled up wadding (batting) or use cotton wool if thats all you have handy.
Round 16: dc 2 st together, dc into next 2dc, rpt
Round 17: dc 2 together, dc into next dc, rpt
Finished the ball by dc crocheting together 2 stitches until it is complete.


Next make the little hair tuft:
ch4, turn, ch1, dc into each st, ch3, turn, ch1, dc into each st.

To make the eyes cut out a pair of eyes from white felt and using your yarn needle embroider on some black pupils.


The eyebrows (or eyebrow) is make simply by chaining 10 in black yarn.

The tail is made by using the black yarn:
Ch3, turn back on yourself then ch 1 and dc into each st from the first row, when you get to the beginning ch3 and again turn back on yourself, ch1 and dc into each st from the second section. When you get back to the beginning again ch3, turn, chain one and dc into each st. You should get the 'T' shape as above.

The nose is made with two triangles, each made with yellow yarn.
Row 1: Ch5, turn,
Row 2: dc into each ch (4 total, don't need to ch1 up to second row, this is how the row gets smaller), turn
Row 3: dc into each dc from row 2 (3 total)
Row 4: dc into each dc from row 3 (2 total)
Row 5: dc into one dc from row 4
(I hope this makes sense, I literally made this bit up having never made triangles before! But this is an accurate description of what I did.)

 When you have all these pieces ready, you need to sew them all together. I would suggest sewing the eyes on first, then the beak and eyebrows. When you sew the beak on, try to make them curve around into a mouth shape and sew the eyebrow into a 'V' shape. Finally sew on the tuft of hair (or feathers I guess) and then the tail.


And now you have made your very own red bird and can make the child in your life very happy. I'll share the patterns for the others I make with you when I do those too. Zoe xx

Update: Click here for yellow bird, here for blue bird and here for pig and king pig
Related Posts Plugin for WordPress, Blogger...