Showing posts with label Christmas. Show all posts

The Christmas Bow Ties

When I made the two sparkly dresses I mentioned that I might make some bow ties to match for my sons. Well I only managed to do this on December 23rd so this is the first chance I have had to blog them. They looked really cute on both my boys but the younger son, age 2, took it off after about 30 seconds because it was itching his chin, I can't blame him but it means there is no photo of him actually wearing it. You'll have to accept a photo of my rather dashing older son:

Well I am a little biased but I thought he looked fabulous. I improvised how to make these but it was very similar to the method used for these cat bow ties if you fancy making some yourself. I think I may just make some for our cat next too (or is that a little too far?).

Any way I hope you had a really lovely Christmas and NYE. I'll be back on friday to continue the capsule wardrobe series. See ya later, Zoe x

A Gingerbread Village


When it comes to Christmas time one of my favourite things to do is make a Gingerbread house. You can see last years 'Stitched up' house here and two other houses I made here. Each year I like to try something a little different. This year I went a step further and made an entire gingerbread street. Although you could argue that this is actually a much easier approach because it skips the 'construction' step which is where most people fail.


Each 'house' is decorated with piped royal icing, silver ball and some holly and berry sprinkles. I like to go with the flow once I start piping and each house is a little different to the one before. Once I had piped each house we displayed them on a shelf in the living room. We are planning to redecorate in the living room any way next year so I took everything off a shelf and spray painted it white (this again is something I was going to do any way, I wouldn't repaint furniture just for a gingerbread house, I'm not THAT crazy.) It made the perfect setting for the scene.

The ginger bread houses on their own were really cute but I decided to add some colour with the paper trees. Then I thought I'd go all out and made the snowflake and pom pom garlands to make it a perfect white Christmas. It's a great addition to the Christmas decor and hardly cost me anything, we had the ingredients int he cupboards already, I used yarn and paper we already had for the garlands and even the spray paint had been sitting around waiting to paint these shelves for about a year. The only thing I bought was the holly and berry decorations. Bargain.

Now I know I said that I would share last week some capsule wardrobe outfit ideas but I came across 2 problems with this. Firstly I was distracted by all the christmas activity going on and I would be lying if I said this gingerbread street wasn't part of that. Secondly when I was writing the post it was really boring. I mean so boring I didn't even know what to say. Nobody wants to read boring blogs so I decided to give up on that post idea. I will be writing more about capsule wardrobes in the new year but for now I will just be doing a couple of christmassy posts and taking it easy for a few weeks.

I hope you're starting to feel the good Christmassy vibes too. Do you do a gingerbread house? I'd love to see. Zoe xx

Christmas Dresses Made For Two


Happy Christmas!

Too early? Well I have no problem with preparing for Christmas in November. In fact I originally planned to make this dress in October but then my fabric took a little while to arrive and then I had tonsillitis. I missed the deadline for the By Hand London's Hackathon but decided to hack-along any way.

So let me start with my dress:


The bodice is the holly jumpsuit bodice pattern. I loved the fit of this pattern on my tartan playsuit, flattering but not too tight and thought it would be perfect with a skirt for Christmas. I lost a little weight when I was ill so it's actually a little looser than I thought but it's pretty good. I probably need the extra space for Christmas Turkey any way.

I have fully lined the bodice, partly because the sequin fabric was quite itchy but also because it was a little see-through. I basically used this method for constructing the dress with the full lining. I lined with the viscose-rayon that I have made the skirt from. I loved working with this fabric, it has a lovely drapey and soft feel and it was pretty easy to work with. I wouldn't recommend it for a total beginner but if you are looking for something to sew with after a bit of practice with cotton it would be a good way to go.

The skirt is a full circle skirt so, of course, it is perfect for spinning:

And my daughter loved the spinning part too. So that brings me to her dress. I only bought 1m of the sequin fabric but it was more than enough to make the bodice and sleeves for mine and a mini bodice for a 3 year old. She has been so excited about this dress and I let her help me cut out the pattern pieces and do some of the sewing. Well I let her press down on the peddle while I guided the fabric through the machine but she thought she had made it all. Every one was happy.

Her dress bodice is from a book on making children's clothes that I've had for ages but not used much. The skirt is a half circle skirt, still good for spinning even if not quite as good as a full circle.

I also added a little flower to the waistband of her dress and hers doesn't have sleeves. I wanted it to be similar but not exactly the same. Now I just need to get her some sparkly shoes to wear with it.

So that is two dresses made ready to wear at Christmas. It was also a goal of mine to make something sparkly after Me-Made-May so I can tick another thing of that list too. 

I have a very small amount of the sequin fabric left and my sons want me to make them sparkly bow ties, what do you think - will it be too much? Well obviously I'll show you if I do. Happy Christmas! Hehe. Zoe x

14 Tips For Beginner Craft Fair Sellers


Finding tips and information for selling at craft fairs isn't easy. We had a lot of fun heading down to some craft fairs last year and while it was our first time we feel like we have learned so much already. We wanted to share some of these lessons with you in case you are thinking about it in the future. Some are general about your stall and style, and some are more specific about what to take. I hope they can help:

1. Think about working with some one else
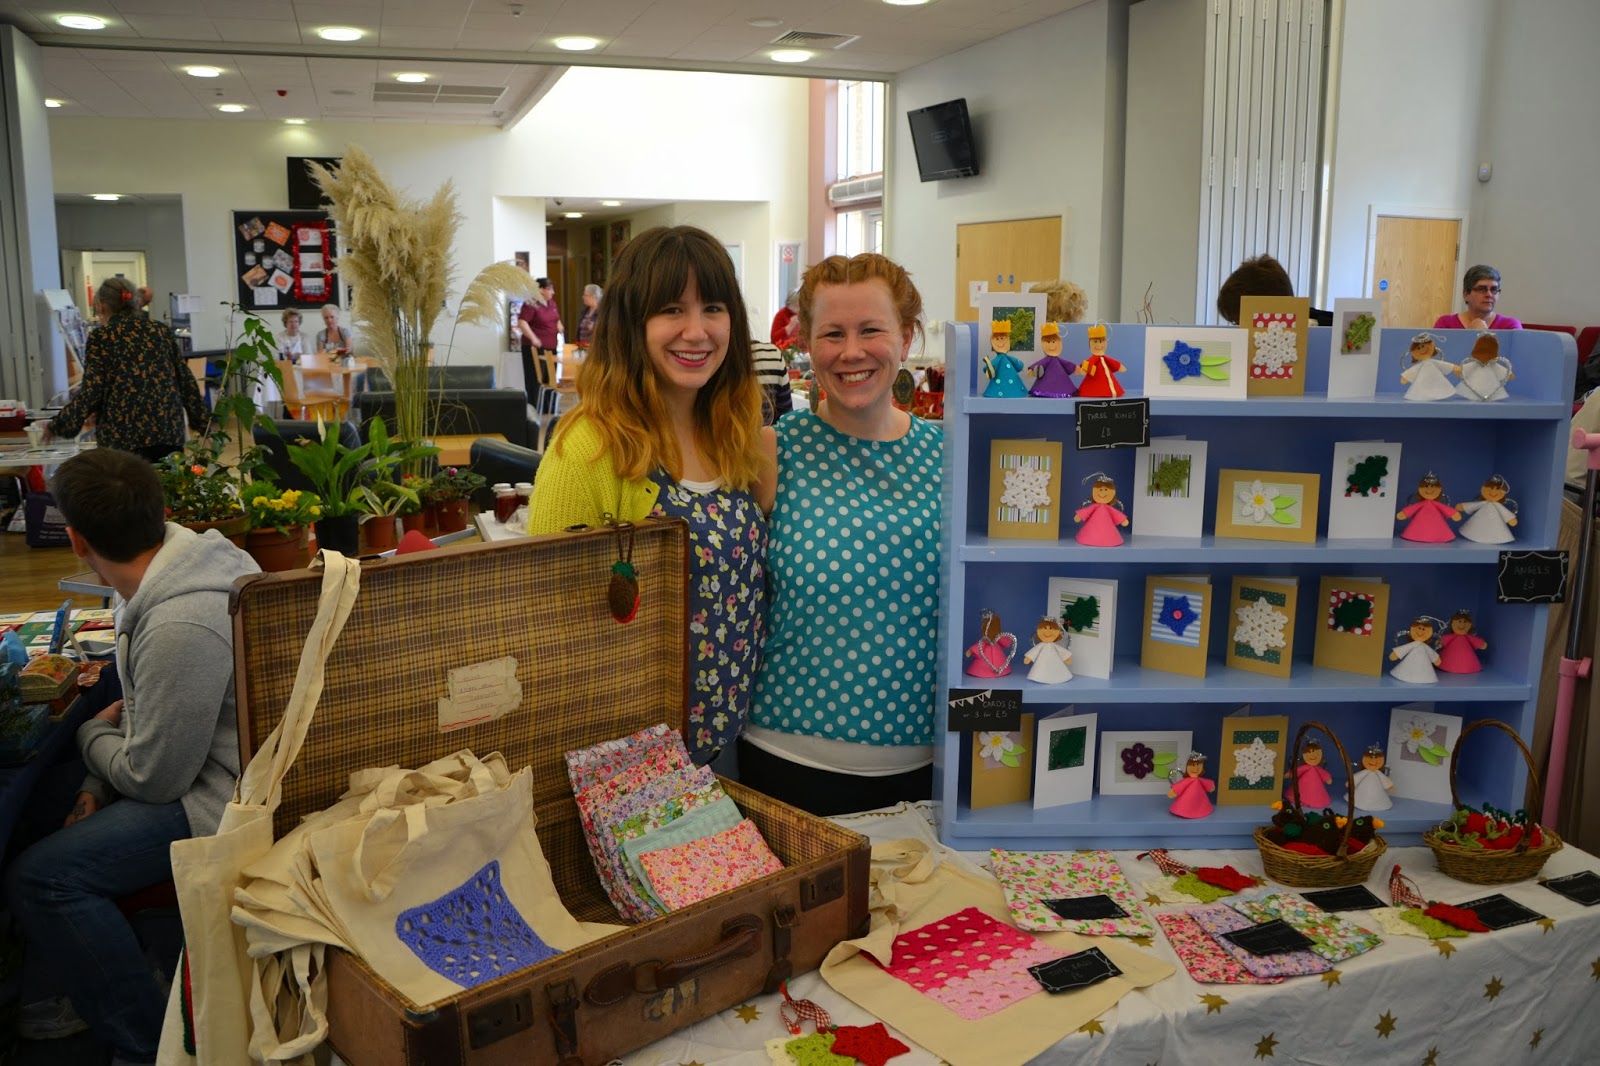
Cassie suggested that we could work together at some craft fairs for the first time this year. The biggest bonus of working together is there is less preparation to do. I made the angels, iPad and kindle sleeves and the other nativity figures and Cassie made the granny square bags, the key rings, robins and cards. We didn't need to come up with so many ideas each because we had enough between us and we didn't have to do so much making but could split the cost of each stall between us.

2. Think about how well your items go together
When I shop at craft fairs I am always much more attracted to stalls that have a clear 'image'. This usually comes from the personal skills and style of the maker (or makers). Cassie and I have over-lapping skills and similar styles so our 'image' was quite natural. I would describe it as Colourful Handmade Chic but you might want to call it something different!

3. Try to find fairs that fit with your style and price
One mistake we made was going to a fair where almost every one shopping there was able to make all the things we were selling. At this fair we only just covered the cost of the table that we had hired. Furthermore we were the most expensive stall by quite a wide margin! Try to find out the sort of customer that you might get at each fair and consider all you prices for that individual fair. We actually found finding fairs one of the hardest things to do so have a look around at whats local and not so local.

4. Think carefully about your price
I would say pricing when you start out is very tricky. Consider the cost of the the materials used, factor in the time you took to make each one (bare in mind that the more you make the quicker you will get) and look on Etsy for how much others are selling similar items for. Then come up with a price. If this seems too high to you and you think you won't sell any start with just a few and see if they sell. Or you could make just one to display and take orders for others (factor in postage costs too). If your price seems too low, mark it up a bit to start with and you can always take lower offers if people are interested on the day but think its too much. All in all this is tricky, sometimes you'll get it right and sometimes you won't and peoples interest will vary from fair to fair any way.


5. Consider your display and how it fits with your style
When you think about how to display your items try to fit this with your style. Don't forget you have a limited amount of table space so add height if you can. Even if you love lots of colour (we obviously do) try to make your background fairly neutral because you want your products to stand out but this still can fit within your style. Cassie bought this bookshelf for £5 and painted it. It was a bit cumbersome to take to and from each fair but it was perfect for displaying our cards and angels. It fit with out colourful theme, added lots of height and extra display space but was plain enough that our goods stood out.

6. Remember that you might have to adapt your display
Each craft fair you go to will have slightly different tables and layout so try to be flexible with your display. We couldn't use the bookcase at one of the fairs we went to so we had to figure out a new way to display the angels and the cards. We used a bench and covered this with out table cloth to make extra surface space and a different height.


7. Stand up and say hello to potential customers
Customer service is really important to me when I go into a shop, if the assistants are not friendly I am instantly put off buying and often walk out the shop. This is even more important when you are selling your own goods. If you have put time and effort into making things, put some effort into selling them too. If you don't sell then you might not make much profit or even make a loss. We had chairs behind our tables at all the fairs we went to. We moved them before the fair started so we weren't even tempted to sit down. If you are doing a longer fair this might not be practical but when there are people near your stall you should stand up. Also don't be tempted to spend the whole time chatting with the person you have gone with, I don't mean stand there silently but when a customer comes pause your conversation to speak to them instead.

8. Look Nice
Wear something nice, do your hair and put some lippy on. I am not talking ball gowns or cocktail dresses, but something that fits with your style so you are presenting an image of the business through yourself as well. We dressed colourfully but fairly casually and smiled. Easy.

9. Make a stock list
Have a list of what you have made and tick it off every time you sell one. This was essential for us because we were doing it together and needed to make sure the right money went to the right person but I would really recommend doing this even if you are on your own. Every time you tick something it's very satisfying and without it you would easily lose track of what you have sold. Also if you are planning to do more fairs in future its a great way of seeing what sold well so you know what to make for next time

10. Take business cards
Even though you are just starting out you need to have something with your website, blog or e-mail address written on to give to each customer. You never know if someone may need to contact you. They might want to ask something simple about washing or repairing an item or they may want to contact you to order more. If you have one item that you consider to be your best and most important then its a good idea to have a picture of that on the business card too, the card may travel and end up with someone who has never seen you before and then has a reason to visit your site. My business cards didn't have this this time but they might next year. Bags also add to the whole impact of your business and also are very practical for people who are hoping to buy more than one thing.


11. Make enough of everything
When you are making your goods it is very tricky to know how many to do of each before you sell for the first time. Remember you are more likely to sell more of your smaller and cheaper things so make the most of those. Try to make enough to you fill your table but have spares in a box underneath so you can replenish when you make sales.

12. Think about what you will do with whats left
Unless you are only selling at school fairs its probably not a good idea to have an empty table at the end of the day. Obviously though you want to sell as much as possible but you will almost certainly have some left over so what are you going to do with them? The more fairs you go to the easier this becomes, you know you have more fairs to go to and it becomes easier to know how much to make for each time so I would recommend booking onto at least 2 or 3 for your first year. If you don't sell everything then consider setting up an Etsy shop or selling your goods via your blog or website. (More on this to come another day).


13. Take something to drink and eat
While you don't want to be talking to customers while you have your mouth full of sandwich, you will be there for quite a long time and, especially if you're working alone, won't be able to leave your stall. So take a flask of coffee and something to snack on.

14. Enjoy it
You absolutely must enjoy yourself. We went with the attitude this year that we loved making things and thought it would be fun. We wanted to cover our costs but our main aim wasn't to start a profitable business to support ourselves. Even if your aim is to go into serious business of craft fairs it is essential that you are enjoying yourself or you will simply burn out and not be successful.

This is by no means an extensive list of all the things you need to think about to sell at craft fairs. The one place I managed to find a good list of instructions was on this list from handmade jane. It is very helpful and it gives you a list of things you need to take with you, but hopefully we have given you a few ideas of how to plan ahead for your first craft fair. Zoe (and Cassie). xx

3 Yummy Christmas Recipe Ideas


I know I already said Happy Christmas but I couldn't help but add this post after a delicious family lunch yesterday. My Mum made a BBC Good Food Christmas Pie which is sort of a Christmas staple for us now, it uses up lots of leftovers like turkey and stuffing but also has cranberries to make it sweet. This time the turkey was replaced by chicken as we haven't cooked our turkey yet. I made a wintery Jamies Cranberry Spinach Salad which was pretty delicious too. For pudding Cassie served some of the Hummingbird Bakeries Raspberry Cheesecake Brownie which was also very scrumptious. As you can see we also ate roasted new potatoes, roasted gammon, pigs in blankets and a tomato salad. We had some glitzy rocky road too so the overindulging in food began early this year.

If you are still hunting for recipes to use with some family or friends over Christmas then you can try these out. The Raspberry Cheesecake Brownie would be a good all year pudding too. Have a good one, Zoe xx

Homemade Hot Spiced Apple

The other night I had dinner with some friends and we were served some delicious hot spiced apple to drink. I loved it so much I decided to try and devise a homemade recipe for it. This a wonderful and alcohol free alternative to serving mulled wine so if you have any hosting to do over the next few weeks you should consider making some. It is spiced with similar flavours to mulled wine so its a nice drink to experiment with your own mix of spices. Here is what I used:


Ingredients
1.5l Apple juice (not shown)
Peel of one orange
Cinnamon stick
2 star anise
1 vanilla pod
1/2 tsp ground nutmeg
6-8 cloves
Squeeze of orange juice (not shown)

Method
Slice open your vanilla pod so the flavour can come out a little more then simply put all these ingredients into a large pan. You may want to break up one of the star anise to give it some extra flavour too. Heat gently until you have a hot beverage ready to serve.  The delicious smell will make your house feel very Christmassy.


You can pour it into a jug to serve or just ladle it straight into your glasses, try not to let the solid ingredients go in the glasses though!

As this is my last post before Christmas I want to wish you all a very Happy Christmas and I hope you have lots of Joy over the season. Zoe xx

Stitched Up Gingerbread House


Tada! Here it is, my gingerbread house for this year. I actually look forward to making this all year and this year was no exception. To be totally honest this is not an original idea. In fact if you have ever searched for 'gingerbread house' on Pinterest you have probably come across the house that I have based this one on. If you haven't then have a look here. When I first spotted this one I just had to make one for myself. There are excellent instructions here but I have done mine slightly differently so I am also giving you full instructions.  For my gingerbread I used this recipe:

Ingredients For The Gingerbread
250g unsalted butter
200g dark brown demerara sugar
7 tbsp golden syrup
600g plain flour
2 tsp bicarbonate soda
3 tsp ground ginger
1 tsp water

Ingredients For The Royal Icing
500g Icing Sugar
2 Egg Whites

For Decorating a Stitched Up House
Strawberry laces
Fondant icing (white and food colouring OR white, green and other colours your want your buttons to be.)
Tree cutter
Person cutter
Star cutter
Circle cutters in 3 small sizes
Edible pen in black

Make Your Gingerbread House
Preheat your oven to 180 degrees. In a pan on the hob melt the butter, sugar and syrup. Mix the flour, bicarb and ginger in a bowl and add the melted ingredients and stir together to form a dough, if it doesn't quite come together add the water. Roll out the dough to about 3mm thick on some parchment paper. Then cut out your pieces. You can choose a template from here for your house. Just print one out, cut out the shapes and then use a knife to cut them out of your dough. Make sure you do 2 of each side, end and roof piece. Take any excess off your parchment paper and then transfer your shapes to the oven. Use any left over dough to cut out extra shapes for decorating, I cut out 1 lady and 2 trees and the rest into stars. Cook these pieces in the oven for 10-12 mins or until they just start to go brown around the edges.

Once you have taken them out the oven, before they cool use your templates to trim them down to the right size with straight edges, if you don't then they won't line up when you try and put it together so it will probably fall down. If you're going to 'stitch' your house together like I have you also need to add holes to both ends of both side and end pieces. Do the same number of holes on every edge.


Once it has cooled, mix together your icing sugar and egg whites to make your royal icing glue. Then pipe thick lines onto the edges of the walls and put them together one at a time. If you are 'stitching' together your walls then now is the time, so get some strawberry laces and you can literally sew them up. Then you can add the roof one side at a time by piping more icing onto the walls. You probably need to hold these in place for a few minutes to make sure they don't fall down. Then leave your house over night before decorating. Keep your royal icing ready to use by covering with cling film as you'll need the rest for decorating.

Decorate Your House
Now it's time for the fun part. First off you need to make all the things that you want to adorn your house with. I made button roof tiles and used 4 colours, red pink, blue and yellow.


To make your buttons, roll out your icing and cut several of your largest circle size out. Using the next smallest circle cutter make indents in the circles of icing and finally use a cocktail stick you make the button holes. For the smallest buttons for the path use your smallest cutter and just make holes. Repeat with each colour until you have enough tiles. I needed 50 to tiles my roof so did 13-14 of each colour plus the small ones for the path.

I also cut out a yellow star, 5 green trees, a red door, a blue window and a pink lady using my cutters and 2 tiny yellow stars with a knife. I made a wreath for the door out of green icing my making a long snake, curling it into a circle and squashing it a little. I then used a knife to add some lines to it to give it some texture. the bow is made by cutting a thin ribbon of pink icing, folding the end round to the back and wrapping it with a very thin snake of more pink icing.


To make the tree I carefully cut on of my gingerbread trees in half and stuck these two halves to the middle of the second gingerbread tree using my icing glue. Then I stuck the green icing tree shapes into each corner of the tree and pushed the result into some white fondant icing to stand it up. To finish this off I piped royal icing lines on and stuck one of the smallest yellow stars to the top.

I trimmed down the pink icing lady into a dress shape by chopping off the arms and head. Then I icing glued it onto the gingerbread person and finally piped the stripes and spots onto the dress. I stuck the wreath to the door and drew the window shapes onto a square of blue icing. The last thing to do before you assemble it all is to sprinkle some icing sugar on the 'ground' for the snow.

When all the pieces made and the snow has fallen you have to stick it all together. Tile the roof by covering the top of the house with royal icing and laying your buttons over it in lines. Use more royal icing to stick the window, door and star on and the last icing tree with star to the wall. Pipe some more details on if you wish like the roc-rac around the door.


Lay down your smallest buttons to make a path and you're done. This is SUCH a fun house to make and its now proudly on display to add to the christmas decor in our house. The gingerbread will go a little soggy after a few days but you can display it for a lot longer. I hope you enjoy making a gingerbread house too. Zoe xx

Make Mixed Media Christmas Cards


For most of you I expect this post is too late to inspire your Christmas cards for this year. I didn't want to blog about it too early as it would spoil the surprise for those receiving them. Pop in on your Pinterest or something and you'll be ready to go next Christmas.

I send about 50 cards to friends and family that don't live locally so always want to come up with a design that can be made and replicated relatively quickly. This year I saw an idea in a Prima magazine someone gave me using gingerbread men. They look really cute but cutting out 50 gingerbread men by hand would have been pretty time consuming so I came up with this idea instead where the Christmas tree is just a simple triangle which can be cut easily and quickly on a guillotine.

It's pretty easy to see what I did but here are some simple instructions in case you want an extra hand.

What you need....
  • Cards and envelopes
  • Green card
  • Yellow card 
  • Christmas patterned or paper
  • Thread (I used some red and some sparkly cotton)
  • Star cutter
  • Guillotine
  • Pritt stick
  • Double sided tape
  • Sewing machine
  • Merry Christmas rubber stamp (optional)

What to do....
  1. Cut a strip of green card to a width of 7 cm. along one edge make a small pencil mark every 4cm. Along the other edge make a mark 2cm in and then every 4cm thereafter. Use the guillotine to cut lines between the marks to make isosceles triangles. 
  2. Cut the Christmas paper into rectangles slightly smaller than your cards. Mine are 4in by3in because the card was 12x12in but you can adapt that depending on the shape of your card to ensure you don't have lots of waste. Use the Pruitt stick to glue these onto the cards
  3. Use the yellow card and the star cutter to cut out some small stars.
  4. Thread up your sewing machine and select an interesting stitch. My machine has some fancy ones but don't worry if your doesn't. A simple but wide zigzag stitch is pretty effective. Make a few lines of stitching across each green triangle. This in undoubtedly the most fiddly bit of these cards. Play about with different stitches and see what looks best. By the end I had it perfected and wasn't cutting the thread between each line but just pulling it through a few centeremetres and turning the tree to minimise waste of the thread.
  5. On the back of each tree put a strip of double sided tape up the two long sides of the triangle. Try and catch all the thread ends under the tape to secure the stitches and tidy them up from the front. 
  6. Peel off the other side of the tape a stick one tree on top of the decorative paper on each card. Use the Pritt stick to stick a star on the top of each tree. 
  7. Your cards are done now but if you have one use a Merry Christmas stamp on the inside of each. I think it finishes them off nicely and it saves you writing it 50 times!
If you've just got a few to make then get going and you'll be done easily in an evening. If not store it up for next year. 

Happy Christmas. Cassie. Xx


Throwback Thursday: Christmas Ginger Bread Houses


I love #throwbackthursday on instagram so today I thought I would play along and share with you two gingerbread houses. The first gingerbread house I ever made was one of those Ikea ones you can buy, I left off the front and made it into a gingerbread nativity instead. That's Cassie and I working on it together and our brother too. Pretty sure he was just eating the marshmallows.


The people were made out of three marshmallows each, we used rice paper for the details like the crowns and angels wings, and baby Jesus was asleep in a cannelloni manger. We even had a gold coin for the king and a twiglet staff for a shepherd but this must have been eaten before the photo was take or is out of view. I think I will make another one like this one day because it was a lot of fun.

Last year I made this gingerbread house for Christmas (not sure that's really old enough for die hard throwback thursday fans but I am using it any way). This house was the first make of mine that was repinned by someone and it was a very proud moment, I text Cassie to tell her because I was so pleased! The roof tiles are shreddies, I piped icing icicles and I decorated the tree and star shapes with more piping and stuck them on with more icing. Keep your eyes peeled for this years house. Ho ho ho! Zoe xxx

How to Make Handmade Business Cards

If you haven't seen already we are excited about going to some craft fairs this year to sell for the first time. It was important to me that people who we meet for the first time might be able to come and have a look at this blog and see what we are up to so I wanted to create some kind of business card. Business card is maybe an exaggeration though really as all I wanted was to share the site address.

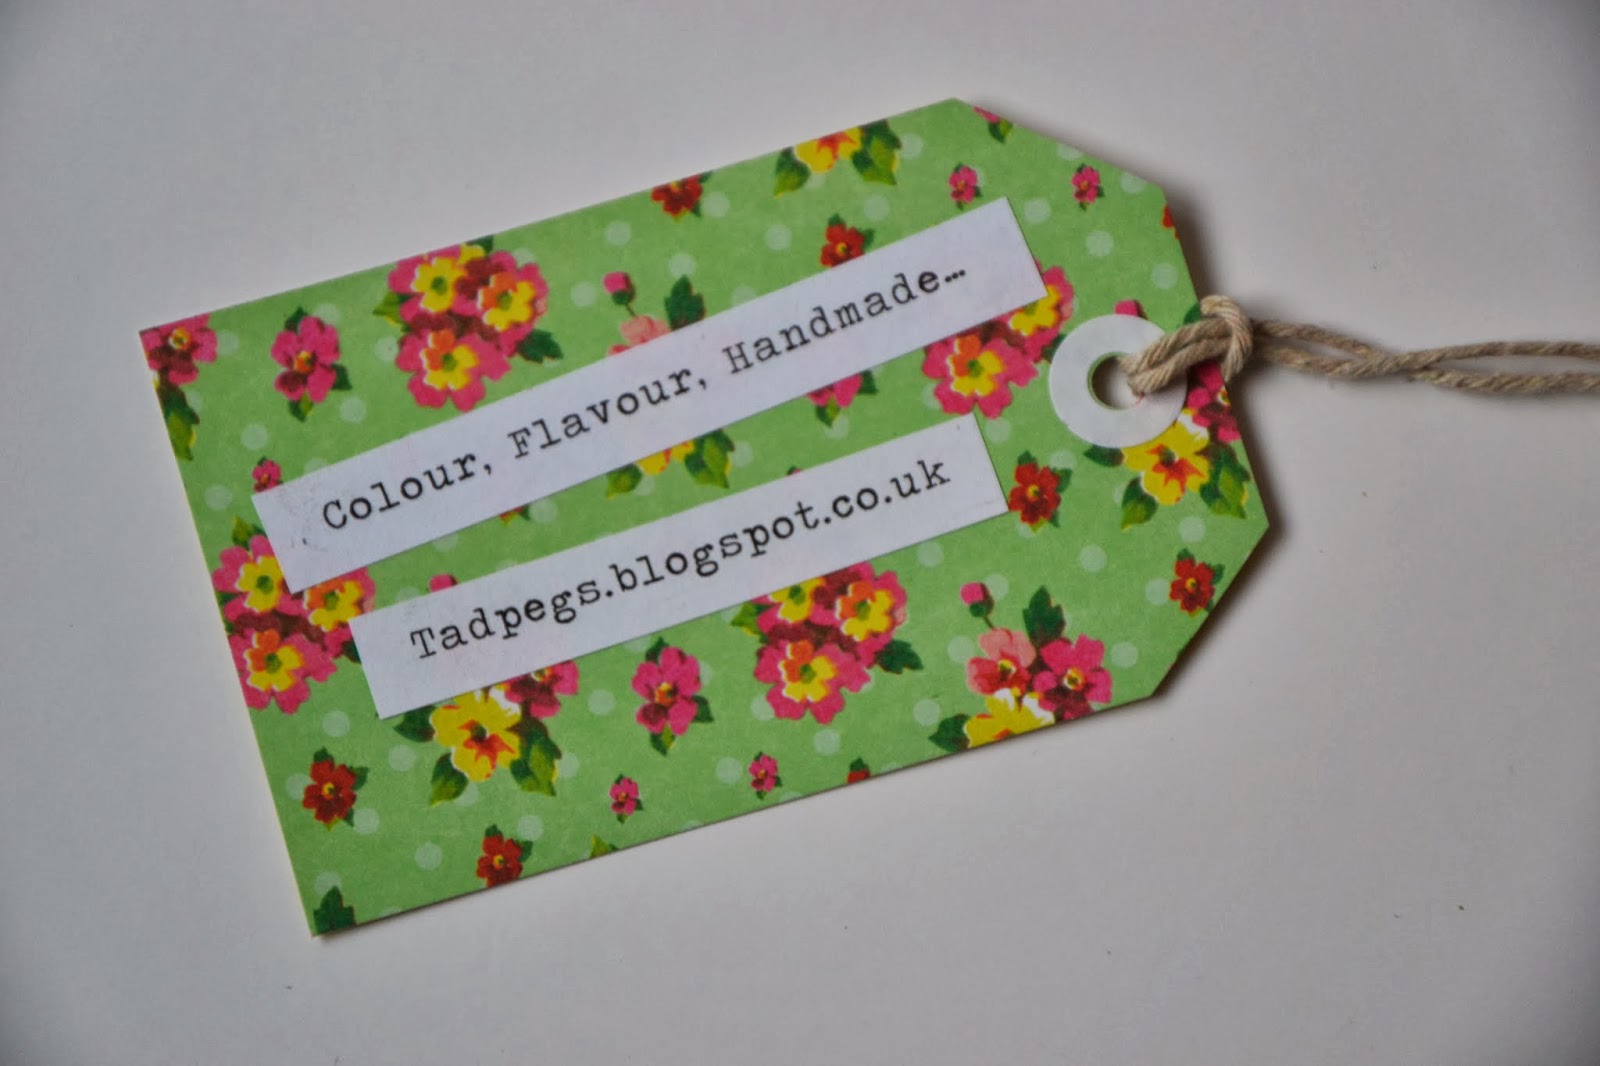
I decided making some fun luggage tags out of some scrapbooking card would be perfect. I cut the card  into 4''x2.5'' rectangles, trimmed two corners off, punched a hole which I reinforced and then pulled some string through. Then my husband kindly printed out the words and together we stuck the information on. I could easily add more information to the back if I wanted although they are double sided and the back is patterned too but there is the potential to do this in future.

I can simply tie these onto the brown paper bags we have ready for sale time. I think they look really cute and I hope that people will notice them more than they would a traditional business card. If you would like to see us in action I will be putting details of a couple of fairs we will be selling at on our Facebook page. Zoe xx

My Poppet: Handmade Christmas Inspiration Guide

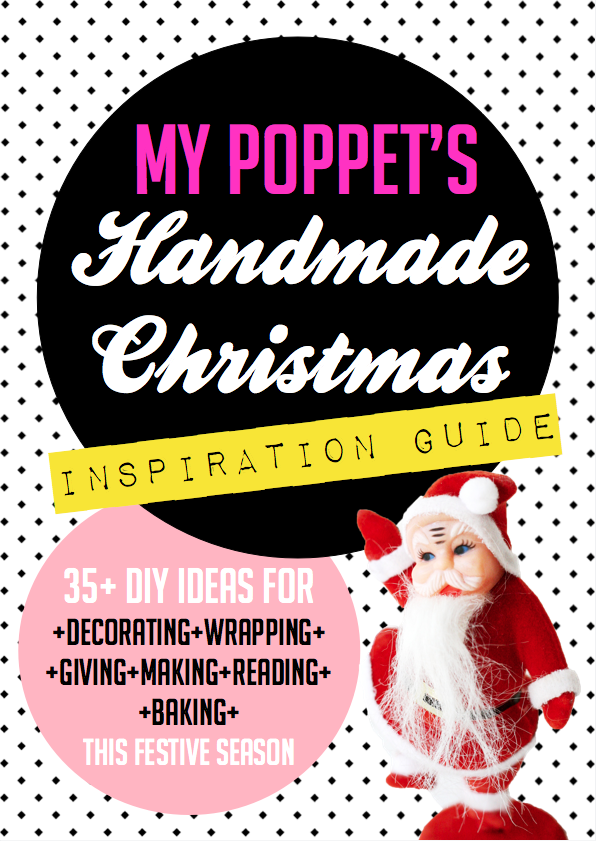
Handmade Christmas Inspiration Guide.

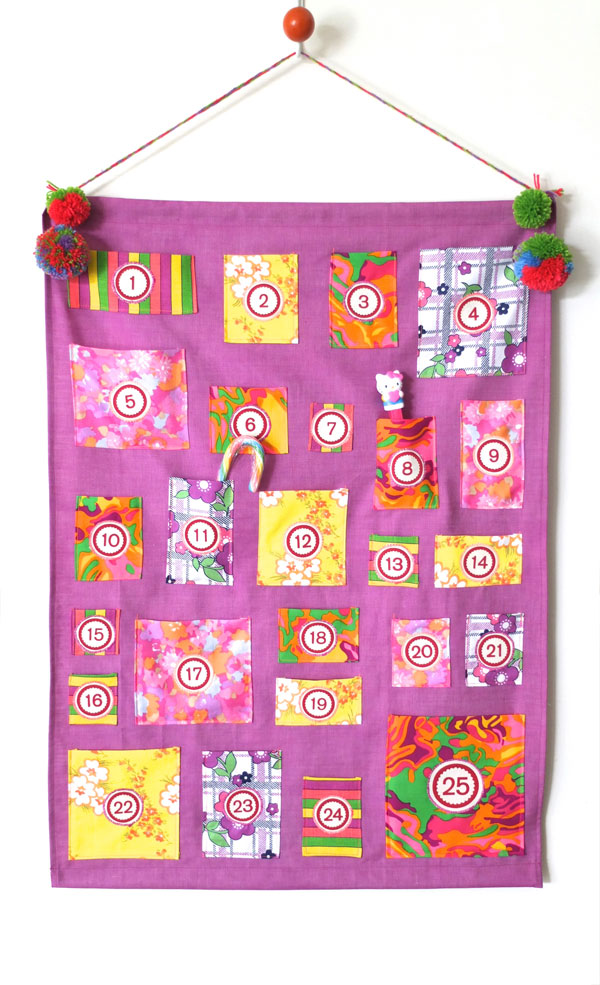
Today I wanted to share with you something from one of my favourite Blogs, My Poppet. I love reading about what Cintia is making and its so fun to see the way she mixes colours and patterns with beautiful results. This week she shared a round up of some of her favourite Christmas things from her blog. Take a look by clicking on the above photo. I saw some things I have never seen before and I particularly fell in love with this Advent Calendar:

Advent Calendar.
If I hadn't already made my calendar I would be making this one for sure! I know it might be to early to say it but I can't resist, Happy Christmas!! Zoe xx

Make a Felt Advent Calendar


If you haven't already got your advent calendar sorted for this year (and many years to come) you have still just got enough time to make one of these before December begins. We had a felt calendar as children and I remember being so excited every year when we brought it down from the loft that christmas must be nearly here. So when I had children this was one thing I was certain I was going to make.

I had a lot of fun deciding how to decorate each pocket, they are simply cut from felt in the same size and then felt shapes are sewn on top or sometimes embroidered on. These are then sewn onto a felt Christmas tree with a few baubles and a star for decoration.

To put the numbers on I have added little cards in each pocket with the number poking out the top and with a short part of the Christmas story written on each. I didn't want to lose the meaning of Christmas altogether but don't worry, we put sweets in it too each night.

To put it all together I stitched the felt tree to some backing fabric with the stiffest interfacing I could get and then stitched a hook on the back to hang it. I am so looking forward to the start of advent and being able to share this tradition with my children. I am just a big kid really. Zoe xx
Related Posts Plugin for WordPress, Blogger...