Can you believe I have never made myself a bag before? Well there is no time like the present so when I had some chambray fabric leftover from
my dress I decided it was the perfect time to start. It was one of those moments when I asked myself 'what have you been waiting for?' It is quick and easy to stitch up and the results are both pretty and useful.
To make your own you will need:
1/2 metre of fabric
Broidery anglais for decoration (optional)
Sewing machine and thread
Method:
Cut your fabric into 2 large rectangles that are a few inches wider and taller than you would like your finished bag to be, and two longer thinner rectangles that will become the straps. The strap rectangles will need to be the length you want your finished handles to be and about an inch wider than twice the finished width of your handles.
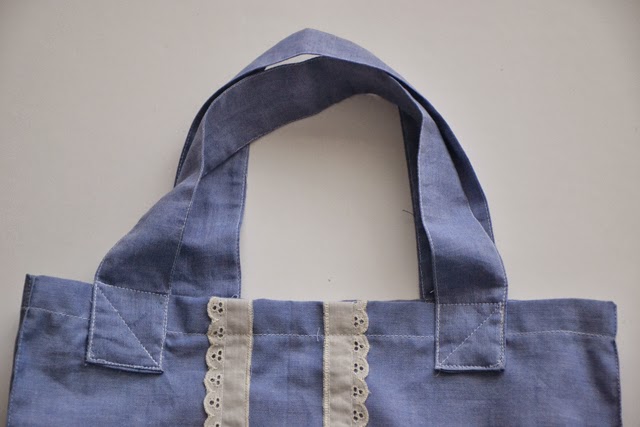
Note that my finished handles were half this long as I decided what is shown in the photo was too long.
Then if you want to decorate your bags at all you need to stitch on any embellishments, I sewed on two length of broidery anglais.
Then place your two larger rectangles together with the decoration on the inside (or right sides together). Starting at the top corner stitch down one side, across the bottom and back up the other side, reinforce the start and finish with some reverse stitching.
Then press open your seams. The next step turns your flat back into a more structured bag. You need to pinch the bottom corners so that the side and bottom seams come together:
Then sew a diagonal along the corner so that your pinched corners make a bag shape.
Then turn your bag right side out. If you want to add more structure to your bag, press the sides of the bag by pinching and pressing up from your diagonal line of stitching you just did, to the top of the bag and then stitch as close as you can to the pressed corner all the way around the edges of the sides of the bag:
To finish the bag before adding the handles, turn 1cm along the top edge inside the bag, press and then turn another 1cm and press. Stitch around the top hem.
To make your handles, fold the long rectangles in half lengthways with right sides together. Stitch all the way along the long side. Then turn your handle right sides out and press. Turn the ends in and press again. Finally pin your handles in place and sew to the bag with a square of stitching and a diagonal line.
And that's it, you have made yourself a bag! Time to fill it up and take it shopping I think. (Or take it empty and come back with it full). Enjoy. Zoe x


No comments :
Post a Comment