Dished Up: Jambalaya

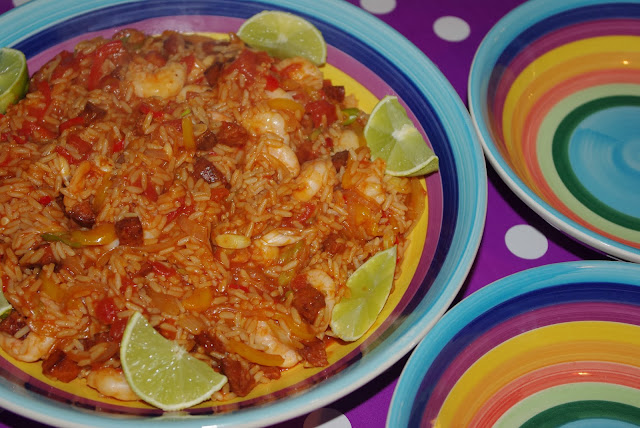
Jambalaya is one of those words I've heard a few times but had never eaten and to be honest, I didn't even really know what it was. So when I stumbled across this recipe recently on the delicious magazine website I thought I'd give it a go.

Jambalaya come from New Orleans. The story goes that the spanish were trying to make paella but couldn't get hold of saffron and substituted it with tomatoes. The Caribbean influence in the area led to the edition of spices and jambalaya was the result. As for the name there is an old wives tales that tells of a travelling gentleman who stopped by a New Orleans inn which had little food remaining from the evening meal. The innkeeper instructed the cook, "Jean, balayez!" or "Jean, sweep something together!" in the local dialect. The guest pronounced the resulting hodge-podge dish as "Jean balayez." I don't know if it's true but I love the story so I like to think so.

When I was prepping the dish I just loved the beautiful array of ingredients. Just look at the colours! This recipe actually does use raw prawns but my recommendation would be to always by prawns raw. They take moments to cook and are so fresh and tasty, that for me it's a no brainer. 

The dish was yummy. It went down a storm with the family. Not too spicy for the children, who kept stealing prawns from my plate! Definitely one to make again.

I even remembered to serve the garnish with it. I can't tell you how many times I've gone in the kitchen to clear up after dinner and found a little bowl of something I was supposed to sprinkle on at the end.

So if you ever pop in to see me just call me 'Jean' and I'll balayez something for you. 
Cassie xx

And a Happy Thanksgiving to all our readers in the USA from both of us! xxx


Rocky Road (no bake) Cheescake


I am a little bit obsessed with rocky road, I'm still on the hunt for the best rocky road recipe but this takes rocky road to a whole new level of indulgence. It has all the main components of rocky road: biscuit, chocolate, marshmallows and nuts. But the extra ingredients make it a delicious pudding.

This is what I used:
280g chocolate chip cookies,
100g butter
300g dark chocolate
300mls double cream
100g caster sugar
200g full fat cream cheese
6 large marshmallows
50g crushed macadamia nuts (optional)

This is what I did:
First I crushed the biscuits in a bag with a rolling pin, if you have a food processor do it in there, its much faster. I removed about a cupful of this mixture to save for later. Then I melted the butter and mixed with the crushed biscuits. I pressed this mixture into a lined 22.5cm springform tin and put it in the fridge for a few hours.

To make the top I mixed together the cream, sugar and cream cheese until it it all came together and there were no cheese lumps. I melted the dark chocolate (over a pan of simmering water) and then poured about 1/4 of the cheese mixture into the chocolate and stirred. Once it was thoroughly mixed I poured in the remaining cheese mixture. I left this in the fridge over night. When this had set I melted the marshmallows in a pan with a little butter and drizzled it over the top.

Then I removed the cheesecake from the tin and put it on my serving plate. Finally I took the remaining crushed biscuits and combined them with the nuts and I gently pressed this mixture around the sides of the cheesecake.

I served this with mini marshmallows and it went down a treat. If you are having a dinner with friends you should make this, your guests will love it. Zoe xx

Spotty Picnic Blanket Skirt

I am totally hooked to making my own clothes already. I decided my second attempt should follow a real pattern so I went with Tilly and the Buttons (you may remember her from 'The Great British Sewing Bee') pattern for The Picnic Blanket Skirt. Her instructions are well thought out and make it really simple to put together.


The skirt is made up of 5 rectangles of material so it couldn't be more straight forward. I multiplied my measurements by 2.5 instead of Tilly's 2.1 to get a fuller skirt which makes it excellent for spinning around. If you have a look at Tilly's pattern, you'll know what I mean. I made mine out of a very lightweight cotton which means even the gathering was really easy on my skirt.

I was going to go with fabric covered buttons but I started the project with pink nail varnish on and it looked so cute with the grey I couldn't resist. I really recommend this as a first pattern to try out when making clothes, I think I will be making another one soon. Zoe xx

Homemade Wall Hangings Part II

This is the second idea for homemade wall hangings, you can see the photo hanging in part 1. For this second one we are going to make some art. You might remember me suggesting you save all your scraps from your quilt, even some of the quite tiny ones that were clearly too small to sew into anything and this is why. I was planning to make some 'art' out of them. Even if you haven't made a quilt or you have but haven't saved scraps you could easily make one of these out of some patterned paper, other fabric scraps cut into any shape you like.

I simply bought some blank canvases and got out my fabric scraps. I had a little play around with a few different layouts.

When I was happy with my layout I mixed up some PVA glue and some water to make a gloopy glue mixture (Mr Makers technical name for it). I then painted the canvas with the glue mixture. I dipped the fabric pieces in the mixture and then pressed them onto the canvass where I wanted them to go. It got quite messy so in hindsight I should have put some newspaper down underneath.

Then I made two more and left them out to dry. They're now up in our newly decorated bedroom. 

I find it hard to chuck away good bits of fabric, even these tiny ones so I am really pleased I thought up this project, plus it's much quicker and easier to use them this way than to try and fit them into a scrappy quilt. I have another idea for using some scraps that I will show you soon too, not for making art with this time... Zoe xx

How to Make Handmade Business Cards

If you haven't seen already we are excited about going to some craft fairs this year to sell for the first time. It was important to me that people who we meet for the first time might be able to come and have a look at this blog and see what we are up to so I wanted to create some kind of business card. Business card is maybe an exaggeration though really as all I wanted was to share the site address.

I decided making some fun luggage tags out of some scrapbooking card would be perfect. I cut the card  into 4''x2.5'' rectangles, trimmed two corners off, punched a hole which I reinforced and then pulled some string through. Then my husband kindly printed out the words and together we stuck the information on. I could easily add more information to the back if I wanted although they are double sided and the back is patterned too but there is the potential to do this in future.

I can simply tie these onto the brown paper bags we have ready for sale time. I think they look really cute and I hope that people will notice them more than they would a traditional business card. If you would like to see us in action I will be putting details of a couple of fairs we will be selling at on our Facebook page. Zoe xx

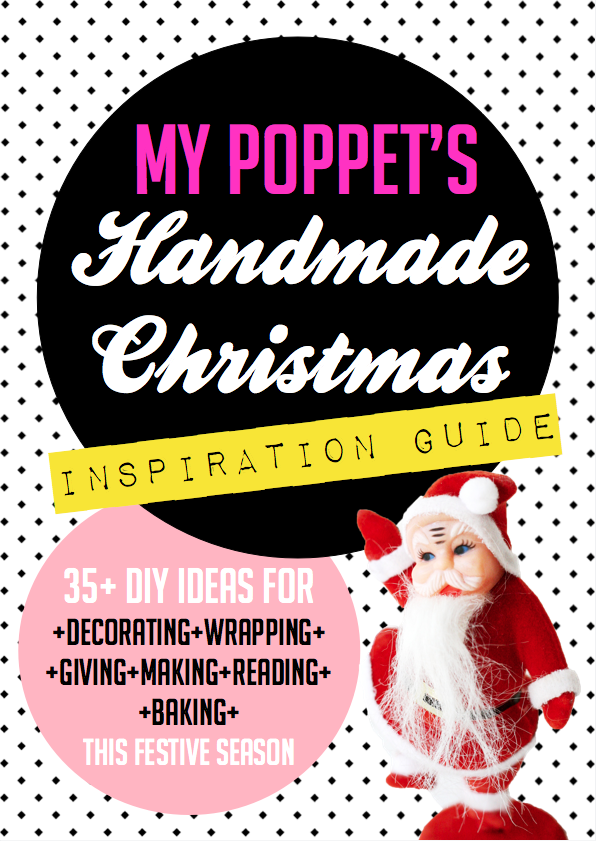
My Poppet: Handmade Christmas Inspiration Guide

Handmade Christmas Inspiration Guide.

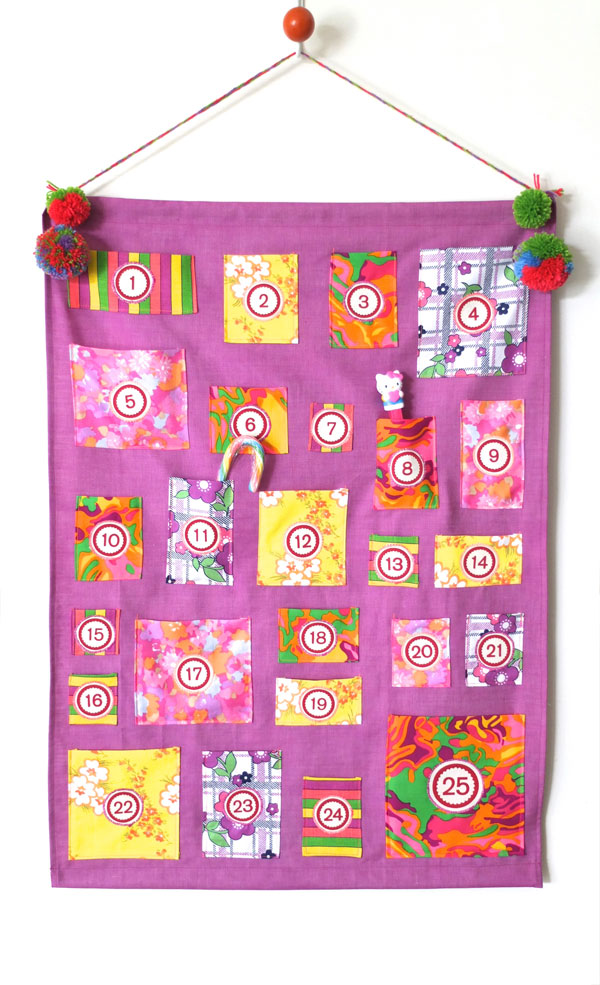
Today I wanted to share with you something from one of my favourite Blogs, My Poppet. I love reading about what Cintia is making and its so fun to see the way she mixes colours and patterns with beautiful results. This week she shared a round up of some of her favourite Christmas things from her blog. Take a look by clicking on the above photo. I saw some things I have never seen before and I particularly fell in love with this Advent Calendar:

Advent Calendar.
If I hadn't already made my calendar I would be making this one for sure! I know it might be to early to say it but I can't resist, Happy Christmas!! Zoe xx

Make a Felt Advent Calendar


If you haven't already got your advent calendar sorted for this year (and many years to come) you have still just got enough time to make one of these before December begins. We had a felt calendar as children and I remember being so excited every year when we brought it down from the loft that christmas must be nearly here. So when I had children this was one thing I was certain I was going to make.

I had a lot of fun deciding how to decorate each pocket, they are simply cut from felt in the same size and then felt shapes are sewn on top or sometimes embroidered on. These are then sewn onto a felt Christmas tree with a few baubles and a star for decoration.

To put the numbers on I have added little cards in each pocket with the number poking out the top and with a short part of the Christmas story written on each. I didn't want to lose the meaning of Christmas altogether but don't worry, we put sweets in it too each night.

To put it all together I stitched the felt tree to some backing fabric with the stiffest interfacing I could get and then stitched a hook on the back to hang it. I am so looking forward to the start of advent and being able to share this tradition with my children. I am just a big kid really. Zoe xx

Homemade Wall Hangings Part I


I recently shared with you our decorated bedroom. One of the projects I did for the room was to make some homemade wall hangings and this is the first of the two projects. I really wanted to have this photo, taken by the lovely Rebekah Cox, up on display. The origional photo was actually in colour:


But I felt that the room had a lot of colour coming from the quilt so I wanted something a little more 'grown up' and went with black and white, one day I might redo it in colour though because I do love this version. I prefer the look of a photo to a photo on canvas but I didn't really fancy having a large photo frame up. I decided to have a poster size photo printed and mount it on foam board to hang on the wall. This isn't exactly a tutorial because its so simple I am sure you could figure it out but I will tell you what I did any way.

I used my print in the largest size I could buy that kept the quality high, some foam board, a long ruler, some double sided tape and an old rotary cutter and some scissors (not shown). If you don't have an old rotary cutter you could just as easily use a stanley knife. Using the double sided tape a carefully stuck the photo into the corner of the foam board.

I then used my ruler and old rotary cutter to cut through the top layer of the foam board along the edge of the photograph. You can then bend the foam board back and the bottom layer snaps too.


And you can use your scissors to cut and parts that didnt make a clean break. You may need so trim some of the foam too.

Then thats it, you now just need to hang it up. It is so light that all I did was hot glued some string to the back to hang over my hook and you have a lovely hanging photo without needing to buy a large frame too.


Have you got some photos you've been meaning to hang for a while? I quite fancy doing some mini ones and making a wall collage since it was so easy. You can see the second of the two wall hanging projects soon. Zoe x

Maybelle Flowers: a Fun Flower Pattern

I found this super cute and easy pattern the other day for 'maybelle flowers'. I haven't made many crochet flowers before, I have mostly stuck with granny squares, but I wanted to try something new.

I also wanted to find something to make in those spare 10 minutes I have scattered over the day. The kind when its not long enough to get out the sewing machine or a cutting mat but not short enough to waste altogether.


This is perfect, every time I have a gap like this I can make one or two maybelle flowers. I'm not sure what I will do with them yet but they are pretty cute.

At the moment I am thinking maybe a garland, possibly put them in a frame for my daughters room or perhaps a blanket. What do you think? Zoe

Newly Decorated Bedroom


When we moved into our house 3 years ago I wanted it to be really colourful, so we painted the walls really bright colours. It didn't take me long to realise that bright colours didn't have to be all over the walls to have a brightly coloured house and that these bright colours were not creating the restful atmosphere I needed. Luckily one of my favourite things to do is redecorate and the next room up for a change was our bedroom.


I am not sure I am ever finished with decorating and I haven't decided yet what lighting to have so these are the pictures before we change the lights. The colour on the walls is a much lighter blue than the original colour and now the most vibrant colour comes form our quilt. All the furniture and decor in this room is either second hand or homemade, or sometimes a mixture of the two. Our first house was almost entirely furnished with second hand furniture any way because we couldn't afford to buy the new things that we wanted, but over time I have built up quite a collection of second hand goods that I genuinely love. The two 'bedside tables' are a perfect example of this.


My Bedside table is also my desk. Our 3 bed house is quite cosy for the 5 of us so we have to make our rooms multifunctional and our bedroom is no exception. I showed you the bed that I upcycled and I have also redone a few other bits of furniture in here. We have left a few pieces exactly as we inherited them like these wardrobes. One of them we were actually given from my very generous in-laws when they moved house, the other we bought on eBay.


I saw this mirror at a car boot and thought it would be perfect in the room with the Octagons Quilt. You can see these flowers on my very first post ever which I made after seeing this Pin (one of my very first ever pins) planning to put them in my new bedroom so you can tell how long this project has been going on for. I will share with you the other projects for the room over the next few weeks. Time to plan the next room to decorate. Zoe xx

Dished Up: Sticky Toffee Cake


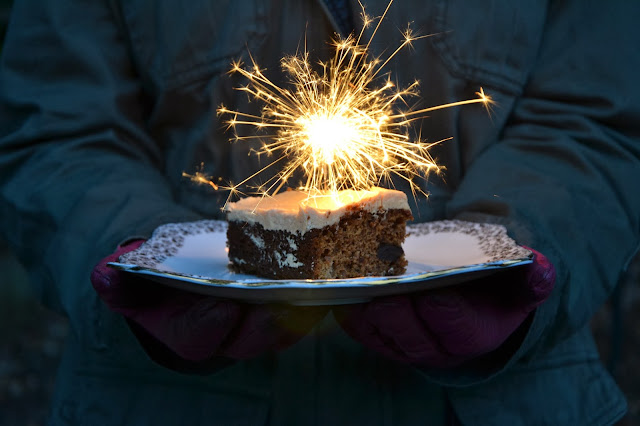
Two things that I love are sticky toffee puddings and bonfire night. Let's be honest who doesn't love a good sticky toffee pudding? So after playing around with a few recipes I came up with this Sticky Toffee Cake to serve up as a sparkling treat as we remembered gunpowder, treason and plot this year.
You may find the icing a little tricky if you've never made a caramel before but this video will give you an idea of what to expect. And believe me, it's worth getting right!

What you need.....
200g Dates, chopped
200ml Strong Tea
1tsp Bicarbonate of Soda
125g Butter
200g Demerara Sugar
1tsp All Spice
250g Self Raising Flour
3 Eggs
2tbsp Golden syrup
And for the icing....
125g Caster Sugar
80ml Double cream
160g softened Salted Butter
200g Icing Sugar
Sparklers (optional)

What you need to do.....
1. Start off making a dry caramel by melting the caster sugar in a heavy based pan. Once the sugar has melted, cook it to look like a strong tea. 
2. When the colour looks right quickly pour in the cream and beat it in. You have to do this carefully as it will really bubble but you need to stand back and mix at the same time or you'll end up with just a hard lump. If you have a bit of a lump keep it over a low heat and melt it slowly. Set this aside and let it cool completely. You can put the pan in some cold water like this to speed up the cooling process.

3. Preheat the oven to 180 Celsius and grease and line a 20x30cm tin. In a small pan bring the tea to a simmer and stir in the chopped dates. Simmer for 5 minutes then turn off the heat and stir in the bicarbonate of soda.
4. Beat the butter and the Demerara sugar until it's pale and creamy. I did this in my freestanding mixer. Then mix in the flour, spice, eggs and golden syrup. Fold in the date mixture and pour into the tin.  Don't worry if it looks a little curdled. Bake for 30-35mins until a skewer comes out clean. Leave to cool.
5. When the cake and the caramel are both completely cool make the icing by beating the salted butter and the icing sugar for 5 minutes with an electric mixer until really light and fluffy.

6. Beat in the caramel and slather the icing over the cake. Cut into squares and enjoy with your sparklers. (Don't worry though, if you haven't got any it's just as tasty without!)

Happy Bonfire Night, Cassie xx

Snapshot: A Pirate Adventure


One thing I haven't shared much about on this blog is my family life. While I certainly don't want to make this the main theme on the blog I also find there are some things that I have wanted to share just a little bit about so I have decided to start a new feature called 'snapshot'. This feature will occasionally share with you a 'snapshot' into our family life and what we have been up to.


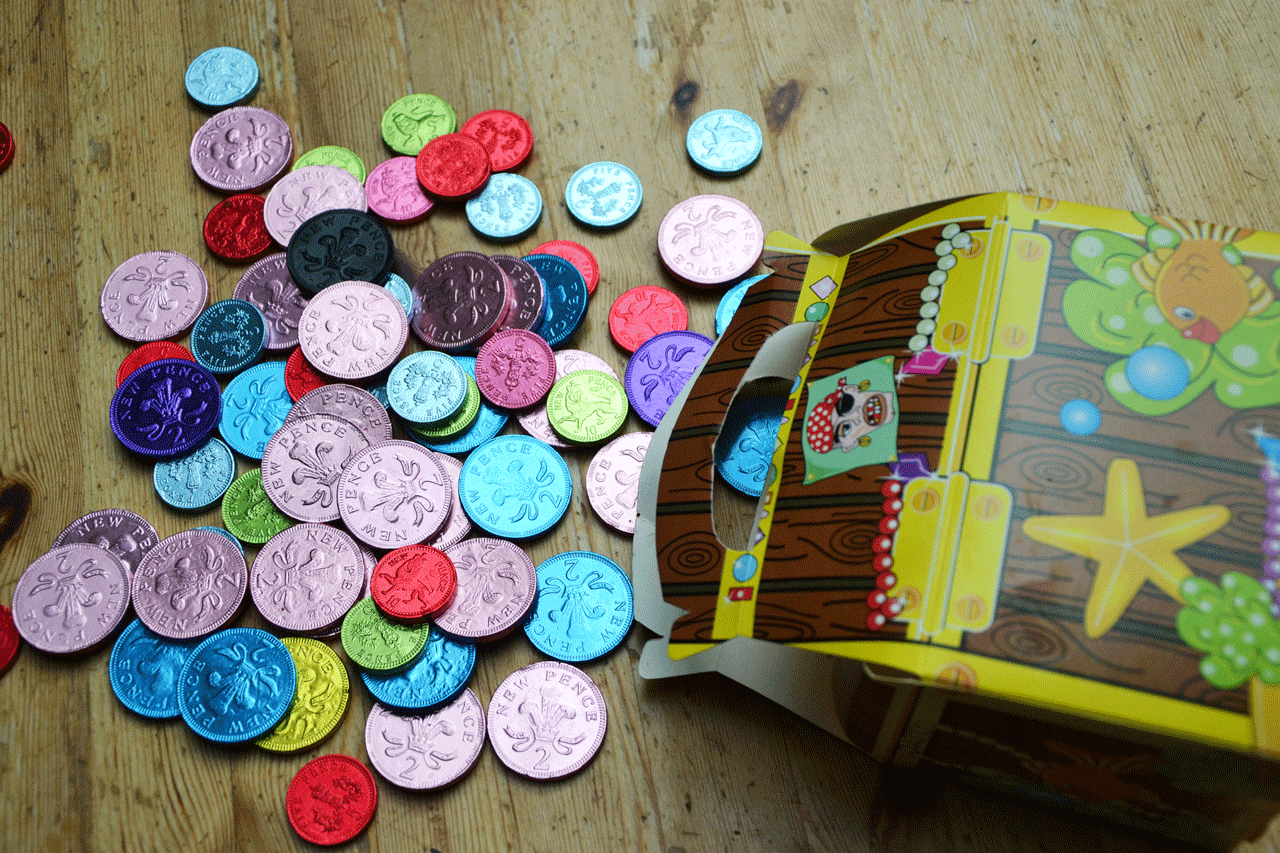
Today we went on a Pirate Adventure. I made a treasure map and hid some treasure at the X marks the spot last night after the children had gone to bed. When they got up this morning I gave them their map, dressed them up like pirates and we all went out on a treasure hunt. Their costumes I made out of some scraps of spotty fabric for the bandanas and red fabric for their sash. With their stripy t-shirts on they looked perfect. On the walk my husband went ahead and put down 'clues' on the way. These clues were arrows made of sticks.


The children had a lovely time. They really enjoyed finding the clues and ran all the way. When we found the treasure (hidden in my parents greenhouse in their garden) they were very excited. 'Real Treasure' they declared!


Then we all gobbled it up together. Yum Yum Yum. What a fun way to spend a family day it was. And they burned lots of energy with all that running too. A day well spent. Zoe xx
Related Posts Plugin for WordPress, Blogger...