Crochet Angry Birds: Yellow Bird

With my sons birthday fast approaching (is it really October tomorrow?) I have been finishing of the angry birds that I will give him (See here and here for the red and blue birds). This is the final bird I am making but I will be making some piggies too, you can't play angry birds without the pigs. To make the yellow bird first you need to crochet two diamonds. So using your yellow dk yarn and a 4mm hook follow this pattern:

Ch3, DC into the first chain, turn.
Ch2, 2DC into the next st, turn.
Ch2, 2DC into the next stitch and then 1 DC into the subsequent stitch, turn.
Ch2, 2DC into the next stitch and then 1 DC into the subsequent stitches, turn.

Continue in this manner until you have a triangle (half the diamond) that you think is large enough. My widest row had 14DC's altogether. Now you need to start making the diamond smaller again. So instead of putting 2 DC into the first stitch, you miss it out and just do one DC into each of the subsequent stitches. When you have only 2 DC's in the row turn and then ch2 and ss into the other DC to make it a nice pointy diamond.

Make two of these. Then you need to stitch them together to make a pyramid. Put them together like this:

And then stitch these sides together, continue round until you have only one side left to stitch, stuff with wadding, then stitch together the last edges. Then you should have a yellow pyramid that looks like this:

After making this body you need to make a nose, to do this find a slightly darker yellow yarn or an orange yarn and follow this pattern:

Ch8, ss into the first ch to form a ring,
Ch2 and then DC into the next stitch, 
Skip a stitch and DC into the next 2 stitches. Repeat this step until you have made a little cone.

When you have made these, you need to make the hair and tail. These are the same as each other so you get your black yarn and make two of these:

Ch6, turn, skip the first 2ch (these are the first DC) and DC into the other 4 stitches, this returns you to the beginning.
Going out from your starting stitch repeat the first step: Ch6, turn, skip the first 2ch (these are the first DC) and DC into the other 4 stitches. Then repeat this again : Ch6, turn, skip the first 2ch (these are the first DC) and DC into the other 4 stitches.

I then tied together the ends. You can see in the picture above the top one is tied and the bottom one isn't and by tying them it gave the shape I was after. Then you stitch the hair and beak onto the bird.

I then made the eyes and the eyebrows out of felt and stitched these on too. So now I have three birds complete:

I will be making the pigs soon too, hopefully by the end of the week so come back if you want to see those. Zoe xx

Make a Crochet Circle Cushion


A few weeks ago I shared with you my pattern for crocheting a circle pattern. Now you could easily use this pattern to make some doilies and just leave them as they are but I wanted to turn mine into a cushion. To to this I first of al put the crochet circle onto some fabric and drew around it the size of circle that I would need for the cushion:


 Then I machine stitched along the drawn line leaving a small space for stuffing the cushion:

I turned the cushion inside out (or outside out). Then I stuffed the cushion with some stuffing I had taken out of an old cushion we no longer use. I then hand stitched the opening shut and hand stitched the crochet to the cushion.


And hey presto a cushion! This will eventually sit on our bed but I have to finish the octagons quilt first. Nearly there though. Zoe xx

Upcycle: Decoupage Birds on Wire


These little birds on this box were inspired by the brilliant Martha Stewart and her Encyclodepia of Crafts Book. Her instructions suggest putting the decoupaged birds on a chest of drawers as it makes them look as thought they are balancing on wire but I wanted something to jazz up this chest. This chest has in fact been in my parents house for as long as I can remember but I begged them for it and when they finally agrees I painted it my own colour and added the birds. 


Its currently stuffed full of hats, gloves, scarves and coats so my kids can wrap themselves up easily when we are on our way out (well thats the theory any way). You may have spotted it when I shared about my blue bureau. I still have to finish lining this but I will definitely update you with it soon. I love a good upcycled piece of furniture. Zoe xx

Dip-Dyed Hair

Zoe with Dip Dyed Hair
To add a little colour to my life every day I decided to have my hair dip-dyed. I have been building up to this for months but my hair just wasn't long enough before. I am really looking forward to trying different hair styles and seeing how the colour comes through, especially french plaits as these look really fun with multicoloured hair. I might change the colours occasionally too but I will stick to the blond ends for now. I'm lovin' it. Zoe xxx

Vintage Sheets Octagons Quilt: Assembling the Quilt Top


This stage of making a quilt is definitely my favourite. 'Assembling the Quilt Top' is a fancy way of saying 'sew together the patches' and I enjoy it because you go from lots of small pieces of fabric to one large blanket sized piece that really starts to resemble the finished article and its really quick progress. This is why im ahead of schedule but I thought i would share early since the next stage (quilting) will take me the longest so this way i have three weeks to do that part. If you haven't been following along with the rest of the quilt you can check out the other stages herehere and here.

Once you have all your patches ready you need to find a really large work surface (I use the floor) and lay out your patches in the order that you'd like them to go into the quilt. I even enjoy this stage because its like a giant puzzle. The trick is to try and get an even spread of colour over the quilt top but to keep it looking random-ish. Once you have an order that you think looks good get someone else to check it. I text a photo of mine to my mum and sister and they spotted a couple of areas that needed tweaking that I had missed.


When you are happy you need to carefully stack up your patches. Collect together each row from left to right with the left most square at the top. Then you will have a little pile of patches for each row, then take the top patch from each row and fold it around the side of the pile. Then you can stack up the rows, making sure you keep them in the right order, and you know where each row begins and ends.

Now you can head over to your sewing machine with your patches. I normally take one row at a time and put it on my knee. I then take the folded patch and the next patch on the pile and stitch right sides together keeping a 1/4" seam allowance. Make sure that you are sewing together the correct edge of the squares. If you have done octagons, the first square will only have on triangle corner. This corner needs to line up with one triangle of the next patch. Once these two patches are stitched together open it out and stitch the third patch onto the second, again right sides together. Continue like this until you have done the whole row. I then lay my row on the floor and went on the stitch the second row. As you finish each row, lie it on top of the rows you have done on the floor, this also helps keep your patches in order.

Now you need to press you seams. Normally in quilting the seams are pressed to one side and you alternate along the row. So press your first seam to the left, the second to the right, the third left again and so on. On your second row of patches press your seams in the opposite direction to the seam above. So if you pressed your first seam left on the first row press the first seam to the right on this row. This helps to keep the quilt top nice and flat.


When all these seams are pressed go ahead and sew all the rows together keeping that 1/4" seam allowance an stitching right sides together. When you have done this all you need to do is press these seams. Again press them to one side in alternating directions.


If you have cut and stitched accurately then your corner triangles should line up nice and evenly like this:


If, like me, you rushed it a little because you were too excited to see how it would turn out then some (or most-oops) of your corners might look a little more like this:


But it all adds to that homemade kind of feel right? Come back in three weeks to see how we can make the quilt sandwich. Zoe xx

P.S The photos I took for this post were mostly taken on my iPhone and they turned out well. The two not so good photos were taken on my DSLR but it was evening and I had no natural light. The lesson I learned here was to make more of an effort to take day time photos and not to worry too much about not having my DSLR to hand.

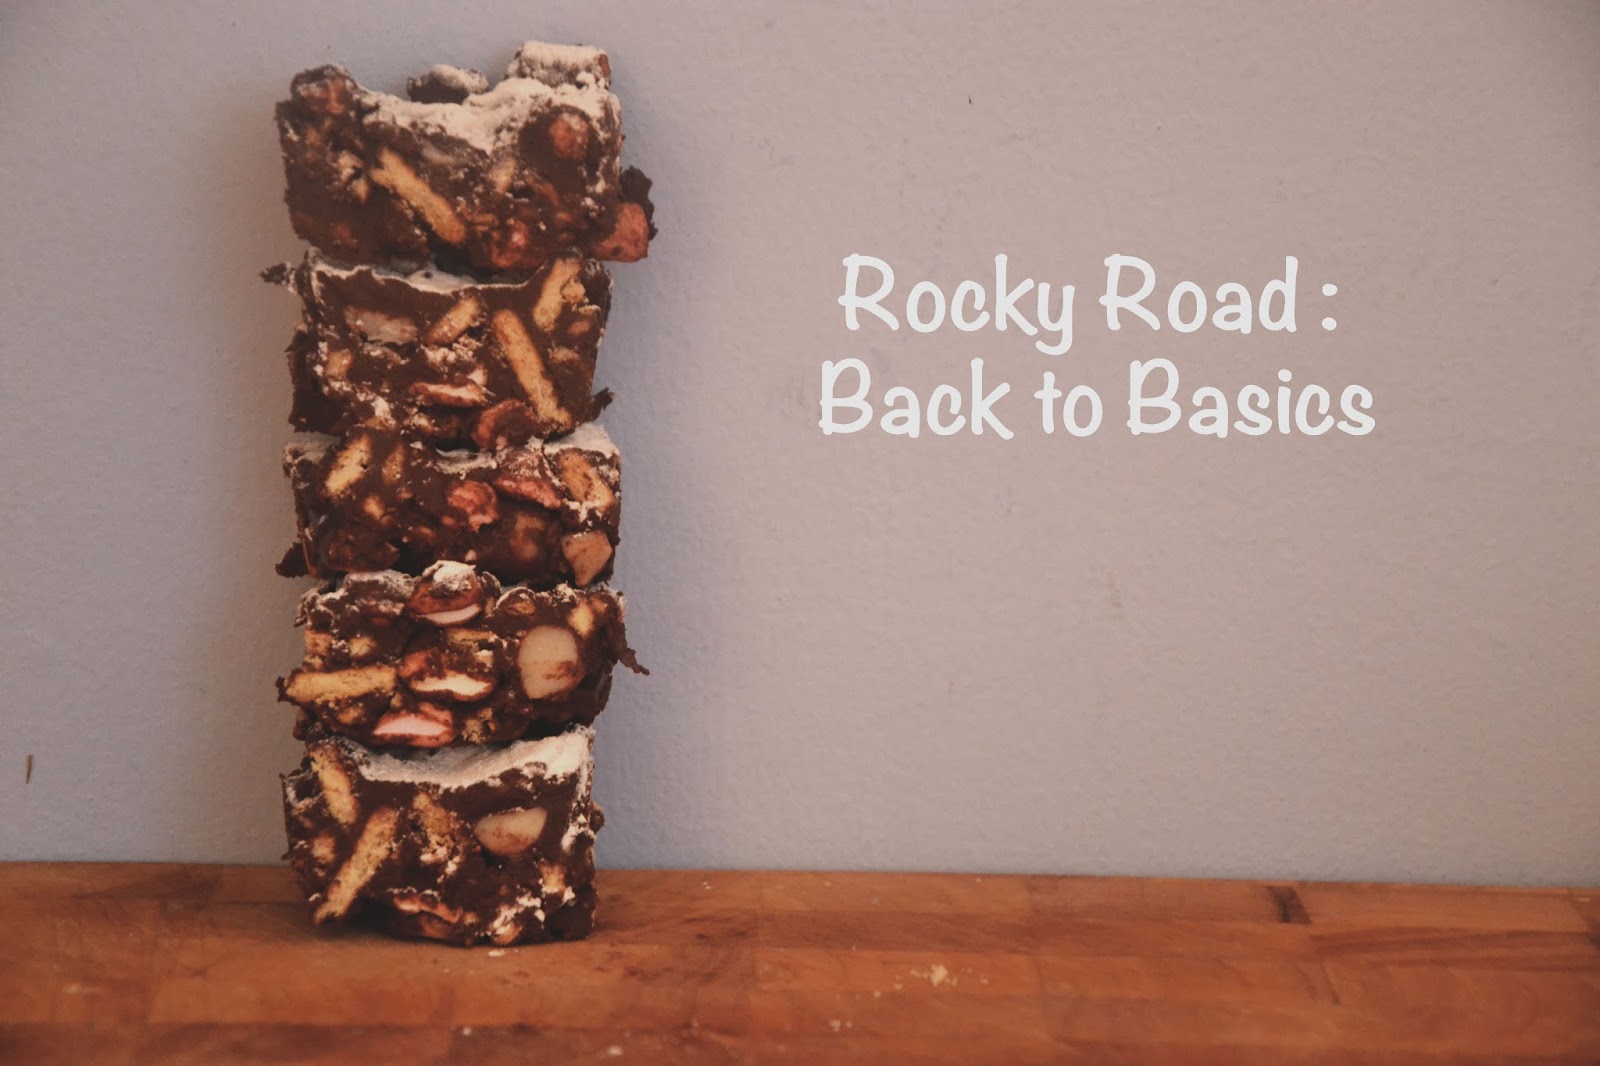
Rocky Road: Back to Basic


I have mentioned before how I am a little obsessed with Rocky Road (see here). Its the cake I would always choose to eat from a coffee shop, a cake I love to eat because its so deliciously indulgent and the cake I would choose to make if I could only make one kind of cake for the rest of my life. Nom Nom Nom. I have been trying to find my own perfect recipe for Rocky Road and have made several attempts that were a total FAIL. So I went back to the start and looked up Nigellas recipe that can be found here. I have then adapted this very slightly to make them more chocolatey and added some nuts.

I used:
400g Dark Chocolate
125g Soft Butter
3 tbsp Golden Syrup
200g Rich Tea Biscuits
100g Macadamia Nuts (optional or replace with your favourite nuts)
100g Mini Marshmallows
2tsp Icing Sugar

To make these I simply melted the chocolate, butter and syrup in a pan. Once melted I removed three scoops of this and put it aside. I crushed the biscuits and nuts in a bag with a rolling pin until I had some crumbs and some chunks and then mixed with the chocolate mixture. Once all mixed I added the marshmallows and put all this into a baking dish, the chocolate that was set aside was spread over the top. I refrigerated it for a couple of hours, then cut into 20 pieces and sprinkled the icing sugar over the top.

So I am going to play around with this recipe and make further alterations and everytime I land on a good on I will share it with you. Enjoy eating this yummy scrummy (doesn't results in a small tummy) Rocky Road. Zoe xx

Vintage Sheets Octagons Quilt: Piecing


So its time to start sewing this quilt together. If you have missed out on the steps so far look here and here. If you are going to make octagons then follow these steps, if you want to stick to just normal squares then you don't need to do anything before the next stage so take a couple of weeks off. If you are making the octagons then get out all your squares and background triangles that you have already cut and your sewing machine.


Take one square and one triangle. Place the triangle on top of the square right sides together as I have done in this photo above. The triangle needs to overlap the side of the square a little so that when you press it back later the edges will line up neatly with the edges of the square. I did the first one by eye and then pressed it back and it was about right so I carried on doing them by eye. The picture above should give you an idea of the placement for this to try yourself.

Once you have got the placement right, sew a triangle onto one corner of each square. By doing one at a time like this you can save thread and time. We call this method 'chain stitching'. You simply sew one line of stitching on your machine, then without pulling this all the way out of the machine you pass the next thing to stitch into the machine. You end up with a bit of a mess like above but when you have done them all, then simply snip them all apart and stack them in a neat pile. 

At this point take 4 squares out of your pile and put aside, these are the corners. Try to remember to take out a mixture of different patches so that you get a variety in your border. (Unless you are not doing yours randomly of course.) Then sew the second corner triangle on to each square. When you have done all these take out enough squares for the edges of your quilt. So my quilt is 9 x 12 and I have already taken the corner squares out, this leaves 2x7 and 2x10 = 34 squares total.

The remaining squares need all four corners sewn with triangles so finish these all off and you should end up with squares that look like this:

When you get to this stages cut all the corners off so that your squares look like this:

I have kept all my little snipped off corners in a bag because I have an idea of what to do with them. Then finally press back your white corners so that you press the seams away from the triangle:


and you should end up with patches that look like this:

Repeat for all your squares and then you are ready for the next step. So come back in two weeks and we can start putting together the quilt top. Zoe xx

10 Favourites From The Summer

It has been nearly three months for me and this blogging malarky and I must say I am rather enjoying it all. As Autumn approaches I am going to give a quick round up of some of my favourite summer time posts. Above you will see the Soduku Blanket I made from crocheted granny squares. We snuggled under this while camping and it already needs a few repairs but I am sure it will be ready for the colder weather.

There is the Crocheted Circle Cushion which I am yet to share how to actually make into a cushion but you can get started on the crochet part while you wait.

If crochet isn't your thing yet (although it really should be, its so therapeutic) then why not try making an Octagons Quilt or even simplify the instructions and make a square patch quilt? This would also be a great one for the winter months and we haven't even started sewing yet so plenty of time to catch up.

To help you get inspired for your first (or later of course) quilting project how about these cute Baby Quilts For A Boy And A Girl?

Or even make yourself a Union Flag Quilt.

But if you're feeling a little more adventurous then why not make a Picnic Blanket Skirt? When I say more adventurous, this is still only stitching in straight lines so I'm not sure it really counts.

You might like to refresh yourself in the last few days, or if we're lucky weeks, of sunshine with some Homemade Lemonade.

This White Chocolate Chip Ice-Cream has also helped keep us cool, but even if the weather does get colder you can always make a blanket or quilt too to balance yourself out right?

This Rocky Road Cheesecake recipe however works whatever the weather.

Or these Marshmallow Glitzies would also go down a treat on a chilly Autumn day. I am looking forward to the Autumn season. There is something lovely about snuggly knitted jumpers, eating cheese toasties and soup (not together, although maybe I will try that?), Autumn leaves and colours and of course the run up to Christmas. Yes thats right, its time to start getting ready for Christmas. Yippee! Zoe xx

Crocheted Angry Birds: Blue Bird

As you saw a few weeks ago I have been working on some crocheted angry birds for my eldest son whose birthday is in October. I already shared with you the red bird and today I finished the blue bird. Well actually I made three blue birds because they are only little and quick and also because in the game when you make blue bird fly if you tap the screen he splits into three.

Making this bird if very similar to making the red bird so I won't go through all the instructions. The bird itself is smaller than red bird though so I will write the pattern for this here. So use a DK blue yarn and a 4.0mm crochet hook (english stitch terms used of course.)

Round 1: ch6, ss into first st to form a ring
Round 2: 2 dc into each st (12 total)
Round 3: 2 dc into 1 st, then 1 dc into next rot all the way around (18 total)
Round 4: 2dc into 1 st then 1 dc into next 2 st, rpt all the way around (24 total)
Round 5-8: 1dc into each stitch. After this round stuff your angry bird with wadding (batting) or cotton wool if thats all you have handy.
Round 9: dc 2 st together then 1dc into next 2 (total 18)
Round 10: dc 2 st together then 1 dc into next st (total 12)
Continue to dc two st together until you come to the end.

When you have done this tie in your ends. You can make the tail and the 'hair' in the same way as these instructions and the eyes are again made out of felt. Blue bird in the game has little bags under his eyes so I tried this on one, he didn't look quite how I hoped and then I lost my brown felt somewhere so I didn't do the same with the other two birds but you can if you'd like. Just stitch on two little brown triangles of felt that slightly overlap the eyes.

The nose is also slightly different to red bird. Using your yellow yarn you ch2, then 2 dc into the first ch, then 2 dc into each of these st. then 2 dc into the each of these st. Continue this until you think you cone shapes nose is large enough, I think I did 4 rounds.

When you have done that stitch all the pieces together:


Then make 2 more:


So now you have the red bird and the blue birds complete, next I will make the yellow bird. Have fun. Zoe xx

Update: click here for yellow bird and here for pig and king pig.
Related Posts Plugin for WordPress, Blogger...